How to make a simple marker
Making a simple marker is easy. It is enough to have a regular board and wooden pegs on hand.
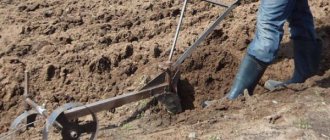
A marker for planting potatoes is a wooden stake with a diameter of about 65 mm. The height of the stake must be at least 90 centimeters. A transverse strip is attached at a height of about 15 cm from the sharp edge. It will serve as a stop that limits the depth of the hole.
Before planting with this tool, you must first mark the locations of the holes using a rope. The ropes are pulled along the rows at a distance of 40-80 cm from each other. Everyone sets the distance independently; it depends on whether the hilling will be carried out with a walk-behind tractor or manually. A gap of about 25 centimeters is left between the bushes, plus or minus five centimeters, depending on the size of the potatoes being planted and the variety.
Why is a homemade device better than a purchased device? In the marker you can set the exact distance, which will be equal to the distance between the wheels of the cultivator or tractor.
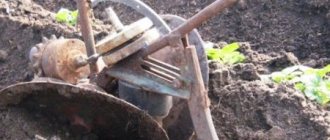
Hedgehog cultivator for weeding
They remove grass with roots, unlike flat cutters, which only cut the stems. Hedgehogs rake the soil between the rows, which creates distinct rows and beautiful beds. Loose soil allows oxygen and liquid to pass through well, which increases the growth of potato roots, and this is a guarantee of an excellent harvest.
Hedgehogs for weeding potatoes
Weeding with a walk-behind tractor is done using certain paws or a rotating cutter. The cutter is rotated by the power take-off shaft. The advantage of the paws is ease of installation and thoroughness in loosening the soil. They loosen the soil at a depth of 4-7 centimeters, depending on its condition.
To operate, the presser feet need to be secured in certain fasteners at a distance equal to the width of the row. The fastener should have a slight overlap that will cover both legs. Devices can be either single-sided or double-sided. If the device is one-sided, then the legs must be attached so that the blades are located towards the row spacing.
The paws, which have one-sided blades, can be installed in another way, which makes it possible to process the bed on both sides simultaneously.
There is another device for manual weeding called a weeder. This is a frame, with a knife and a drum. Its wheels are placed between the rows, the knife chops the grass, and the spinning drum catches it and throws it back.
There are manual and electric cultivators with a gasoline engine. For weeding, devices with 2 knives are used, which are attached at an angle of 45°. It is best to carry out weeding with a cultivator, which has three-pronged mini forks installed instead of knives.
For comfort, these devices are installed on wheels: the summer resident pushes it, pressing it as close to the garden bed as possible.
Weeding cultivator on wheels with two blades
Using a device with a hedgehog attachment, they immediately weed and hill up the potatoes. The hedgehog consists of 2 cones mounted on a frame. The cone is made of 3 steel wheels of different diameters. Pointed spikes are welded onto the wheels. 2 hedgehogs are attached to the frame, spinning, they hook the grass in parallel and rake the soil from row to row.
Electric cultivators are more dynamic and are used for small gardens. Their main drawback is the need to pull the cable from the outlet, which is not always comfortable. It is more rational to use cultivators with a gasoline engine. But such cultivators are less dynamic than manual ones, but the most productive. All types of cultivators are equipped with hedgehog attachments. The strength of the engine is selected depending on the condition of the earth; the heavier it is, the stronger the device.
Marker for planting potatoes using the Mittlider system
The American agronomist Mittlider invented his own method of planting potatoes. According to his method, the vegetable garden should be divided into planting beds up to nine meters long. The width of the beds is 45 centimeters. There is a distance of about 100 cm between them. The narrow beds method allows you to water and fertilize only the soil on them.
To plant potatoes using this method, you need to make a more complex device. In order to understand the principle of this device, you need to look at the diagram.
To make a marker for planting potatoes with your own hands, you will need a metal pipe with a diameter of 21 mm; it is used to mark holes. Thus, the holes are obtained at a distance of 29 cm from each other. Another pipe with a diameter of 55 (65) mm is welded to the frame, from which a cone is formed that will punch holes.
Before planting, first stretch the cords along the beds. The frame is placed parallel to the stretched lines, starting to plant the first row, it is pressed into the ground. The marking pin will mark the hole; you need to stick a cone there. Do this until the end of the row. On another row, holes are made in a checkerboard pattern.
Using this device, you can grow a decent harvest even in a small area.
Tips and warnings
Fastening the footrest, handles and valve is best done by welding. Fastening structural elements with bolts or self-tapping screws may be no less strong, but in those places where their ends stick out inside the body, obstacles will form for the passage of potato tubers.
Assembly of the structure
Before assembling the entire structure, make sure that the total weight of all elements will not pose a problem for you during operation.
The device should not be too heavy, otherwise you risk not making your work easier by slightly mechanizing and speeding up the process of planting potatoes, but on the contrary, complicating your life by moving a non-lifting device.
At the same time, the pipe body must be strong enough to withstand many cycles of inserting and removing the device from the ground. Depending on the preferences of a particular designer, individual design elements of a manual potato planter can be made in different ways.
Some equip the valve mechanism with an additional hook so that you can reliably control the process of opening and closing with your foot. This is, of course, the simplest and most primitive agricultural tool. However, this is where its beauty lies.
Anyone can make a potato planter; the material for this will probably be found in any household, and the efficiency of the device is very impressive.
Potato planter made from two-wheeled trolley
Separately, I would like to talk about another design of a homemade apparatus for planting potatoes. This is a two-wheeled cart, on top of which there is a box for tubers prepared for planting.
In the lower part, between two running wheels, there is a device for uniform feeding of potatoes into a pre-prepared furrow. Such a cart rides over the furrow and, while moving, lays out potato tubers at regular intervals.
A shield covering the furrow can be located behind such a device, but in this case, moving the cart will require more effort, or the help of a second person.
Such a device can hardly be called a manual potato planter, but it is also a simple home-made unit that can collect any old and unnecessary items.
When moving the wheelbarrow, potato tubers fall into the recesses on the wheel and with the movement of the wheel they move down into the prepared furrow. To prevent the tubers from falling out along the way, there is a protective wing in front of the wheel.
Shovel-harvester
Another design used for planting potatoes is called a harvester shovel. These are two handles that can move closer and further away from each other, opening and closing a cone-shaped container into which potatoes are placed for planting.
When closed, the container is stuck into the ground, after which the handles are brought together, the container opens and the potato tuber ends up in the ground. It’s convenient, but you have to bend down and put one potato into the cone each time.
As you can see, people have come up with many convenient and practical devices that make life easier for gardeners. Some of them can be called successful, some not so much, but they all help and, with varying degrees of success, replace the classic shovel.
It’s almost as easy to construct a feed cutter with your own hands.
Improved three hole marker
Using three cones and metal pipes, you can make a device that will allow you to make three holes at once. It is necessary to take a steel pipe D 32 mm. Steel is easy to weld, although you can use a duralumin pipe.
Cones are made from high-strength wood, such as oak or acacia, but preferably aluminum.
The cones are screwed to the bottom crossbar with long bolts. The depth of the hole depends on the length of the bolts. The longer the fixing bolts are, the deeper the hole will be. Make a distance of 45 cm between the cones.
Types of markers for planting potatoes
Markers can be both very simple and quite complex. These devices are often made from scrap materials. Some found wooden stakes and strong boards, while others used profile or round steel pipes. It doesn’t matter what the tool handle or frame is made of, only the distances between the elements that punch holes are important.
The simplest marker
It is a wooden stake about 90 cm high and approximately 60–70 mm in diameter. The crossbar, attached at a height of 150 mm from the tip, serves as a stop that limits the depth of the hole. To work with such a tool, you need to mark the locations of future holes using cords: they are pulled along rows at a certain distance from each other (40, 50, 60, 70 or 80 cm).
The distance between the cords depends on whether weeding and hilling is planned manually or using a walk-behind tractor. The gap between the bushes is chosen in the range of 25–30 cm, depending on the size of the planting material and how powerful the stems are characteristic of a given variety.
Marker for planting potatoes using the Mittlider system
A more complex marker model is presented in Fig. 1. This device is made from 1/2″ metal pipe (with an outer diameter of 21 mm). A cylinder with a conical end (hereinafter referred to as a cone), which punches holes, is made of a pipe with a diameter of 55 or 65 mm and welded to the frame. A pipe pin (Ø 21 mm) is designed to mark the next hole at a distance of approximately 29 cm from the previous one.
Rice. 1. Marker for planting potatoes with markings according to the Mittlider system
Starting the first row, the frame is placed parallel to the cord stretched along the bed and pressed forcefully into the ground. Then a cone is stuck into the hole marked with a marking pin, and so on, until the end of the row. Having moved to another path, they make holes in a checkerboard pattern on the other side of the bed. If you plant potatoes according to the Mittlider method, using such a device, you can grow a substantial crop in a small area: up to 1000 kg per hundred square meters (100 m2).
A marker that punches three holes at once
The assembly diagram is shown in Fig. 2. Consists of a frame made of steel pipes and three cones.
Rice. 2 Marker for planting potatoes, designed for 3 holes in a row
The welded frame of the device is made of profile pipe 25x25x2 mm, light and durable. You can use available materials, for example, a steel water and gas pipe with a diameter of 32 mm. A duralumin pipe is also suitable, but steel is better suited for welding. It is recommended to make cones from aluminum or dense wood: acacia, oak.
DIY potato planter
The simplest device for planting potatoes can be a potato planter. Any man can make a potato planter after spending a couple of hours. You will need to take two boards 1.5 meters long, as well as two stakes with a diameter of 10 cm.
Pegs are made from thick spruce branches. They are processed, sharpened, and made into handles. Wooden transverse strips are nailed to them. Make a distance of about 60-65 centimeters between the stakes if the planting will subsequently be processed with a cultivator or mini-tractor. The distance should be no more than 55 cm if the processing is manual.
The bottom board should be with a reserve; a note is made on it using a narrow strip at the same distance as the stakes. It will help determine the beginning of the pits.
How to use this device? Place the device on the ground, holding it by the handles in front of you. Press down to make holes. You immediately get two ridges of holes, the third will become a note, they follow it in the opposite direction. The second person will follow the marker and plant the potatoes.
How to make a hand plow
A hand plow will become a homemade machine for planting, hilling, and loosening the soil. It can be operated by two people. It takes effort to make a plow.
For production you will need:
- Meter-long hollow pipe with a diameter of 2.5 cm.
- Hollow pipe with a diameter of ¾ inch.
- Metal sheet 2 mm thick.
- A metal plate with holes or a lanyard.
- Gas-burner.
- Bulgarian.
- Welding machine.
The large pipe is bent, departing from the beginning by 30 centimeters. To facilitate this procedure, you can use a pipe bender. Use a blowtorch if there is no pipe bender.
The small pipe needs to be bent. To adjust the height, you need to make holes on the vertical post and on the top edge. The height of the stand is made individually so that the person who will hold the plow will be comfortable. It can be adjusted with bolts.
The vertical part at the ends is made flat. Its height is about 60 cm. A lanyard is placed between the rod and the stand to be able to adjust the angle of attack. The angle is attached below. More details in the video:
Source: proposadki.ru
Manual hiller for potatoes. Homemade manual hiller from a bicycle
It is very difficult to hill up potatoes and beds with your own hands, but a homemade hiller makes life much easier for the farmer. The scheme for creating the unit is very simple.
Operating principle
The key part of a manual hiller is the cultivator or plow. It is he who will do what is done manually with a hoe or hoe - plow the soil. This plow, using its sharp end (“nose”), digs slightly into the soil and distributes it on its sides, covering the potato rows with soil.
If the hiller is a homemade model made from a bicycle, then the cultivator will be mounted on its frame. By slightly changing the structure of the unit, grabbing the steering wheel, you can control the device, directing it in the desired direction. The movement of the hiller itself is carried out due to a single wheel in the front part of the frame.
The essence of the work of a manual hiller can be summarized more briefly using the following algorithm:
- the cultivator crashes into the ground;
- the operator of the apparatus, using the steering wheel, directs the hiller in the desired direction and moves it forward;
- movement is carried out due to the existing wheel.
What is needed to create a hiller?
First of all, you will need certain equipment and materials:
- frame of an unnecessary bicycle (necessarily with a handlebar and one wheel 26-28 inches);
- welding fixtures;
- wrenches for nuts and bolts (if the cultivator will be screwed to the mount).
At the same time, you will need a little patience and the ability to work with a welding machine.
Preliminary actions
To begin with, prepare the bicycle frame: handlebars, saddle, pedals, and remove the rear wheel. The second wheel is disassembled and cleaned - only a metal rim is needed.
The metal rim penetrates the soil better, which is why the hiller will gain much greater stability and maneuverability than with rubber. Operating such a unit will become much easier.
The process of creating a hiller
The manufacturing process can be divided into 5 stages:
- The mount on the rear wheel is cut so that in the end there is only a “triangle” from the bicycle frame.
- The cultivator will be placed instead of the wheel, and it must be fixed there.
- Screw or weld the cultivator.
This should be done efficiently, because this part of the hiller will bear the greatest load. If the cultivator will be screwed on, then tighten the nuts as tightly as possible, otherwise the manual hiller will not last even a couple of days. This is where both nut and bolt wrenches come in handy. By operating them simultaneously, you will be able to secure the parts firmly and for a long time. - Next, the offset of the cultivator is adjusted (how far/close it is). This is done for the purpose of convenience during the hilling process, so as not to trip over the cultivator blades.
- The previously removed steering wheel is tightly twisted in place of the saddle.
Creation of a cultivator section
Creating a basic cultivator is quite simple. In fact, this is the same plow. Two plates are attached near the base, which form an angle directed forward (towards the wheel). As the hiller moves, the plates will divide the soil into 2 parts and hill up the potato rows with the raised soil.
However, the following requirements for this part should be adhered to:
- the total width of the blades should be equal to 2/3 of the row spacing of the potato bushes;
- the cultivator should go 10-15 cm underground;
- The angle of the blades should be close to 90 degrees - this way they will perfectly pick up the soil.
After carrying out a full range of work, you should end up with a full-fledged manual hiller that does its job perfectly while growing potatoes.
To familiarize yourself with the device in more detail and understand how to properly make such a homemade hiller, you can see the following
Useful tips
If you operate the hiller together, the hilling process will be significantly simplified and the efficiency of the work done will significantly increase. To operate a manual hiller in pairs, you need to attach a regular belt to the front of the unit.
You can attach some kind of weight to the back. This improves penetration into the ground, which, again, increases work efficiency. But at the same time, it will be more difficult for such a unit to move forward due to the increase in mass.
From a bicycle wheel and fork
If you have a front bicycle fork and a wheel for it, then you can create a hiller using the following technology:
- 2 pipes need to be welded at an obtuse angle;
- a bicycle handlebar is attached to a long pipe (it would be wiser to weld it so that it does not fall off during operation);
- A cultivator is attached/welded to the junction of both pipes, below.
The final output will look like this:
Creating such a hiller is much simpler than the one mentioned earlier. However, different types of units should be used for different purposes.
Hand Tools Overview
Now, indeed, it will be easier to plant potatoes using original devices, and in this case a shovel will no longer be needed. The tools that replace the spade not only make the process easier - thanks to them, the rows are perfectly even.
The plantation looks neat, and it is more convenient to hill up the bushes. Each of the proposed devices allows you to maintain the planting pattern, so potato harvesting will actually be carried out using a mechanized method.
The device can be bought in a store or ordered online, but it is cheaper to make it yourself. No special material is required here - improvised means will do. The drawings of homemade tools are simple, so even a person without skills can make them.
Planting potatoes without a shovel
Markers
Which of the summer residents has at least once seen this device in action and is interested in how to make a marker for planting potatoes with your own hands. Craftsmen have invented several types of convenient devices. It is suggested to use metal pipes, wooden stakes or a durable board as the material.
How to make work easier and faster when planting potatoes using a cultivator
Planting and caring for potatoes is a difficult and tedious process. Typically, the areas allocated for potatoes are quite large, so planting, hilling and harvesting potatoes requires a lot of time and effort. And, of course, this process needs to be automated. There are many devices that make the life of a gardener easier. These include both mechanized devices and manual equipment. There are plenty to choose from, given the area of the plot and financial capabilities.
Related article: Weeds on potatoes: types of plants and methods for their destruction
How to use the devices
The devices described above make the planting process easier and faster, but you need to get the hang of using the tools. To keep things moving, it is recommended to do the work with a partner.
How to manage markers
It doesn’t matter what type of device will be used, the principle of operation is the same. To begin with, mark the first row with twine and make indentations in the ground parallel to it with a marker, applying some force to this. Moving along the twine, one worker forms holes, followed by placing sprouted tubers in them.
Using a 3-cone marker, planting can be completed in a short time. The next rows are designed based on the nearest planted one. If the area is small, then the holes are marked in a checkerboard pattern for ease of subsequent processing.
Planting with a scriber
How simple the design of this device is, so simple are the actions of the farmer when using it. Even a large potato plot can be easily planted within a couple of hours, following these instructions:
- holding the tool with both hands, set a reference point (side rail) at the beginning of the section;
- press with your foot on the lower crossbar so that the stakes penetrate the soil to the required depth;
- After moving the instrument back and forth for a few seconds, expand the hole to the required size.
Having passed through the site in one direction in this way, you get 3 ridges of holes: 2 from stakes and another from a vertical rail. Turning in the opposite direction, the scriber is placed as a guide in the hole of the last ridge. While the sower fills the first 2 rows with potatoes, his partner continues marking the rows with a scriber, walking towards him.
Planting under the plow
Despite the fact that the manufacture of this structure will take some time, the planting of tuber crops itself will be easier compared to a situation where you would have to work with a shovel. True, in this embodiment, a trench is formed into which the potatoes are placed by a third person (two people operate the plow).
It will be difficult to maintain an even distance, but the row will turn out even if you focus on the stretched twine. Before you start plowing, the tool must be configured:
- by rotating the lanyard nut in one direction or the other, set the desired angle of attack of the knife;
- use a bolt to adjust the height of the control column handle to suit your height;
- The neck-axillary belt is adjusted to the figure of the partner walking in front.
Weeding equipment
Mechanical and hand tools will help make work easier. Let's tell you more about them.
Cultivator
Cultivators come in manual, electric and gasoline engine versions. The plants are removed along with the root system. The most commonly used cultivators are equipped with a pair of knives located at an angle of 45° to each other.
Hand tools
A variety of saps and hoes are simple and reliable helpers for processing small areas.
Common sapa
A rectangular or trapezoidal piece of metal, sharpened on one side and attached to a long handle. But this tool is more suitable for row spacing than for beds. With such a squeegee it is easy to cut off fragile potato stems and damage the roots.
Crested Sapa
A tool with a cutting surface in the shape of a crescent. This tool is similar to a hoe, in which not only the ends of the “horns” are sharpened, but also the arc connecting them.
Flat cutter
Another tool for removing weeds. It is notable for the fact that working with it requires less physical effort. The Fokina flat cutter is popular: it is good because the gardener himself can change the angle of the knife in a way that is convenient for him.
Another option for quickly getting rid of grass is using a trimmer. This device resembles a scythe equipped with a motor. A special nozzle is provided for removing weeds.
LiveInternetLiveInternet
-Music
–Categories
- Fashion history (52)
- English.Training (51)
- Arana (180)
- Architecture (22)
- Aerobics (77)
- Batik (30)
- Jewelry (126)
- Bonsai (4)
- Boho (206)
- Paper (149)
- Bottles (31)
- Felting (81)
- Videos (16)
- Vintage (190)
- Stained glass (34)
- Delicious treats (94)
- Parenting (15)
- Sundries (4)
- Baking (286)
- Cakes and cupcakes (12)
- Bread (16)
- Embroidery (2700)
- Ribbon embroidery (7)
- Crazy quilt, embroidery (34)
- richelieu (34)
- Knitting knits (3754)
- Machine knitting (14)
- Knitting with fur (18)
- Knitting, needs (84)
- Gymnastics for the face (76)
- Cities and villages (30)
- Country ideas (143)
- Decoupage (59)
- Wood (8)
- Diary (37)
- Longevity (319)
- Pharmacy drugs (20)
- Longevity Qigong (91)
- Housekeeping (75)
- Spiritual practices (16)
- Food (329)
- Diets (29)
- Cheese making (13)
- Eat and treat (97)
- Woman (41)
- Painting, pictures (13)
- Earn money! (28)
- Health, beauty (694)
- Herbs (65)
- Toys (454)
- Felt (25)
- Out of nothing (48)
- Interior (186)
- Yoga (72)
- Mantras (4)
- Quilt, patchwork (245)
- Stitch lessons (17)
- Books, magazines (68)
- Rugs (85)
- Leather (73)
- Cosmetics (149)
- We paint (43)
- Crochetwork (697)
- Irish lace (95)
- Romanian lace (9)
- Napkins (161)
- Dolls (391)
- Modeling (106)
- Papier-mâché (14)
- For kids (545)
- Massage (45)
- Master classes (5)
- Furniture (4)
- Copper plating (14)
- Fur, leather, sheepskin coat (2)
- Fashion, style (42)
- Mudras (21)
- Music (52)
- Soap (63)
- Cream makers (21)
- New Year! (167)
- Easter preparations (16)
- Socks, slippers, footprints (271)
- He and she (76)
- Alterations (55)
- Blankets (283)
- Weave (16)
- Pillows (120)
- Tailoring (73)
- Wire (136)
- electroplating (5)
- Religion, rituals (27)
- Painting (146)
- Rus' (45)
- Homemade products (55)
- Wedding (30)
- Candles (28)
- Simoron (16)
- Society, etiquette, psychology (94)
- WALLS (70)
- Poems (30)
- Haircuts (19)
- Construction (28)
- Bags (99)
- Tarapunto (109)
- Movies (3)
- Photo exhibition (41)
- Photo salon (29)
- Photoshop (25)
- Flowers (75)
- Watches (22)
- Something special (61)
- Shawl (426)
- Hats (387)
- Sewing (572)
- Sewing. Necessities. (77)
- Caskets (23)
- Curtains (5)
- Humor (14)
- To young Michurinets (316)
- Razvodilovo (5)
–Search by diary
–Subscription by e-mail
–Interests
– Regular readers
–Communities
-Statistics
Device for planting potatoes without a shovel
Monday, April 03, 2021 22:14 + to quote book
This material, which describes an original device for planting potatoes without a shovel, was taken from an old Soviet magazine. The method described by the inventor of this device is very interesting, but for some reason it was not widely used in its time. In recent years, interest in various kinds of innovations has grown sharply, so we are publishing this material in the hope that it will arouse interest among gardeners and gardeners and will be useful. Unfortunately, the author of this invention is unknown, if anyone recognizes the article and the author from the photo and description, please write to us.
Potatoes are planted with a special tool - a seeder-planter. The planting technology using this device is as follows: a) by pressing the stop, the device is buried in the ground; b) a tuber is placed in the pipe; c) the handles of the seeder are closed and the tuber remains in the soil; d) the device is removed from the ground.
Design and diagram of a potato planter. The handles of the device are made of two steel pipes with a diameter of 22 mm. The working part (gutters) is made of a steel pipe cut in half with an internal diameter of 65 mm. The tip of the working part is a plate made of steel sheet 2 mm thick. A stop made of two tubes with a diameter of 22 mm. A hinge and hinges (M8 bolt) were also used.
To enlarge the photo, click on it.
Next, see another similar simple device, which also involves the refusal of a shovel when planting potatoes and special rationality. This potato seeder is interesting, like the one described above, in that the entire process occurs in one pass, the earth is not trampled down again. And for gardeners who adhere to the rule of preserving the natural flora of the soil, this potato planter is just a godsend.
Two more devices with the same logic for sowing potatoes without a shovel are here and here.
Source: www.liveinternet.ru
Hand hiller. Manual potato hiller
Potatoes have always been considered one of the main vegetables in the kitchen.
It is used for preparing first and second courses, desserts, etc. Growing this vegetable requires a lot of labor, because to get a good harvest you need to hill up the potato bushes several times a season. Thanks to hilling, oxygen access to the roots improves, channels in the ground are destroyed, as a result of which less moisture evaporates, and the number of tubers increases.
Hilling up bushes is carried out in summer cottages mechanically using a hoe. However, this is a long and difficult process.
To help farmers and gardeners specializing in growing potatoes, a special tool called a hiller has been created.
Advantages and disadvantages of hillers
The use of mechanisms always allows you to increase labor productivity on farms and summer cottages.
Manual hiller
Advantages:
- reduces labor costs and increases farmer efficiency;
- can be a multifunctional tool that can additionally be used for loosening the soil, planting potatoes, and also during harvesting;
Flaws:
- in order to use the device, you need to purchase it, which means that material costs will be required for the purchase and further maintenance;
- When working with the device, you must follow safety regulations.
Types of potato hillers
Depending on the design, the following types of devices are distinguished:
- lister;
- disk;
- propeller
Disc hiller
Propeller mechanisms make it possible to move the soil between the rows into the furrows.
The most common are lister and disk devices.
Lister mechanisms
Interesting! Devices of this type are available with a fixed working width. Otherwise they are called plows, as they look like a plow.
They are produced with an adjustable angle of attack (the angle of inclination of the cutting part of the hiller to the ground) and fixed.
Adjustable ones allow you to change the depth of loosening and, accordingly, the gripping area.
Advantages of the device:
- consumes less energy compared to disk devices;
- simpler in design;
- the price is less than for a disk device;
- It is light in weight, so it works great on low-power machines (walk-behind tractors and cultivators).
Lister hiller
Flaws:
- does not work well on wet and heavy soil;
- Potato planting should only be level, with strictly fixed row spacing.
Disc hillers
Structurally, they consist of two disks with a sharpened edge. As the hiller moves, the discs rotate and crush the soil. They have a convex shape. Due to this shape, the soil is simultaneously loosened and an earthen ridge is formed.
The disks are attached through ball bearings to the racks, which are located on a horizontal holding frame.
Note! They can be adjusted vertically, less often horizontally. With vertical adjustment, the angle of rotation of the disks changes, due to which the amount of earth needed to form the ridge also changes.
Horizontal adjustment moves the discs vertically (raises or lowers). In this way, the angle of attack is adjusted.
Advantages:
- better performance of hilling, the ridges are smoother and higher;
- can be used with different row spacings;
- allows hilling on heavier soil.
The disc hiller can be used with different row spacings
Flaws:
- higher price;
- higher fuel consumption.
Depending on the volume of work performed and the degree of mechanization, the potato hiller can be:
- manual;
- automated.
Fact! Manual - designed to perform only hilling, automated - used to perform several types of work: hilling, loosening, planting, harvesting.
Manual - moves due to the fact that a person pushes or pulls the mechanism.
An automated potato hiller is an additional hanging device for a walk-behind tractor, cultivator or tractor.
Manual potato hiller
Allows you to process potato beds, regardless of the presence of a walk-behind tractor or a tractor. For manual types, the most common designs are lister and disk mechanisms.
Purpose and types of potato planters
The very name of the unit suggests that it is intended for planting potatoes. When working together with a walk-behind tractor, this happens automatically. You just need to load the tubers into the hopper.
All potato planters are divided according to the number of planting rows . This:
- Single row units. They can be mounted or trailed. They are most often installed on a walk-behind tractor and cultivate 20-30 acres of arable land. They have one conveyor for feeding tubers and a hopper that can hold 100-120 kg of potatoes.
- Double row. Such units can already be attached to a mini-tractor, which weighs more than a walk-behind tractor and is capable of pulling a larger potato planter. This device has two feed conveyors, and the bunker can hold up to 250 kg of tubers.
- Four-row potato planters. These devices are industrially manufactured and DIYers do not make them. The units have two large containers and each of them has a pair of conveyors. Using this equipment, potatoes are planted on 2-3 hectares within an hour. The bunkers can hold up to 250-300 kg of potatoes. These potato planters are usually equipped with dispensers for treating tubers and simultaneously applying fertilizer.
The first two types of devices are very often homemade potato planters, made with your own hands and tested more than once in the garden. Usually they are repaired, improved and prepared for field work in the spring.
Weeding attachments using a trimmer
For weeding, use a trimmer with an electric motor located on top. Between the rows they are often weeded with a trimmer head and fishing line.
It happens that a knife with 3 blades is used to remove grass. Steel knives are mounted on a trimmer with a level stand. If the stand is crooked, then plastic attachments are attached. If the knife hits any obstacle, the device will be thrown back or broken.
3 blade blade for electric trimmer
On the market or in a store you can buy trimmer attachments with earth cutters, which are shaped like disks with curved blades and are attached to a single axis. More often there are 4 cutters in one attachment.
Earth cutters for trimmer
The size, diameter and number of cutters depend on the power of the brush cutter engine. The instructions for use for the attachment indicate which lawn mowers it is suitable for.
You cannot make the attachment yourself, because... it is difficult to choose the width and diameter so that it does not break the device. You cannot weed with a trimmer on difficult, clayey soils.
Before using the trimmer, professional summer residents treat all rubbing elements with silicone lubricant.
Rules for processing potatoes using a trimmer:
- Before processing, you need to protect your eyes and ears , since during weeding the cutters rotate at high speed, raising dust and dirt into the air.
- You need to treat the area for weeds when the grass is still small. Treatment should be done once every two weeks .
- It is better to weed in the morning , then during the day the grass will dry out and turn into straw.
- There is no need to immerse the cutters to a depth of more than one and a half centimeters . With this technique, the land is cultivated, and the soil receives oxygen and nitrogen, which has a great effect on potatoes.
- You should also not immerse the cutters because this can lead to damage to the device .
- If the engine on the device is not very powerful, then you need to take a break every quarter of an hour .
- At the end of the summer season, the nozzles must be treated with a disinfectant to remove all germs.
Weeding potatoes with a brush cutter.
A broken cutter can be replaced with a cutter made by yourself. To do this, you need to carve a circle from a steel sheet and bend the cavities. The diameter cannot be larger than that of the cutters used. It is prohibited to put additional cutters on the trimmer axis.
Design and principle of operation
All such units have almost the same design . This is necessarily a strong frame onto which the remaining components are attached, consisting of an axle with lugs, two gears, a conveyor with cells for root crops and a supply pipe. A small plow is also attached to the frame to create a furrow into which the tubers are placed at the same distance. And behind the frame, a disk hiller is installed to fill the potatoes with soil. The entire landing process occurs automatically.
What kind of shovel should be used for digging potatoes?
Experienced gardeners prefer products whose canvas is not made of a solid sheet of metal, but with gaps, holes and crevices.
Main parameters:
- bucket size – 210x280 mm;
- four oval or oblong slits.
Advantages:
- such a shovel is lighter, and therefore working with it requires less effort;
- there is no need to regularly clean the blade from adhering lumps of soil and weed roots;
- This is a multifunctional device that performs several tasks simultaneously.
The working blades in such products are made of high quality steel, treated with special anti-corrosion agents.
Functions
The tool performs several important functions at once:
- digging up soil, digging tubers;
- loosening the soil;
- separation of the root system, stones;
- cleaning tubers from soil;
- Suitable for digging carrots, beets and other root vegetables.
Some farmers use a combination shovel-fork. The upper part of the blade (from the handle to the middle) consists of teeth, and the lower part is the tip of the shovel. The unusual design is easy to use and has functionality similar to lightweight shovels.
Making a planter with your own hands
Creating a unit begins with collecting all the necessary materials, spare parts and tools . As well as preparing the site where welding and other work will be carried out.
Materials and tools for manufacturing
Building a potato planter is not an easy task. But it will not be difficult for home craftsmen to make such a technique. To do this you will need to collect the following parts :
- metal corner or profile square pipe for the frame;
- axle with bearings for lugs;
- two gears and a chain for the conveyor;
- steel wire 5-6 mm;
- any conical bunker or make it yourself from tin;
- lugs (they are made from a small gas cylinder).
In addition, there must be a site where a vice and a welding table are located for assembling and adjusting the homemade product.
And you will also need tools:
- grinder with a set of cutting discs;
- DC welding machine with electrodes;
- drill, metal drills;
- other set of metalwork tools.
Now you can start assembling, following the instructions and advice of skilled craftsmen.
Step-by-step assembly instructions
To make a potato planter with your own hands, drawings, necessary diagrams and detailed dimensions must be prepared in advance. It is important to know the order of work :
- Construct the frame. It is welded to a size of 60 x 30 cm from a profile pipe. Then an axle with a sprocket is mounted on it. This will be the main drive of the planter.
- Grousers are made. They are often made from a gas cylinder. It is cut in a circle and two rings 8-10 cm wide are obtained. Then hubs are welded onto them and attached to the axle using studs. The wheels must be removable.
- They are making a bunker. It is made from sheet metal 1 mm thick or taken ready-made from an old washing machine. The container should hold approximately 30-40 kg of potatoes.
- They are making a conveyor. It is a chain with welded cells with a diameter of 5-6 cm.
They are made of steel wire and welded every 8-9 links, which allows the tubers to be laid at a distance of 30-40 cm from each other in one row. Then an unloading pipe with a diameter of approximately 100-120 mm is attached. Through it, the root crops flow directly into the furrow, so the lower edge of the pipe should be in contact with the furrow maker. Now they act like this :
- Install the mount to the walk-behind tractor. It is made from channel bars or corners. This unit must be adjustable vertically for ease of coupling with the walk-behind tractor.
- Attaching the hiller for filling holes. Two discs are installed behind the frame, with the help of which the potatoes are covered with soil. This device resembles an ordinary hiller with adjustable angles of rotation.
- A plow is installed to create a furrow. It is attached to the conveyor pipe. It works on the principle of a ral, that is, a soil loosener. They make it themselves or use a plow from agricultural cultivators. The purpose of the plow is to make a furrow for laying potatoes.
Thus, all potato planting is done automatically and only due to the rotation of the planter wheels. Sometimes individual craftsmen add a fertilizer hopper, which meters the supply of the substance into the hole.
In the same way, they make a potato planter for a mini tractor with their own hands. Drawings of it are widely presented on homemade websites. As a rule, it is double-row, and therefore has two bunkers and two conveyors. The operating principle is absolutely similar to a single-row planter. It is made both mounted and trailed. It is a bit heavy for an average walk-behind tractor, since over a hundredweight of potatoes are loaded into the container. Its productivity allows you to plant tubers on 30 acres in 1-1.5 hours of work.
Manual potato planter. Quick manual potato planter
In this publication, we will first consider the simplest version of a manual potato planter, which will be useful for those who would like to quickly build an affordable tool and not spend money on complex designs.
Garden tools and other products in this Chinese store.
The second part presents more complex structures that will have to be tinkered with, but for perfectionists and, at the same time, manual labor enthusiasts, these will be the most interesting developments.
On the first video
The simplest manual potato planter in the form of a wooden handle and a ledge for the foot. According to the author of this mechanism, the potato yield does not suffer at all with this method of planting, but on the contrary, it is higher.
Craftsmen buy inventions at their best
The device, which is presented in this video, is not particularly or even at least some kind of sophistication. The gardener simply called it “digging stick.” But, for the purposes of this publication, it would be fair to consider it as a manual potato planter. With its help, you can plant potatoes without a shovel practically with your own hands. This method is called “heeled” among gardeners.
The field was previously plowed with walk-behind tractors. First, a 70X20 field is marked. Or they simply stretch the threads at a distance of 70 cm from each other, and during planting of potatoes, 20-30 cm are measured each time using a potato planter.
Holes are made every 20 centimeters and potatoes and peas are thrown into them. All this is immediately covered with earth. The soil must be moist, because if it dries out, the holes will crumble. Therefore, you need to plant potatoes using this manual potato planter immediately after plowing the field. Peas do not interfere with potatoes; they grow in symbiosis. The fact that holes are made and the earth is compacted does not have any consequences for the harvest. On the contrary, it helps collect moisture after rain. This simple mechanism, made in haste, has served for 7 years. In another publication about what kind of potatoes should be planted.
Electronics for DIYers in
Second development.
When planting potatoes, after they are laid in the furrows, it is necessary to cover them with soil. Many people suffer when working with shovels, rakes or hoes. The furrows were pre-cut using a walk-behind tractor with a special device for cutting furrows. Planting material was placed in the furrows. A homemade heel was made in front of the hiller to adjust the constant depth and to make it easier during work. Now we will show how the potato planter works. Thus, there are no more problems with planting potatoes and covering them with soil. The planter is also convenient when moving it around the field. You just need to turn it to the top with the working part and move it on the wheel.
Another development is also shown, which is sometimes called Tykalka.
Testing a planter in the garden
After production, the potato planter must be tested and adjusted for normal planting. The unit must meet the following parameters :
- the depth of the tuber is 12-15 cm. This is regulated by the height of the furrow plow;
- the distance between potatoes in a row is 30-40 cm. This depends on the diameter of the lugs and the number of conveyor cells. This calculation is made at the stage of manufacturing the unit;
- the distance between potato rows is 60-70 cm.
In addition, it is necessary to carefully select seed material. The tubers should be the same size, fit freely into the planter cell and not have long shoots.
These are optimal conditions for good germination and, therefore, a large harvest.
Description and timing of the procedure
Weeding time is determined taking into account weather conditions and soil structure . There is no need to weed too often, the main thing is to ensure that the grass does not choke the potato bushes.
Bees in winter: wintering of bees, death, feeding
How often to weed
On average, a plot of potatoes is cultivated 2-3 times per season . Water for the first time 3-4 weeks after sowing, removing the first weeds. At this time, young shoots reach a height of 2-4 cm.
The field is processed the second time when the bushes reach a height of 20-30 cm, before flowering . Weeding is combined with hilling and loosening the soil.
Advice. If weather conditions have delayed the emergence of seedlings, and the weeds have already grown, then carefully remove them with a flat cutter without waiting for the potato sprouts to appear.
During and after the bushes bloom, it becomes difficult to cultivate the area.
When not to weed
The appearance of flowers on the bushes indicates the beginning of the formation of tubers . During this period, weeding and loosening is not recommended, since sharp tools can easily damage small potatoes.
If you still have to cultivate the potato field during this period, then do it carefully, acting only on the surface of the soil .
Planting potatoes
Thus, heavy manual labor is eliminated when using mechanized devices . In this case, planting potatoes occurs several times faster. A walk-behind tractor with a trailed planter makes a furrow, potatoes automatically fall into it, and then the hiller fills the holes. It turns out that in one pass the seeds are planted and the soil is compacted. Time is wasted only on turning the unit in the opposite direction. Therefore, if you have a large plot of land, this is an indispensable assistant. You just need to monitor it and carry out timely maintenance.
In addition to trailed automatic potato planters, manual planting devices are also widely used. This is the most popular "crow's beak". When planting, the tip is stuck into the soil, then the potatoes are thrown into the cavity of the “beak”. Next, the cuttings close, the “beak” opens, and the potato remains in the ground.
At the beginning of September, the potato harvest is harvested. In the meantime, while it is ripening, craftsmen can work all summer long on making potato diggers and other useful devices. For example, a DIY potato peeler will be an excellent helper in the kitchen.
Source: pochini.guru