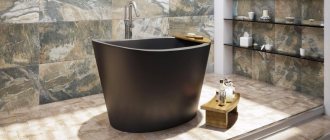
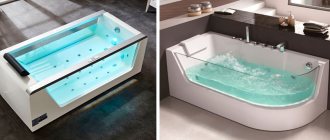
Many people feel the need to paint a bathtub at home. For this purpose, three technologies have been developed and the same number of repair coatings used in each of them. The highest quality is considered to be poured acrylic, followed by mixtures that need to be applied with a roller or brush. The most convenient, but short-lived, is enamel in an aerosol can.
Why is it profitable to restore a product?
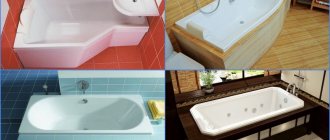
The bathtub coating gradually becomes thin; rust and limescale deposits give the product an unaesthetic appearance. It is important to carry out restoration work in time, while the plumbing can be saved without replacing it.
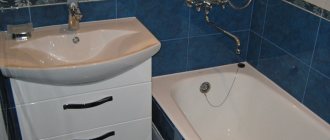
If your plans do not include renovating the entire room, replacing tiles and floors, then it is more profitable to update only the bathtub.
Buying a cast iron bathtub is expensive; its transportation, delivery and installation will require additional costs, because it is impossible to do it alone due to its weight.
At the same time, replacing it will ruin the appearance of the finish; you will have to change the entire tile.
If the bathtub bowl does not have large cracks with chips, then you can carry out the restoration with your own hands easily and quickly.
Attention! Restoration work on old plumbing does not require large expenses; even a beginner can easily handle the job.
Old-style bathtubs made of cast iron are much higher quality than their modern counterparts, so it is better to restore the product than to install a new one. Modern plumbing has a service life of only fifteen years.
Restoration: pros and cons
The main advantage of such an elegant way out is the big savings, which hardly anyone takes into account. If paint costs around 1,000 rubles, then the most inexpensive cast-iron model will lighten your wallet by more than 15 thousand. However, there are other arguments.
- Dismantling an old cast-iron bathtub and installing a new one is work that requires subsequent renovation of the room. If we talk about the minimum, then we will have to deal with restoring the tiles along the edge of the product, as well as sealing its junction with the wall.
- There is no way to “crank out” such operations alone, so the help of friends, relatives or neighbors will be needed. If you turn to professionals, then again, not entirely justified expenses are inevitable.
- The excellent quality of old classic cast iron models is something that modern products “cannot dream of”, the maximum service life of which is 15 years, but this figure is still approximate.
- The painting process itself does not require much effort or a lot of time.
The benefits are obvious, but there are a few small flies in the ointment:
- Before painting, serious preparation of the product is required, and each stage must be completed correctly;
- some compositions take a very long time to dry, so the owners will have to look for a spare “airfield” for hygiene procedures;
- The coating is not durable, so after a while it will have to be renewed.
It seems the pros may outweigh the cons. Proof of this is the popularity of this method of restoration, almost “without noise and dust.”
Bowl resurfacing methods
The following update methods are considered the most popular:
1.painting with enamel.
2.applying liquid acrylic.
3.liner insert, made of acrylic material.
All types of coating have positive and negative properties. Painting using enamel or acrylic is considered a non-labor-intensive job and can be done with your own hands. The most important thing is to determine the correct composition and follow the instructions strictly.
Installing the liner requires skill, which is why it is worth inviting specialists.
Reviews about the use of enamel
- “I tested the aerosol on our brand new iron bathtub. The child made a small chip with a toy and an unsightly mark was left on the bathroom, which over time began to rust. I did everything according to the instructions included with the aerosol enamel. I'm happy with the result, we've been using the bathtub for 1.5 months now. Yes, I forgot to add, the chip was in the upper corner"
- “Aerosol enamel is a rare nasty thing, in my opinion. First of all, it smells. When working with it, I advise you to purchase a high-quality respirator and dress well (wear old, unnecessary clothes), since splashes fly in all directions. Secondly, the coating did not last long for me - only 3 months. And then in one place it swelled and began to peel off. I do not recommend using enamel from a can for the bath. It’s better to pay more, but make a coating of liquid acrylic"
- “We used white enamel from a can to restore the whiteness of the sides of the bathtub. In principle, for such money we were satisfied with the result. We haven’t been using it for long, only 2 months.”
Preparatory work before applying paint
Before applying any type of coating to a cast iron bowl, preparatory work should be carried out. If you thoroughly clean the surface, the painting result will be almost one hundred percent successful.
Attention! Preparing a bowl for painting contains several steps that must be followed.
The bath is degreased by first washing it free of dirt. Fats on the surface and dirt residues reduce adhesion, which prevents the solution from being absorbed, so the result may be negative. After a short time, the enamel will crack and peel off in places with fatty residues.
To degrease the bathtub, you will need to use acidic detergents. The bath can be easily cleaned with oxalic acid. The applied solution should be left for about fifteen minutes.
During work, safety precautions must be observed, as the product is dangerous for the respiratory tract and skin. For protection, wear gloves with a respiratory mask.
Then the bath is rinsed well.
The next step is to treat the surface with an abrasive agent to remove the old enamel. The rough surface of the bath ensures good absorption of paint products.
Attention! Mechanical cleaning is carried out with a drill using a grinding brush attachment; turning the brush removes old enamel and paint.
The rust is cleaned off to a metal coating.
Next, the bath is vacuumed to remove small particles and washed again with an acidic agent.
To do this, pour the product into a bath bowl, fill it with water, and leave for an hour and a half.
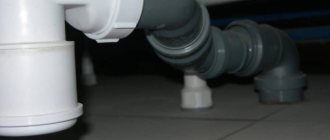
Rinse the bath of the product up to three times, then dry the surface with a hairdryer. To avoid clogging the siphon, first disconnect the bath from the pipe into the sewer.
If there are chips, they are puttied, rubbed with sandpaper, and dust is removed.
You can start painting.
Preparing the surface for painting
Each bath requires a personal approach. Restoration work and preparation for it are no exception.
Preparing an iron bath for painting with enamel
Before painting, the bathtub must be prepared for work. The inner surface of the cast iron bathtub must be completely cleaned of residual grease and traces of limescale. To combat them, the most common alkaline agent is suitable. For example, the traditional Pemolux. On the contrary, it is recommended to refrain from using substances containing chlorine.
Product with a little added water:
- Apply with a sponge to the surface of the bath and spread evenly;
- remains in this form for 15–20 minutes;
- after this period it is washed off.
Next, the master will have to begin cleaning the bathtub from rust, traces of old paint and dirt. For this you will need:
- electric drill or grinding machine;
- medium-grain sandpaper;
- a pair of gloves, a respirator and goggles that protect against dust.
A power tool will help remove the old paint layer.
However, the power tool is unlikely to reach the inner corners of the bathroom and the drainage area. This is where sandpaper comes into play.
The result of manipulations with an electric drill or grinder should be a matte and rough surface to the touch. There is not much left to do before painting begins:
- fill the remaining cracks and chips;
- vacuum the surface of the bathtub, clearing it of the smallest grains of dust;
- rinse again, this time with an acidic solution;
- allow to dry (if you need to speed up the process, dry the surface with a hairdryer).
All chrome and nickel plated parts should be removed to prevent exposure to harmful components.
Preparing a bathtub for acrylic painting
Acrylic painting also requires special preparation. Otherwise, within a few days after the work, an emergency may occur - the paint will begin to peel off. To prevent this from happening, you must:
- carry out a general cleaning of the room, clearing dust from the walls and ceiling above the bathroom, which will minimize the threat of tiny dust particles getting into the paint;
- clean the bathtub itself from deposits, grease and dirt, and in particularly problematic areas you will have to use a grinding machine;
- remove all areas with enamel beginning to peel off;
- rinse and thoroughly dry the bathtub with a hair dryer, and then wipe with a napkin.
Getting moisture under the paint can ruin the entire work.
Even a minimal amount of water will be destructive and lead to irreversible processes. Drying the bathtub at the preparation stage should be given the closest attention. It is also important to ensure that after applying acrylic nothing falls into the freshly painted bathtub.
Experienced masters share very useful advice: you need to remove from the bathroom in advance any small objects that could be accidentally touched.
It is also recommended to secure the washing machine - wrap it in plastic and secure it with tape.
Enamel painting
The use of enamel is considered an old proven method.
Attention! Applying enamel is an affordable way to update a bathtub and does not require dismantling.
There are enamel-based dyes on sale that can easily be used to restore a product.
The advantages are:
1.low price of paint.
2.does not require any installation.
3.used for bathtubs made of cast iron and steel.
The disadvantages are:
1. The enamel coating is thin, not durable, does not withstand cleaning with harsh detergents, and can be damaged by impacts.
2.enamel does not eliminate the presence of chips, cracks, and dents.
3.The paint has a long drying time, about a week.
The bath can be used for five to nine years.
This method is suitable for temporary use if repairs and replacement of plumbing fixtures are planned in the future.
Advantages and disadvantages of using spray paint
Advantages
- the aerosol is easy to apply to uneven surfaces;
- no other tools are required for the job;
- enamel from a can fits perfectly and forms a smooth surface;
- suitable for updating old cast iron or steel products;
- low cost compared to updating a bathtub with liquid acrylic.
Flaws
- if you apply enamel to the surface incorrectly, unsightly stripes and smudges may occur;
- the coating is not durable enough, since aerosol paint contains a certain amount of solvent and creates a thin layer on the product.
To ensure that the enamel does its job well, buy paint from a trusted manufacturer.
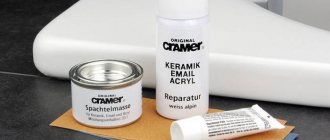
Enamel paint, its features
Simple enamel for applying to a bathtub will not work; you need to buy a special bath product.
To coat the bathtub, you should read the instructions in order to follow the technology for diluting the composition and its application.
Attention! The bathtub should be coated with enamel quickly; its working condition is about an hour, then it will harden and become unusable.
Russian brands include Epoksin 51C or Epoksin 51.
The product includes epoxy resin with amine hardeners, which are produced by German or American factories.
Before starting work, the mixture is mixed until smooth, then applied to the bowl. If desired, you can add colors by changing the color.
The product is very stable and has a long service life of approximately nine years.
Attention! The enamel is thick after dilution, so it is not easy to apply; after an hour it will completely harden.
The bath will dry for a week, during which time the bath should not be touched.
Enamel from the Finnish brand Reaflex 50 is of high quality and has positive reviews from specialists.
The product contains two components that are mixed before application. The price of enamel is higher than Russian products, but the high quality eliminates this drawback. After drying, a coating is formed that is durable, durable, and has a glossy white or blue tint.
Russian enamels Fantasia and Svetlana do not have high technical characteristics. The products consist of a hardener with enamel, and the kit includes tools for work.
Dyeing technology
Depending on the recommended thickness of the enamel layer from different manufacturers, the color of the bathtub and the repair composition used, several coats of paint may be required or one coat of paint will be sufficient.
In addition, the compositions of different brands do not have the same shelf life. For the second layer, some of them will have to be mixed before each painting, others can be reapplied without fear that the paint will harden before this time.
Some companies, such as Ecolor, have taken care of this in advance. For example, Epoxin paint is sold as a kit containing two 300 g containers with a base (200 ml each) and two jars of hardener (50 ml).
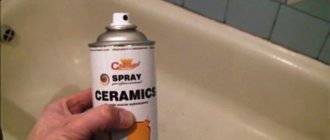
Aerosol
The simplest option for restoring a decorative protective coating is an aerosol can. The step-by-step technology in this case looks like:
- shake the enamel by hand for 2 – 3 minutes;
- the home craftsman independently applies a layer, first to defective areas (putty chips, scratches), then evenly distributes the jet over the entire surface;
- after 15 minutes, possible drips are cut off with a blade or smoothed out with a spatula.
Brush or roller
When using two-component compounds with a hardener, they are applied to the iron surface using different methods, which is also necessarily indicated by the manufacturer on the packaging. It is much easier to paint yourself with enamels, which are applied to the surface using traditional methods - with a brush or roller. In this case, it is necessary to take into account the following nuances:
- the enamel base is packaged in containers in such a way that the required amount of hardener can be added to it, that is, there is no need to look for additional containers for mixing;
- a wooden spatula is used for stirring; the process takes 5–10 minutes for different manufacturers;
- re-mixing is carried out after 3 – 5 minutes of paint settling, its time is 3 – 5 minutes, respectively;
- The color of the new coating is given by adding tinting paste after the initial mixing of the base with the hardener;
- colored enamels thicken during use faster than white compositions;
- When mixing, it is not recommended to use power tools, since the enamel is saturated with air, the bubbles of which will reduce the quality of the coating;
- when stirring by hand, you need to scrape the thicker paint from the side walls of the container and lift it from the bottom;
- the surface must be covered from top to bottom, starting from the sides of the bowl, moving the brush to the bottom of the bath;
Applying paint to the bathtub with a brush. - When using a multi-layer coating, the layers are applied at right angles to each other after waiting for 15 minutes (dust adhesion time is indicated on the paint packaging).
Primers or primer-enamels are used for the outer surface of the bowl. This is cheap and practical, since the outside of the bath is usually decorated with panels or screens.
In bulk
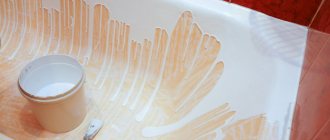
The most complex technology is painting without painting tools using the pouring method:
- In this case, it is better to pour the diluted two-component composition from a common container into a small container, which is convenient to work with outstretched arms;
- the position of the body should provide access from one place without walking along the bathtub to all its areas;
- It is convenient for right-handed people to start from the left side farthest from themselves and gradually move the container with paint to the right, for left-handed people, accordingly, vice versa;
- the material is poured evenly onto the side in such a way as to fill it in one go;
Pouring acrylic during the first round. - areas not filled with paint are filled with a spatula;
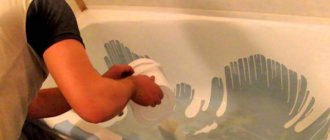
- then the can is shifted slightly inward, the vertical sections of the walls are poured, approximately up to the middle of their height, with a simultaneous smooth movement in a circle;
- the back wall of the bowl opposite the drain hole usually has a flatter angle of inclination, the enamel flows down it more slowly, which is fraught with sagging;
- during the second circle, the acrylic should drain to the bottom, completely covering the vertical walls;
Second round of the pouring method. - at the same time, there is an accumulation of paint in the area of the drain hole, so it is necessary to select the material from there with a spatula back into the container or to other areas of the bath;
- the remaining “bald spots” are filled with enamel solution from the bottom with a spatula.
Leveling the enamel layer with a spatula.
When the bath is installed correctly, the drain hole is the lowest point of the structure. Therefore, excess enamel will automatically flow into the container underneath. The mixture has self-leveling properties, that is, it spreads evenly under its own weight, forming a uniform layer.
Additionally, after applying paint to the entire surface of the bowl, using the edge of a spatula without strong pressure, draw a uniform grid on the side walls and bottom from top to bottom, towards the drain. After some time, the thickness of the layer and its uniformity will level out on its own. The procedure should be repeated 1 – 2 times, taking into account the remaining pot life of the solution.
Removing drips from the outside of the side.
If the bowl of a sanitary ware has a rounded edge, drops will accumulate on its outer part. They are removed with a spatula as they accumulate until the paint has completely cured.
Painting with liquid acrylic
The restoration method has existed for about ten years. It has already become popular among all renovation methods and is considered the most reliable for restoring plumbing.
Reference! Liquid acrylic contains two components: acrylic and hardener, which must be mixed for painting. For a bathtub of one hundred and seventy centimeters you will need about four kilograms of acrylic.
The advantages of the product are:
1.carrying out work within a short time with little effort.
2.The coating of the bathtub is smooth and has a glossy shine.
3.The service life of a bathtub with a new coating is up to fifteen years.
4.When applying acrylic, you do not need to use protective equipment, it is harmless and has no pungent odors.
5.acrylic dries in a maximum of three days.
The disadvantages include the high cost of the product when compared with enamel.
But the durable coating is of higher quality than enameled coating.
Types of coatings for steel or cast iron bathtubs
In factory conditions, manufacturers treat the inside of cast iron and steel bathtubs with powder enamel, which is sintered in a high-temperature oven to a glassy coating. Naturally, such technology is impossible at home. Therefore, completely different repair compounds are used to restore the enamel layer.
Enamel coating before and after painting with liquid acrylic.
Outwardly, they look like glassy enamel, but cannot compare with the factory coating in terms of durability, impact resistance, and adhesion to the metal of the bathtub. There is confusion over the names of these mixtures due to the following factors:
- the application technology itself is called a self-leveling bath;
- the material is called liquid acrylic;
- Ecovanna, Plastol, Stakryl, etc. - brand names.
By analogy with the trademark Giprok, which has become the second name for the material plasterboard, liquid acrylic is often called Stacrylic, and they even try to compare it, which is fundamentally wrong.
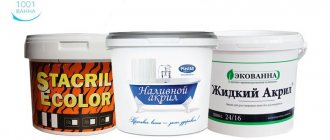
The best brands of liquid acrylic are:
- Plastall (Tolyatti) - Plastol product line - Classic, Premium, Titanium, Super, Light Beige, differing in viscosity, fluidity, curing time, packaging 2.5 kg, 2.8 kg, 3.4 kg, 3.9 kg for bowls long 120 – 170 cm, respectively, 8 year guarantee, application time 1.5 hours after mixing, drying time 1.5 days, applied in bulk;
Two-component composition Plastol. - Stacril (St. Petersburg, Ekolor LLC) – coating thickness 6 mm, pour-on method of applying acrylic mixture, drying in 36 hours, 3-year warranty;
Stakryl - Epoxin (St. Petersburg, Ekolor LLC) - based on epoxy resin from the German manufacturer Basf or Dow, the product line includes purple, red, brown, yellow, black, blue, turquoise, green and white, applied with a brush, roller, the life of the composition after mixing 1 hour, curing 1 day;
Epoxin - YarLisoat 616 (Yaroslavl, ZLI) – pouring from the sides, paint lifetime 20 – 40 minutes, year warranty, layer thickness 3 mm;
YarLisoat 616 - Ecovanna (Moscow) – aerosol can Turbo, repair kits for removing scratches, two-component epoxy EcoEnamel, liquid acrylic color EcoMix and super white Lux, 12 month guarantee, hardening 24 hours, paint life 15 minutes;
Eco-enamel - Random House (Moscow) – repair kit “Svetlana”, “Fantasy” with enamel, solvent, color;
Repair kit for painting bathtub Fantasia - Reaflex 50 (Finland, Tikkurila) – two-component Reaflex composition, pot life 4 hours, epoxy base, application by spray, brush, consumption 1 l/10 sq. m, the second layer is applied after two days, operation of the bath after a week.
Epoxy enamel Reaflex Tikkurila - Restvanna (SPB, Ekolor) – epoxy base, packaging 0.8 kg, color pink, white, green, blue, consumption 0.2 kg/sq.m. m, pot life up to 2 hours, drying 24 – 72 hours, application with a spray gun, roller, brush, 2 year warranty;
Restoring enamel composition Restvanna - Finnacryl (St. Petersburg, Ekolor) - acrylic base, several basic colors, hardening 8, 16 and 24 hours, packaging 2.7 - 4 kg for plumbing fixtures of different sizes;
Paint for metal sanitary ware Finnacryl - Sipoflex (Moscow) – two product lines with curing for 16 or 24 hours, tinting in any color, operation within 24 hours.
Acrylic enamel for bathtubs Sipoflex
Before painting the inner surface of an enameled cast iron plumbing product, you should prepare it for this.
All acrylic-containing enamels have a characteristic odor, however, even in this category, Stakryl stinks stronger than other compounds in the first two days. However, this enamel is considered one of the strongest and most durable.
The Ecovanna composition has minimal consumption, since the hiding power of this material is the highest in its category. In addition, it does not form smudges, which is very convenient for those who want to beautifully enamel the inner surface of the bathroom on their own, without the involvement of specialists.
Tolyatti Plastol does not contain solvents, which is considered the best option for enamel in terms of environmental safety. The Sipoflex product has absolutely no odor and does not cause allergic reactions.
Advantages and disadvantages
The advantages of painting cast iron bathtubs include the following factors:
- Wide range of compositions. Aerosols are suitable for quickly repairing minor damage. Epoxy paints are inexpensive, but give short-term results. If reliability and durability are required, it is recommended to purchase acrylic enamel. You can find paints of any shade or get the desired color yourself.
- Low price. On average, taking into account tools and materials, the cost of restoration with paints will be 3000-5000 rubles. Replacement price is about 15,000 rubles.
- Possibility to restore the bath yourself. The process is limited to the removal of pipes, as well as the distribution of the composition.
- Fast execution. You won't have to wait for delivery or worry about getting your tub inside. The entire procedure will take 3-4 hours in total.
- Get an attractive finish. Bath paints provide a high-gloss shine. You can apply decorative patterns yourself.
- No unpleasant odor. Some materials emit evaporation immediately after drying, but during use they quickly erode.
Among the disadvantages of restoration with enamel are the following:
- Enamels take a long time to dry. The only exception is aerosols, but they are not suitable for quick repairs. In some cases, you will only be able to use the bathroom after 5 days.
- Requires special training. Before painting, the bathtub must be cleaned of dirt and old enamel. Otherwise, the adhesion will be weak, and there is a risk of rapid peeling of the coating or moisture penetration inside. You need to take care in advance to protect yourself from fungi and bacteria.
- Not all paints are designed to last long. Some quickly turn yellow and lose their original appearance. When using budget materials, it is recommended to avoid any exposure that could damage or change the color of the enamel. For example, you should not dye your hair at home, because... the pigment may become embedded in the coating.
Restoration of an acrylic bathtub
Filling the entire surface of the bathtub
It is necessary to distinguish between the need to change the shade of the bathtub or to repair it. In the first case, we recommend using glass acrylic of the desired tone. It is enough just to fill the entire surface, and then the composition will work itself without your participation. If repairs are required, then there is no need to fill the entire bathtub with acrylic. Simply clean the damaged area and then apply liquid acrylic to it. You can find all the necessary equipment for such a procedure in a special kit for repairing acrylic bathtubs. They are sold in almost all large hardware stores.
Tell us about your experience renovating bathtubs. What difficulties may newbies encounter? Leave your message in the comments below the article!
- Author: Julia
Rate this article:
- 5
- 4
- 3
- 2
- 1
(0 votes, average: 0 out of 5)
Share with your friends!
Priming the surface before painting the bathtub
The third stage is priming the surface. To do this, apply the first thin layer of enamel and then let it dry well. You can apply paint to the surface with a hard-fly brush (flat brush) at least 70 mm wide or with a spray gun. After drying, apply finishing layers (usually 2 layers).
| 4. Applying the first layer of enamel (primer) |
| 5. Applying a second layer of enamel (painting) |
Of course, this is not a canonical description of the technology and materials for painting a bathtub, but it contains the basic commonly used methods of painting a bathtub.
Features of painting the internal surface
What paint can you use to paint the inside of a bathtub? The coloring composition can be multicomponent or acrylic. Epoxy resins are used to produce durable coatings. However, the material also has disadvantages. This is a high complexity of work, toxicity. Acrylic enamels are less toxic, but can achieve almost the same effect. Any of these compositions can be applied to the surface only after comprehensive preparation.
- Degreasing. The inside of the container is treated with alkaline solutions, which remove dirt, grease, and limescale.
- Removing the old layer. At this stage, you will need a sanding tool or regular sandpaper.
- Removing enamel residues. You need to clean it thoroughly and wash off all the old paint. Otherwise, under the influence of the new enamel, it may swell and form bubbles. If, when rinsing with water, no drops collect on the walls of the container, the degreasing has been carried out efficiently. If necessary, degreasing is carried out again.
- Drying. At this stage, a special hair dryer is used. If you don’t have one, rags or old newspapers will do.
- Dyeing process. According to the technology, you need to start painting from the sides of the bathtub, gradually moving down. Apply a layer to the bottom of the container last. Painting is done in stages, there can be 2-3 layers.
Features of exterior bathtub painting
For exterior painting of plumbing fixtures, waterproof alkyd enamel is suitable. It's inexpensive. It’s easy to work with and doesn’t give off a strong smell. There will be no need to ventilate the apartment for several days after painting. However, there are also disadvantages to using an alkyd composition. The reason is the expenditure of energy, effort and time. Before you begin painting the outside of the tank with alkyd enamel, it must be prepared. The old layer must be cleaned and degreased. This is done for better adhesion. If there are deep damages, putty (resin) is used.
Acrylic inlay method
Acrylic insert for a cast-iron bathtub
It is somewhat similar to the previous method, but has one distinctive feature: instead of liquid acrylic, an acrylic blank is inserted into the cast-iron bathtub, which completely follows the shape of your bathtub. The workpiece is attached to a special adhesive. And the service life of such a coating will be about fifteen years. Many consumers also choose this method of bathtub restoration. Why?
- Long service life. Fifteen years is quite an impressive period for which you can forget about a new restoration of the bathtub cover.
- The new coating is characterized by increased strength, much higher than that of ordinary enamel.
- Even after many years, the coating will remain as snow-white as on the first day, without turning yellow or gray.
Speaking about the disadvantages of this type of restoration, we can mention the need to remove the drain siphon. In addition, if the bathtub is made of thin cast iron, it will not be possible to install an acrylic insert into it. If the bathtub is thin, it may sag under the influence of weight. This, in turn, breaks the adhesive layer, as a result of which the entire structure can move.
Types of paints
There are several types of dyes for applying to plumbing fixtures. These are: – epoxy resin; – acrylic enamel; – epoxy dye; – aerosol enamel; – alkyd paint.
Resin
Epoxy resin is a paint for cast iron bathtubs with chips and cracks. The thick texture of the composition is applied in a thick layer, filling and masking all surface imperfections. When restoring with resin, no primer is needed. Before treating the entire surface, the prepared epoxy composition is applied to problem areas. Painting of plumbing fixtures begins after they have dried.
Acrylic enamel
Acrylic bath paints adhere well to cast iron surfaces, dry quickly and create a glossy, durable finish. The material differs from resin in having a more liquid consistency and is easy to apply. No special skills are needed to restore a bathtub with acrylic paint. It is enough to follow simple dyeing technology and safety precautions. Acrylic-based enamel for a cast-iron bathtub, if properly cared for, will allow you to forget about the next restoration of the coating for 7-20 years.