Main functions
Steel cable is the main load-bearing element of lifting mechanisms. It is used in all industries, from agriculture, mechanical engineering, construction, shipbuilding, to the oil refining and coal industries. Based on thickness and endurance, power and possible load-carrying capacity, steel cable is divided into several types. The choice depends on the goal and the need to perform certain tasks. The main component of choosing a product is the ability to withstand a certain mass of cargo.
The main area of use of steel edges is their use as traction mechanisms. The rope is used for drilling rigs when stretching for all objects that require a certain fastening. In addition, steel ropes are necessary for the movement of goods. They are also needed for the lifting mechanisms of freight and passenger elevators.
Reinforcing steel rope is used for reinforcing reinforced concrete products. In addition, the cable is used as load-bearing and auxiliary elements of various structures. Its use ensures reliability, which is achieved due to the basic characteristics of the element, which can withstand any load. The cable is especially needed in construction when there is a need to supply reinforced concrete slabs to the required height.
Rope slings are made from metric steel ropes - a special type of steel cable, which differs from all main types in its special flexibility, strength and ability, due to its flexibility, to grab a load for suspension by a hook in order to deliver the load to its destination. Steel slings are used during unloading and loading, in transporting the heaviest, most voluminous loads, which for this purpose are provided with loops, brackets, and eyes to provide a strong, reliable grip.
A method for creating a loop on a cable without using additional components.
This method is used in cases where the load on the steel rope is not high. The method of manually laying a rope into a loop is used in domestic conditions, when stretching a rope for low loads, as well as for cables of predominantly small cross-sections. The example shows a fire without a thimble on a steel cable and the five stages of creating a fire.
This method of creating a loop on a cable is cheaper due to the absence of additional elements, but it requires additional labor, knowledge and skillful hands that can make a loop on a cable in this way efficiently and beautifully.
Steel element design
Due to the weave, the cable has the ability to stretch, thereby allowing it to transport loads of varying weights. There is a core in the middle of the woven strands of rope. The outside of the metal steel rope is coated with a special alloy of zinc or aluminum. This provides the product with protection against corrosion. The core in the center of the rope plays the main role of creating support for all woven strands, preventing them from falling through, facilitating pressure resistance from the woven strands during loading, thereby preventing transverse deformation of the element. Different materials are used to make steel products:
- organic;
- natural;
- synthetic.
Organic material used in the manufacture of cable cores:
- hemp;
- sisal;
- beckoned;
- cotton fabric.
All these are materials that form the round shape of the rope. Thanks to special impregnation, gun lubricant, Vaseline and rope ointment, friction between the strands is reduced.
Mineral material – asbestos. Its main task is to allow the product to be used at high temperatures.
The lubricant, penetrating between the strands, protects the product from corrosion. The outer layer of the steel cable is made of thick wire. In this connection, the steel rope is the connecting part of the product. This is the most suitable option for using the cable in chemical exposure conditions. Zinc is the outer layer of the wire that protects the product from rusting.
There are three types of zinc-coated steel cable:
- LS - rope for working with light loads;
- СС - cable for average conditions;
- ZhS is a rope that is designed for use in more severe conditions, for example, in water.
Strands of wire are used in the production of cables. At the same time, for the manufacture of each type of product, wire of a certain type of grade is used: I, II and B. The highest quality wire, which has increased strength, is grade B wire.
Steel cable clamp - classification
Clamps come in different types. They are divided according to purpose, material used and design. You can also formally designate different lengths; the most popular is a cable clamp of 3 mm, 5 mm in diameter, but in special cases sizes up to 40 mm are used. Each species also has different subspecies. Clamps, which are divided according to purpose, are ordinary and reinforced, and according to the material used - steel and copper; an aluminum cable clamp is also popular; a galvanized steel version is used in particularly harsh operating conditions. Clamps, which are divided by design, are flat, arc-shaped, single and double.
Regular clamps are the most common. Typically, they are made from galvanized steel of class 2. In appearance, such clamps resemble closed loops at the base, which have two strong bolts. This type of product is for household use and is not intended for heavy loads. The reinforced version speaks for itself, its design is more thoroughly worked out, the shutter mechanisms are reinforced, and therefore the scope of their application may be more responsible.
Flat types of clamps are often made of high-strength carbon steel. The surface of these devices is galvanized. Their diameter can range from 2 to 40 mm. In shape, such clamps resemble a pair of plates that are connected to each other with a bolt and nut. They are typically used for splicing steel cables or other standing rigging. They are also quite suitable for creating loops at the end of the brace. Professionals recommend installing at least two clamps on one connection.
Flat clamps can also be classified as single or double. The main difference is the number of bolts available. Single clamps are fastened with one bolt, and double clamps are fastened with two bolts. In terms of application, such clamps are not particularly different.
Arc-shaped clamps are made of a cylinder that is bent in an arc, and fastening occurs using two bolts that are located at the ends. Devices of this type are most often used for connecting metal cables, but it is quite possible to use them for making loops. This type of clamps is more industrial; they are designed for heavy loads. A typical standard arc clamp can withstand a load of about 97 kilograms.
Types of construction
There are three types of steel cable designs:
- Single rope. The design of this type differs from the others in that it consists of only one strand, where all the wires around the central core have the same diameter, twisted in several or in one layer in a spiral around the core.
- Double cable. This design consists of a double lay, one or two layers of wire in strands wrapped around a central metal core.
- Cables with a three-strand construction, when three-strand ropes are twisted into one element. This type of steel rope components is also called strands. It consists of two or three twists of wire strands with the same or different diameters.
Terms of use
First of all, it is worth warning everyone who buys a cable for work. It is quite thin, so if you braid the cable with your own hands incorrectly, it will unravel. There are several reasons for this.
First of all, this is possible due to a low-quality product. This usually applies to very thin elements. In addition, it should be remembered that the thinner the diameter of the wire in the strands, the more often the cable breaks. The product is also often susceptible to corrosion. Therefore, it is better to buy a cable with an anti-corrosion coating. Today, the most resistant to corrosion are products made from stainless or galvanized wire. But a cable without such a coating quickly becomes covered with a corrosive coating, quickly deteriorates and can break at the most inopportune moment.
The most reliable in operation is galvanized steel cable, made using a specific technique of weaving steel wire of different diameters. At the same time, the core located in the center has increased resistance to various influences, since it is coated with a special lubricant and impregnation that has anti-putrefactive properties.
The main task when caring for a steel product during its use is to preserve its structure and shape, which was created at the time of manufacture. This means that such a rope should only be stored in a drum. In cases of long-term storage, the entire surface of the steel rope must be carefully treated with a special lubricant. For these purposes, a special lubricant or film is used:
- "Torsiol-55";
- "Torsiol-35";
- BOZ-1.
The main condition when applying lubricant is to clean the entire surface of the cable from dirt, remove dirt, and clean parts damaged by corrosion. Damaged areas must be covered with a special anti-corrosion substance. And only after this, using a special brush, treat the entire surface of the product with lubricant.
Weaving
How to braid a rope? This question always arises when he is torn. In fact, all strands of wire woven into a single product with a strong core are highly durable. But there are times when even the strongest cable can break. The main thing is that a rupture or place of damage to the integrity of the element is detected in time. To do this, it is necessary not to neglect unnecessary checks, which should always be carried out before starting any work.
To prevent the cable from unraveling, it is necessary to braid it with a loop in places where it may break. And bite off the unraveled sections with wire cutters. This is necessary so that the end where the cable is woven into a loop is smooth, all the wires converge and do not have different lengths.
How to braid a steel cable into a loop diagram
Home comfort June 2, 2015
Any rope or cable, although it is made of good quality and strong steel, can unravel or even break at any moment.
Despite the apparent complexity of the repair, it can be done by anyone, even those without special skills.
The most unpleasant thing in the current situation is the possibility of a collision with it anywhere and precisely when such an accident is absolutely not expected.
Therefore, it will be useful to know how to properly braid a steel cable. Moreover, this does not require any special tools or special skills. In the future, it will be possible to weave both a hook and an earring into the cable.
At the same time, the structural strength will be at a high level, and it will serve you for many years. It is advisable to wear protective gloves before starting work, as the sharp ends of the steel cable strands can seriously injure your hands.
How to braid a cable if you have never encountered such a problem?
In order to properly braid a steel product, you will need an I-beam. As a rule, the ends of the product are bent through it. Excess parts are cut off or cut off with a cutting wheel. If there is an angle grinder, the remaining cut-off part from the cable must be disposed of.
All work is carried out in the presence of special clothing. Mittens and glasses will protect against small wires getting into your eyes and reduce the likelihood of splinters from cut-off remains.
Step-by-step instruction
As a rule, sooner or later any cable unravels. First you need to unravel the cut sections of the cable to a distance of 70-80 centimeters from the end of the product. Then the unwoven parts should be divided into two parts. Next, you need to braid one part of the piece into one or two turns, leaving the ends free. After which you will need a mount. With its help, you need to weave two more turns, weaving in the remaining strands. It should be a strand. True, the ends will stick out after this.
And yet, how to braid a cable correctly if the ends turn out uneven? Actually, everything is correct. After weaving the strands into a loop, you will always get protruding ends.
To complete the connection, you need to wind one end around two woven branches and hide it, and use the other end of the cable to wind the other side. Better yet, take the existing three parts and weave them together, according to the pigtail principle, and wrap the resulting pigtail with the third strand, weave a loop here and wrap it around the pigtail again.
The entire procedure is repeated several times until there are no more loose ends. In this case, each rod must be directed towards the next one inside the pigtail, with their ends brought in.
Often beginners are faced with the problem of how to braid a cable. And it's really dangerous work for them. Therefore, in order to avoid injury and make the weave more reliable, the braided braid must be fixed in several places using special clamps. The role of a clamp can be performed by ordinary pieces of steel wire. They are wound in a certain area at the place where the strands are intertwined using pliers, bending the strands of wire inward.
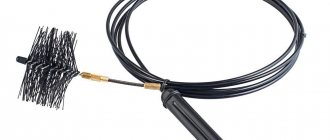
How to braid a steel cable correctly - Metalworker's Guide
When making standing rigging for a sailing vessel, you can use a 7x19 stainless steel cable. In cross section it looks something like this:
The traditional sealing of the ends of such a cable by braiding a wire with a thimble is performed without special tools and provides high strength and reliability of the rigging. Here we describe a version of “crane” weaving, which gives a very dense and compact fire.
Tools
For work you need: a pair of worn flat screwdrivers with “clogged” edges, one of which is sharpened “to a cone”, pliers, or better yet, tongs, a hammer, a roll of masking tape and gloves. It is very advisable to have in addition a small angle grinder with a cutting disc and a solid vice.
An example of sharpening screwdrivers, hereinafter referred to as “piles”.
For example, they work like this. Preparing to punch the first strand.
Weaving technology
We prepare the cable - we make a mark at the end from a couple of turns of masking tape and cut off the protruding parts of the strands. We measure three or four hoses from the end of the cable (full turns of any strand) and make another mark in this place. Up to this point the cable will unravel into strands. After this, we try on the thimble to the cable, roll it along the cable and find the place of the top mark in the middle of the thimble.
https://www.youtube.com/watch?v=jsfll_7CdEQ
We securely fasten the middle of the thimble to the cable with nylon.
how to braid a steel cable
To do this, it is convenient to use strands of scrap nylon ends, which are always available on the boat.
We bend the cable around the thimble and secure it in a vice.
Securely (!) fasten the cable to the thimble. The appearance of the product will depend on this. I use a nylon heel folded in half, drawn in a figure of eight, tightening the cable loop around the thimble. Once again, this must be a really tight and reliable fastening that does not allow the cable to move relative to the thimble.
We fix the thimble in a vice so that the “tail” is on the left. This is the “front” side of the future fire. We are looking for the first strand, it is shown by the arrow. We weave this strand up to the thimble and punch it under two strands of the cable on the other side of the fire “along the descent” - from left to right. In the same place, but under one strand, we break through the strand adjacent to the first on the left (the second). The braided strands are numbered clockwise.
It will look something like this.
The ends of the braided strands must be secured with marks made from a couple of turns of masking tape.
We turn the fire to the other side, or approach it from the other side :).
In the depths of the fire there is strand number six, adjacent to the first, unravel it and punch it under two strands so that it comes out adjacent to the first. On this side, the punches go “against the descent,” that is, from right to left. This is easier to do if you punch the cable with piles and insert a strand into the punching hole at a higher level, then push it into place.
The next strand, number five, goes in the same place, but under one strand.
Again we return to the “front” side of our fire.
Strand number three is inserted in the same place where the first and second ones made their way, but “against the descent.” The photo shows how this is done using a pile.
Under the same strand where the third was pierced, a fourth is drawn, but on the other side - “along the descent”, and UNDER the third.
The core (it can be distinguished in the photo and in life by the different direction of the lay) breaks through in the same way as the fourth strand, and comes out side by side. Options and personal creativity are possible here; the core can come out beautifully to the first strand :).
This completes the first fire punching. We check the correct location of the strands, tighten the slack, cut the core, and push the strands into place with a hammer.
Second punch
In order for the “crane” fire to gain the necessary strength, three or four punches are enough. The second and subsequent punches are made against the descent - from right to left, through one strand under two.
It is necessary to monitor and eliminate an unpleasant feature by tightening the strands - the strands collected in the first punching slide quite easily relative to each other, and come out of their places with further punchings, the fire “swells” and becomes loose. On a thick cable, a thick mark around the first punch helps a lot, holding the strands in place.
For the same reasons, it makes sense to start the second punching with the loosest strand. It could be the fourth one, which we punched last, or some other one, depending on the situation.
https://www..com/watch?v=jsfll_7CdEQ
We consistently punch the strands counterclockwise and complete the punching with a “lock”.
The completed punching looks like this - all strands come out through one, all are on the same level.
We hammer the fire with a hammer and make a third punch, repeating the technology of the second.
After wrapping, we cut the strands and tape the place where they exit the cable with black electrical tape.
After installing the cables and tightening them under the working load, it makes sense to tightly wrap the entire fire with the same electrical tape or nylon heel.
This activity requires some skill; the first fires usually turn out unsightly, but each subsequent one is more beautiful than the previous one. So it makes sense to practice on scraps.
When working with piles on a dense cable, the core wires are often affected; this must be monitored when punching and corrected.
Well, safety precautions must be at their best - protecting your eyes from steel strands flying around, even if covered with marks, sharp piles and great effort require attention and good hand protection.
how to tie a steel cable into a loop
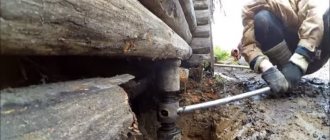
Looking at the suffering of all-wheel drives of all kinds and classes with ropes, I dared to do this opus. More precisely, the agony of sealing the cables. I can offer you a simple and correct way to attach a cable to a loop, and you can attach a hook and an earring and anything else to the loop.
All you need is a solid flathead screwdriver and... Your car
How to braid a cable: diagram and step-by-step instructions
Any rope or cable, although it is made of good quality and strong steel, can unravel or even break at any moment.
Despite the apparent complexity of the repair, it can be done by anyone, even those without special skills.
The most unpleasant thing in the current situation is the possibility of a collision with it anywhere and precisely when such an accident is absolutely not expected.
Therefore, it will be useful to know how to properly braid a steel cable. Moreover, this does not require any special tools or special skills. In the future, it will be possible to weave both a hook and an earring into the cable.
At the same time, the structural strength will be at a high level, and it will serve you for many years. It is advisable to wear protective gloves before starting work, as the sharp ends of the steel cable strands can seriously injure your hands.
Safety during work
To avoid injury, the braid should be wrapped with electrical tape.
To obtain a strong connection after weaving, it is necessary to distribute the strands evenly. This will allow in the future to distribute the load equally throughout the entire product during operation.
We figured out how to braid a rope into a loop. Thus, this issue has been dealt with. But how to braid a fire on a cable? To do this, you first need to understand what fire is and the principle of its weaving.
One day, any of us may need to make a tow rope or other gear that has loops at the end. The first thing that comes to mind here, of course, is about ogons, but in practice, braiding ogons turns out to be quite a difficult task. But if you look at it, it’s not easy only at first glance, since the whole problem lies in the lack of intelligible instructions.
Unraveled and melted
Separating the strand from the cable
Recently I also had to acquire a couple of cables to winch my motorcycle out of various difficult places. Tying knots on a cable is not always convenient, so I decided to braid ogons at the ends. But before I got it right, I ruined quite a lot of the cable, but eventually I got it right, and now I want to try to share this skill with you.
So, the first thing you need to do is unbraid the cable into separate strands. If it is a synthetic cable, then the strands need to be melted at the ends.
Having estimated the size of the future loop, you need to pierce the cable with any suitable object in the place where the fire begins. I use a screwdriver for this.
Next, we separate the strands so that two of them are on top and one is on the bottom. Here I should note that a cable with multi-colored strands is much easier to braid in the first place. On my cable, one strand is green, and I will use it as the “first” one. At first, to make the process clearer, you should follow the order of punching the strands through the cable, but in the future it will become clear that the order is not important.
We will break through the first one here
So, using a screwdriver and fingers to pull off the strand on the cable, we drag our “first” strand through it. My cable is made of polyethylene and is very tough. The punching process takes a lot of time and effort, but you can make it easier by clamping the cable in a vice and unwinding it against the twist, then the strands diverge much more easily.
The first one was pulled out
Having pulled out the “first” strand, we again take hold of the cable and use a screwdriver to pull off the next strand. Since this is the very first punching, it is very important not to confuse anything here, so that everything will proceed simply and clearly. The place into which we must insert the “second” strand is where our “first” strand came out, but under the next strand of the cable from above (if we imagine that the top is where the loop is made). So, we insert and stretch the “second” strand. Now I risk confusing you, but I will still try to suggest that the strand that sticks out at us should always be lower than the one that leaves us.
They dragged the second one
Now it’s the turn for the “third”, the one who remained alone on the other side of the cable. It must be punched through the strand that has so far remained unused in such a way that in the end, on this side of the cable, we see a picture identical to that observed in the case of the first two strands.
It seems clear where to put it
You drag the third one
If you did everything correctly, then don’t twist the cable, everything should be braided absolutely symmetrically.
After the first punch
All strands should stick out at the same level
Complete symmetry
Well, the hardest part is now behind us, and now all we have to do is mechanically repeat all previous operations 4 times. Again we pull back the strand on the cable under which we want to tighten the “first” strand. This place is located below the one where the “second” strand came out last time, on the next strand below.
The first one is here
We break through the first in the second circle
We do the same with the “second strand”, and then with the “third”. The strands are braided in order, one after another. The pattern on the fire should be symmetrical and repeating.
The second one is here
Here we will slip strand No. 3
We break through the third strand
Having made four punches in this way, we begin to reduce the fire to nothing. First we forget about the “third” strand, and weave the “first” and “second” again. Then we forget about the “second” and weave in the “first” for the last time. That's it, the fire is ready.
Almost all
Pull it out
Ready!
Now all that remains is to tap it with a mallet on an anvil, then pull it out so that it compacts. I do this with a crowbar and a piece of timber. Next, all that remains is to cut off the protruding ends of the strands and burn a fire over a gas stove so that the small stray fibers melt and disappear.
Basics and features of the device
Before you start making the fire, you need to secure the ends of the product with a stamp, after which the remaining part of the end is dissolved into strands. The next step is to lay out the unbraided part of the cable with a loop of the required size and punch the running part of the strands. There are many methods to weave a wire rope.
It is important to do the first punching correctly if the bent side of the fire is turned towards the working part, and the running parts of the cable strands are located on the right. In this case, you need to take the first running strand, pass it into the cable against the descent in the direction from right to left under the 3 main strands. The second and third strands are broken under two and into one, respectively.
When the punching of the first three strands is completed, the fire must be turned over so that it is possible to punch the fourth and fifth running parts of the strands. And so on until the end of the cable. The remaining ends of the running strands need to be cut off, and the product itself must be calcined with wire.
Tools
For work you need: a pair of worn flat screwdrivers with “clogged” edges, one of which is sharpened “to a cone”, pliers, or better yet, tongs, a hammer, a roll of masking tape and gloves. It is very advisable to have in addition a small angle grinder with a cutting disc and a solid vice.
An example of sharpening screwdrivers, hereinafter referred to as “piles”.
For example, they work like this. Preparing to punch the first strand.