A little about the device and the work ahead
Modern models of mobile phones are very quickly losing their former relevance, because they are being replaced by new versions of devices.
Not every user is ready to spend a large amount of money in order to acquire a brand new powerful smartphone. The components for such devices are not very expensive, but installing them is a rather expensive undertaking. Is it possible to repair the cable yourself? If you disassemble your gadget, you will see that the contact pads are attached directly to the display. On the back of the case, these parts are attached to the printed circuit board in a certain sequence.
Tools and materials
To carry out repairs at home, you need to be well prepared and find special materials and tools, such as:
- Flathead screwdriver.
- Magnifying glass.
- Needle.
- Alcohol solution.
- Sandpaper.
- Soldering Station.
- Thick layer of polyethylene.
- Adhesive tape and multi-core cable MGTF.
To independently solder a damaged cable, you will need to prepare consumables and tools:
- flux alcohol solution;
- easy-to-use tweezers;
- rosin and low-melting solder;
- wire with a diameter of 0.15 mm with varnish coating;
- a piece of insulator plate (polyamide or Kapton);
- a miniature soldering iron of 10-15 watts, a scalpel and a bracket with a microscope (or magnifying glass).
In addition, the work will require a soft brush, adhesive tape and side cutters. The home craftsman always has most of the materials, so you don’t even have to buy them.
Method one
In order to repair the phone cable, you need to perform the following steps:
- Remove the back cover of your device and remove the battery.
- Now you need to unscrew the fastening screws using a flat-head screwdriver.
- Remove the main circuit board and the plastic trim that is located under the screen. The last component is attached with double-sided tape.
- Next, you need to start looking for a gap in any of the tracks. To do this, you need to get rid of the insulation with a needle.
- We take a soldering iron in our hands and wrap a piece of copper wire around its tip. A component with low power parameters (about 20-25 watts) is best suited. Solder off the remaining wire insulation.
- The edge that has just been cleaned needs to be prepared for connection to the board.
- If you are done with the previous point, then move on to the soldering itself. We solder the edges onto the printed circuit board and carefully inspect the entire circuit for any gaps between the tracks.
- Take thermal film or a layer of polyethylene in your hands and wrap it around the edges of the soldered cable in at least one layer. Warm up the whole thing until the film melts, thereby gluing it to the tape. An iron is perfect for this action, but you need to take into account that the entire procedure must be carried out with extreme caution.
- It happens that the path breaks not at the edges, but in the very center. To resolve this problem, it is best to duplicate this track using pieces of the mounting conductor.
- Now we assemble the mobile device in reverse order and check its functionality.
How to repair a phone cable in another way? Everything is very simple.
https://www.youtube.com/watch?v=yv0Fqw6aQEE
Restoration work can also be carried out as follows:
- First, grind a small amount of rosin to a powder and dissolve it in an alcohol solution. To create a solution, use a proportional ratio of one to six.
- Now we take the good old “Moment” glue in our hands and glue the damaged area onto an insulated plate. Then you need to put this connection under the most ordinary technical microscope, which everyone used in biology lessons at school.
- Let's start removing the insulation. The tool you can use is a scalpel or a small knife. We remove about 1.5 mm of wire at the break point. Next you need to apply a little of the solution that was in the first step to a section of the tape. Use a brush to apply the mixture. After application, touch the soldering iron tip to this area of the cable.
- Remove the varnish using a scalpel and thoroughly lubricate this section with a solution of rosin and alcohol. Tin the conductor 25 mm from its edge and carefully solder it to the outermost trace in relation to the outermost cable.
- We bend a section of the wire, which we connect the two sides of the non-working track and use wire cutters to bite off the excess parts that were formed during the work. All that remains is to solder the cable to the board.
- If there is a need to “extend” the cable, then use another section of the cable with the appropriate geometric dimensions. Cut the component perpendicular to the damaged area.
- We clean, connect and solder both halves. We isolate the sections of the wire that are exposed and assemble the mobile phone in the reverse order.
The need to restore a damaged loop consisting of several wires or tracks most often arises in cases where a device or gadget has been damaged for one reason or another. This may occur due to moisture getting inside the device or contact failure due to careless handling of existing connections.
The situation is aggravated by the fact that it is not always possible to completely replace the flexible tape of wires (unless you contact a specialized workshop with a request to find spare parts suitable for the gadget). It is for this reason that you may need to independently solder the matrix cable of a phone, laptop, TV or other device.
What you need to know about recovery
If we talk about how to restore a track on a cable, then first of all you should understand the procedure for repairing such a conductor. A special feature of the tracks is that they are not contained in a protected casing or rubber braid, but on the printed circuit board itself.
The main difficulty is that the contacts are flat, and in order to remove them you will need to clean off the base layer of protective varnish. To correct the damage, they can be replaced with wires and round copper fishing line. The conductor is fixed using conductive glue. After this, varnish is applied on top.
When connecting a stranded conductor, it is important that each individual contact is well soldered. You can verify the conductivity of all flows using a voltmeter.
What are the types of conductive glue for cables?
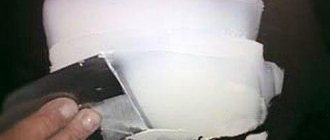
In order for everything to go smoothly, it is better to immediately tin the wiring (you can see how to do this in the article on repairing headphones) and also tin the conductors on the cable. To do this, you need to clean off the top insulating layer.
I did this with the edge of a utility knife. It is enough to clean a small area, into which you then need to poke a soldering iron with tin dipped in rosin. The result should be a tin droplet.
Instead of the missing parts of the cable there will be wires from the headphones. They are convenient for three reasons:
- There are always dead headphones at home.
- Such wires are a mixture of thin copper wires and nylon threads. Thanks to this, they bend easily, are more durable and thinner.
- They are varnished along the entire length. Accordingly, they do not need any outer insulating braid, which will only thicken them and impede their flexibility.
The first step was to restore the outer conductors. Actually, there is no difference where to start, it’s just that the outer contacts turned out to be thicker and the training was done on them)
There were still three thin (~0.1 mm) conductors left in the center. It seemed pointless to me to cut them together with the base of the cable, and in order to separate the soldering points, the excess parts of the conductors were simply torn off.
Initially, adhesive technologies were used to mount a chip on a substrate using a special conductive paste. In this case, soldering (that is, heating) was not required; the paste solidified, providing the necessary heat removal and conduction of electricity.
Later, the technology was adopted for connecting various kinds of displays and other digital equipment components.
Conductive adhesives provided reliable and fast adhesion with minimal dimensions (since there was no need for special connectors).
Modern conductive adhesives can be:
- Isotropic. They differ in that inside the conductive material there are no restrictions on the direction of current propagation; the medium is homogeneous. These can be ICA (isotropic adhesives) or ICP (isotropic pastes).
- Anisotropic. Inside a conductive material, current travels only in a certain direction. This group includes ACA (anisotropic conductive adhesives) and ACF (anisotropic conductive films).
How to glue a cable to the glass of a TV matrix
A friend approached me with a request to help replace the flexible cable on the LCD display of the tidy. Due to age, the train has dried out and peeled off. Many people try to restore it by warming it up. This is a temporary solution and after 1-2 months the LCD partially goes out again. There is only one solution to the problem - replacing the cable. You can buy a ready-made repair kit, but it is not always possible to find the one you need and of good quality.
Actually, a friend bought a repair kit. The contact tracks on it coincided, but the pattern of the tracks itself was a mirror image. But these are minor things. I started gluing them. They are simply glued by heating and pressing. But their quality turned out to be terrible and the trains were scorched by the heated glass...
The repair kit is damaged, you need to make a new one. After reading on the Internet about the subject of restoring cables, I came up with the idea of making a new cable from medical plaster and wire.
On a sheet of paper, mark the pitch of the contacts, then secure the patch with glue facing up on the sheet.
It is better to choose the patch according to the width of the train, but you can simply glue the narrow ones overlapping. Next, take the stranded wire and unravel it. We cut the pieces with a margin and stick them on the patch parallel to each other with a given step.
These multi-core connections take on the role of moving joints between electrical boards, individual models and other circuit components.
The most common types of loop connections include:
- Soldering (one of the most reliable methods, but it requires a certain technological process and equipment; overheating of circuit elements during soldering can damage them).
- Various mechanical joints (clamps, inserts, etc., making such a connection is very simple, no additional equipment or skills are required, the disadvantages include low reliability - the cable may not be fully pressed, the contacts oxidize over time, etc.) .
- Sticker on conductive glue/adhesive tape (we will dwell on this method of connecting cables in more detail).
What are the types of conductive glue for cables?
Initially, adhesive technologies were used to mount a chip on a substrate using a special conductive paste. In this case, soldering (that is, heating) was not required; the paste solidified, providing the necessary heat removal and conduction of electricity.
Later, the technology was adopted for connecting various kinds of displays and other digital equipment components.
Modern conductive adhesives can be:
- Isotropic. They differ in that inside the conductive material there are no restrictions on the direction of current propagation; the medium is homogeneous. These can be ICA (isotropic adhesives) or ICP (isotropic pastes).
- Anisotropic. Inside a conductive material, current travels only in a certain direction. This group includes ACA (anisotropic conductive adhesives) and ACF (anisotropic conductive films).
Read also: Operating principle of the n75 valve
The latter are most widespread in household appliances. So, using ACF you can glue a cable to the LCD TV matrix . The current will flow between the connected contacts strictly perpendicular to their surface inside the anisotropic tape.
The use of any adhesive mixtures is associated with certain restrictions. Various ACF films (adhesive tapes) are designed for joining certain types of materials; they require compliance with temperature and humidity conditions, the absence of dust and other small particles that impede adhesion, as well as certain conditions for pressing the bonded surfaces (minimal force, heating, etc.).
An important indicator of the use of ACF is the minimum required gap between the contacts (each type of film has its own).
VIDEO DESCRIPTION
How and how to glue the cable to the board
Most modern boards for digital technology use a mechanical method of connecting cables, however, in some cases, anisotropic conductive films (adhesive tape) or adhesives can be used.
To glue a flexible cable to the board in the case of ACF, you must:
- Clean off any previous joint/tape residue with isopropyl alcohol.
- Take an anisotropic adhesive film (for example, 3M Z-Axis 9703 is suitable; before use, be sure to make sure that the distance between the contacts does not exceed 0.4 mm, since a smaller size can cause a short circuit).
- Remove the first protective layer and stick the film onto the board.
- Remove the second protective layer from the ACF film.
- Correctly match the contacts of the cable and the contacts on the board, attach the cable and press it evenly onto the surface of the board with sufficient force.
When carrying out work, be sure to take into account that there should be no dust or small particles in the air (if the sticker is being applied in a domestic environment, the work can be carried out in the bathroom).
How to glue a cable to the display - description of the method
The technology for installing cables using conductive adhesive tape is identical to the process of connecting the cable and the board.
Differences can only be in the supported materials (for example, Axis 9703 adhesive tape is not recommended for installation on glass surfaces; only 5352R and 5552R films from the same manufacturer are suitable) and the minimum recommended gap between contacts (for example, 3M Z-Axis 5552R film can be used for distance between contacts less than 100 microns).
Some conductive films or adhesives may require heat or force to be applied to the bonded surfaces during installation.
Before purchasing, be sure to read the specification of the film/adhesive. Specify the order of application.
Repairing torn cables with conductive tape
It often happens that during the process of disassembling displays or other complex equipment, when unsticking the cable, excessive force is applied and it breaks.
Possible soldering problems
If you have a certain quickly acquired skill, soldering ensures good contact. A few problems are easily identified visually. These include:
- weak heating of the connected components or the so-called. cold soldering - the solder acquires a characteristic dull color, the mechanical strength of the contact decreases, it quickly collapses;
- overheating of components - solder does not cover the surfaces at all, i.e. there is virtually no connection;
- movement of the components being connected until the solder has completely solidified - a visible sharp break in the film of the hardened solder, there is no connection.
Elimination of these defects is carried out by re-soldering.
Recovery procedure
Before soldering the cable to the display, for example, you should fix the area to be restored on the insulating plate. The easiest way to do this is to use double-sided adhesive tape.
The fastening ensures mechanical rigidity during soldering and will provide additional strength to the solder joint in the future.
After this, you need to place the area with the broken cable under the screen with the microscope lens and, using a well-sharpened scalpel, clean the contact area from the insulation layer (approximately 1-1.5 mm from the break). Then, using a brush, apply a thin layer of the previously prepared rosin solution to the cleaned contact.
After thoroughly warming up the soldering iron, use its tip with a small amount of solder to touch the areas prepared for soldering. If there is excess solder, they are removed, since otherwise it will be possible to bridge adjacent tracks with them. Following this, a piece of conductor is taken with a conductor freed from varnish and well-tinned, which is then applied to one of the ends of the cable.
In conclusion, having measured the length of the core according to the size of the contact and biting off its remains with side cutters, it will be possible to solder the second end to the mating part of the restored section.
Grounds for restoration
Repairing (restoring) broken connections makes sense only when it is impossible to find a replacement for the damaged ribbon or individual contact assemblies. Soldering a flexible cable is also advisable in cases where only a small part of the conductors could be torn, which, if desired, can be soldered with a miniature soldering iron.
If you do not have special tools and soldering experience, it is best to contact a repair shop. Otherwise, you can completely ruin the train.
To repair a laptop, for example, you will have to pay a significant amount (about 400-600 rubles), but you can be absolutely sure of the quality of the new connection. But even in this case, it is possible to find ways to save on eliminating any malfunction. To do this, in particular, you can turn to a friend for help who can solder the torn wire.