Stapler
A stapler
is a mechanical device that joins pages of paper or similar material by guiding a thin metal staple through the sheets and folding ends. Staplers are widely used in government, business, offices, work places, homes and schools.
The word "stapler" can refer to a number of different devices with different purposes. In addition to joining sheets of paper, staplers can also be used in a surgical setting to join tissue together with surgical staples to close a surgical wound (much in the same way as suturing).
Most staplers are used to join multiple sheets of paper. Paper staplers come in two different types: manual and electric. Manual staplers are usually carried by hand, although models that are used on a table or other surface are not uncommon. Electric staplers come in many different designs and models. Their main operating function is to quickly connect large numbers of sheets of paper in series. Some electric staplers can staple up to 20 sheets at a time. Typical staplers are a third class lever.
Content
- 1 History 1.1 Modern stapler
Story
The increasing use of paper in the 19th century created a demand for an efficient paper fastener.
In 1866, George McGill was awarded U.S. Patent 56,587 for a small bendable brass paper fastener, which was the forerunner of the modern paper clip. In 1867, he received U.S. Patent 67,665 for a press for inserting a fastener into paper. He showed his invention at the 1876 Centennial Exposition in Philadelphia, Pennsylvania, and continued to work on these and various other paper fasteners throughout the 1880s. In 1868, an English patent for a stapler was issued to CH Gould, and in the United States, Albert Kletzker of St. Louis, Missouri, also patented the device.
In 1877, Henry R. Hale filed Patent No. 195,603 for the first machines to simultaneously insert and clamp a staple, and for this reason he is considered by some to be the inventor of the modern stapler. In 1876 and 1877, Hale also filed patents for the Novelty Paper Box Manufacturing Co. from Philadelphia, Pennsylvania. However, the inventions of NPB Manufacturing Co. were to be used for stitching boxes and books.
The first machine to accommodate a magazine of many pre-formed staples appeared in 1878.
On February 18, 1879, George McGill was issued patent 212,316 for the McGill one-way stapler, the first commercially successful stapler. This device weighed over two and a half pounds and loaded one 1/2-inch wide wire staple, which it could pass through several sheets of paper.
The word "stapler" was first used to refer to a machine for fastening paper with thin metal wire in a magazine
American
Munsey's Magazine
in 1901.
In the early 1900s, several devices were developed and patented that punched and folded paper to attach them to each other without a metal clamp. Clipless Stand Machines
(made in North Berwick) sold from 1909 to 1920s.
He cut a tab in the paper, which he folded and tucked. The paper fastener of the new Bump model
used similar cutting and weaving technology.
Modern stapler
In 1941, the type of paper stapler that is most common today was developed: the four-way paper stapler
.
In the four methods, the operator could either use a stapler to staple paper to wood or cardboard, or use it to staple like bag pliers, or in the conventional manner with the head positioned a short distance above the staple plate. The stitching plate is known as the anvil. The anvil often has two settings: the first and most common is the reflective
setting, also known as the "primary" or "permanent" setting.
In this position, the legs of the bracket are bent towards the center of the crossbar. It is used to staple papers that do not require separating. If rotated 180° or slid to the second position, the anvil will be set to the deflection
, also known as "secondary", "temporary", or "straight". In this position, the shackle legs are bent outward, away from the crossbar, causing the legs and crossbar to form a more or less straight line. Stapling with this setting will result in a looser paper hold, but the staple will be much easier to remove. However, the use of the second setting is almost never used due to the prevalence of staple removal devices and the general lack of knowledge about their use. Some simple modern staplers have a fixed anvil that is not vertical.
Modern staplers continue to evolve and adapt to changing user habits. Stapling devices with less force or ease of squeezing/use, for example, use different lever efficiencies to reduce the force required by the user. As a result, these staplers are typically used in work environments where repetitive, large staple operations are routine.
Some modern desktop staplers use Flat Clinch technology. With Flat Clinch staplers, the staple legs first pierce the paper and are then folded and pressed absolutely flat against the paper, eliminating the commonly used two-stage anvil and using a recessed staple base in which the legs fold. Consequently, staples do not have sharper edges and do not cause paper to lay flat, saving space for folders and binders.
Industry
In 2012, $80 million worth of staplers were sold in the United States. The dominant manufacturer in the US is Swingline.
Methods
Permanent mount
binds objects by pushing the staple through the material into
an anvil
, a small metal plate that bends the ends, usually inward.
On most modern staplers, the anvil rotates or slides to switch between folding the ends of the staples inward for permanent stapling or outward for securing
(see below). Clips can be standard, curved, flat or rounded, completely flush with the paper to make document stacking easier.
Consolidation
temporarily binds documents or other items. To secure, the anvil slides or rotates so that the staple bends outward rather than inward. Some staplers secure by bending one leg of the staple inward and the other outward. The clamp securely binds the object, but is easily removed.
Gluing
Attaches objects to surfaces such as bulletin boards or walls. A stapler that can glue has a base that swings out of the way so the staples go straight into the object rather than folding against the anvil. In this position, the staple is driven in a similar way to how a stapler operates, but with less force driving the staple.
Stapling devices
have an inverted V-shaped staple for stapling pre-folded sheets for booklet making.
Staplers without staples
, invented in 1910, are a stapler that cuts out a small piece of paper and threads it through a slit. A more recent alternative method avoids holes by crimping the pages together with jagged metal teeth.
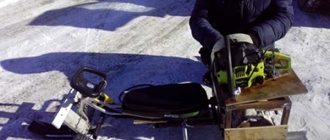
How to make an anvil from an old rail
The experience of a portal user with the nickname DIMDIM is interesting. He tells you what can be achieved when making homemade products if you apply your ingenuity to the matter.
I decided to take up forging. I watched a lot of videos online and came to the conclusion that I could make the entire instrument myself. First of all, I need an anvil, a forge, and various accessories. To save money, I will make everything from what I have in my “bins”, i.e. from scrap materials.
From the Internet, the user learned that most often a homemade anvil is made from a railway rail.
Because there was no rail in the “bins”, DIMDIM involved all friends, relatives and acquaintances in the search for the “donor”. Soon the search was crowned with success, and the user became the owner of an old but strong rail.
All that remains is to cut off everything unnecessary from the workpiece and give it the desired shape. Having uncovered the metal cutting machine, the user began to work.
Typical design
For extended functionality, this blacksmith tool must consist of the following parts:
In the simplest version of the anvil, the rim and/or tail, as well as holes in the paws, may be absent.
Methods for attaching anvils
What is better to make it from?
First of all, you need to decide on the location of the anvil. If a reliable workbench is not available, then you can use a strong, wide stump as a support (oak is the ideal solution: this wood is strong in compression and ideally dampens the vibrations that arise during the forging process). In this case, the diameter of the stump, freed from bark and surface defects, will determine the size of the anvil, in particular its length. It should not be less than 200 mm.
How to attach an anvil to a metal chair?
But placing a blacksmith's anvil somewhere in the corner is not the best solution, since it will be inconvenient to work.
We also advise you to read the article: how to make a spacious tool box from an old metal canister.
Construction of a blacksmith's anvil
A two-horned anvil is considered an ideal and universal option. On strong metal paws there is a so-called “face” or the main flat surface on which the blacksmith performs all flat forging procedures. To ensure that this part is perfectly flat and smooth, a ground plate made of 35L steel, that is, alloyed, is installed on it.
A cone-shaped horn is welded on one side. It is used for rolling and bending parts. Sometimes they are installed on both sides, depending on the type of work. On the other side, a square shank is often welded. With its help, products are bent at an angle of 90 degrees. For convenience when working with workpieces, craftsmen can add additional functionality to their anvils. For example, weld or cut a square hole for a backing tool or shperak. You can also make a round hole to fix, for example, a metal rod when bending.
Shperak is inserted if it is necessary to have a small working surface (mini-anvil). It consists of an all-metal stamping with tips on both sides and a special inflow. It is convenient to do artistic and decorative forging of products on the shperak.
How to install fittings on jeans: master class
- Description
- Comments 3
How to install rivets and metal buttons on jeans with your own hands using available tools - a step-by-step master class.
Rivets and a metal button are a traditional set of metal fittings for jeans. If you sew jeans yourself, here is a master class on how to install rivets and buttons with your own hands.
For example, rivets and a button can be useful for these models:
- 1
- 2
- 3
- 4
- 1
- 2
- 3
- 4
- Best-seller
- 1
- 2
- 3
- 4
- 1
- 2
- 3
- 4
- 1
- 2
- 3
- 4
We sew jeans and trousers in denim style: a selection of patterns
You will need:
— a set of accessories (rivets and buttons);
- an anvil or something that will perform its function (you need something solid, ideally metal, but a thick board made of dense, strong wood will also do);
- narrow masking tape;
How to sew stretch denim: life hacks and tips
Step 1
Let's look at the fittings first. As a rule, for jeans you need:
— a button (available in different diameters) and the included nail (it can be smooth all-metal, smooth tubular or, as in our case, with a circular notch; it holds better when installed at home);
- rivets, they are also solid (consist of a head, a part located on the outside, and a leg, this is a part that secures the head and is located inside).
Step 2
Decide where you will place the rivets. A simple option: refer to a purchased pair of jeans that you like in this regard for an example. Experienced seamstresses convince us: if you want to put rivets not only on the front, but also on the back pockets, you should think twice about it. The fact is that the rivets on the back can scratch or damage the furniture when sitting.
Step 3
Place the rivets in the desired places and press them into the fabric with your finger. Small circles will remain: place a dot in the middle of each with a thin marker or pen.
Step 4
Make holes in the designated places with an awl. Pierce all layers of fabric, trying not to tear, but to push its fibers apart.
Step 5
From the inside out, insert the parts of the rivet legs into the holes.
Step 6
Using nippers, bite off the excess part of the leg, leaving 1-1.5 mm above the surface of the fabric.