Filling forms
Complex design structures are made from this material. To fill any form, use a solution with a ratio of 7 to 10 gypsum and water, respectively. This consistency perfectly penetrates even the smallest cracks in the stone. To prevent the product from being too fragile, it is treated with glue.
IMPORTANT. For different types of work, different concentrations of the solution are used. Therefore, options for diluting gypsum should be studied in detail. It's better to consult a specialist.
Recommendations for handling silicone for pouring
Before pouring the silicone mold, prepare your work area. Silicone molds are a magnet for debris and dust. Therefore, they must be carefully looked after and stored only in closed boxes.
Products must be laid out in one layer to eliminate the risk of deformation. After all, silicone is a material that is easily susceptible to mechanical damage. Therefore, make sure that the finished form is not scratched.
Before pouring epoxy resin, the mold must be washed with soap and dried. The castings are removed from the molds by holding them under a stream of water. Follow the recommendations, and then you will keep the molds in good condition so that you can use them more than once.
Let's sum it up
Icon molds are accessories that are easy to make at home. Therefore, there is no point in buying factory molds. Just follow all the basic rules and instructions exactly to make your own mold.
If you have any questions, we recommend watching a video on how to use silicone to fill molds at home:
In Moscow, we recommend buying goods only from well-known brands. The type of mold and the product made in it depends on the quality of the material.
Technology for manufacturing artificial stone from gypsum
First you need to create a silicone mold for the stone.
Helpful Tips:
- The proportions are determined independently. Depending on the complexity of the form. The more complex the shape, the more liquid the mass should be.
- The solution is applied. You need to stir thoroughly so that there are no islands of dry powder. The final appearance is a homogeneous mass.
- To make the material strong, you need to add sand to it. Approximately 10-15% of the total mass of the solution.
- The molds are lubricated with wax. This is necessary to remove the product without difficulty.
- To make everything quick, you need to roughly calculate the amount of mass to fill all the molds.
- When dry, dimples may form. To avoid this, products are laid on a special surface. When they form, they are added with a liquid solution.
- To obtain a stone of a certain color, special dyes are added to the solution.
- After filling the molds, it is necessary to create vibrations. They will help distribute the liquid evenly among the molds. And it will eliminate the formation of air bubbles, which will contribute to the destruction of the stone.
- After pouring, the surface is leveled with a special tool.
- Hardens in approximately 30 minutes. At this time, the forms should not be touched to prevent voids from forming.
IMPORTANT. To dilute the solution, it is best to take a disposable container. The hardened mixture is very difficult to clean.
Technology of vacuum casting in silicone molds: description of the process, necessary equipment
The technology of casting in silicone molds is a well-known technology for the production of polyurethane parts, which in itself does not belong to additive technologies, but master models made using 3D printing have found their application here.
In this article we will try to describe in more detail this technology and the equipment that is necessary to organize a small-scale silicone casting site, and what function this or that equipment performs.
The entire casting manufacturing process can be divided into several stages, each of which requires its own equipment:
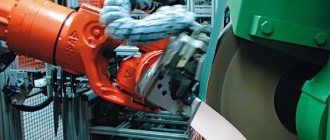
- Master model production stage
The master model is a prototype of the future casting, processed to the required quality, and which will be filled with silicone to make the mold. Future castings of parts will correspond to the master model, so special attention must be paid to this stage.
A model for subsequent use as a master model can be obtained in several ways:
— using 3D printing;
— using classical methods, for example, made on a CNC machine or sculpted from artistic clay;
- use an existing part to manufacture its series.
To produce a model using 3D printing, various technologies can be used: FDM, Polyjet, SLA, SLS, etc. The most optimal technology for this task is SLA technology. It wins based on a combination of parameters: large dimensions of grown models, high growing speed, high accuracy, high quality surfaces, easy processing, low cost. It is thanks to these positive qualities that SLA technology has firmly established itself as the main method for producing master models. the Raplas
RPS 450 HD+
and
Raplas RPS 700 HD+
installations for equipping small-scale casting areas The resulting model is then subjected to manual modification. It is primed, treated with sandpaper, Scotch Brite, and painted. The result is a model with the required surface quality, shagreen, which future castings should resemble. This model, ready to be poured into silicone, is called the master model.
- Silicone mold manufacturing stage
The resulting master model must be prepared before pouring into silicone. First, you need to create a mold parting line on the model, i.e. the line along which, after cutting the silicone block, parts of the mold will open. It is usually created with colored tape, the holes are sealed and the outer outline of the part is formed. After the silicone has hardened, a cut will be made along this outer edge of the tape so as not to damage the master model, and so that after casting there is minimal flash around the part.
Next, sprues, vents (holes through which gases will escape during pouring), and the necessary fastenings for embedded elements (for example, for threaded bushings) are attached to the master model.
To fill the silicone in the shape of the master model with some indentation, a flask is made. Different specialists use the most convenient methods for making flasks: using cardboard, plywood, Lego cubes, etc.
The master model is coated with a release agent (usually silicone aerosol) so that after the silicone has cured, the model can be more easily removed, and is hung in the flask. As a result, the master model is located at a distance from the walls of the flask, attached to the sprues and stops. Now you can prepare the silicone for pouring.
We are considering platinum-based silicone, it has the least shrinkage, all further procedures are relevant for it.
Silicone in the required quantity is mixed with the hardener. The resulting mixture must first be degassed, i.e. remove air bubbles to
which got into the silicone during mixing. The procedure for primary degassing of silicone can be performed in a vacuum injection molding machine. But if the area is congested and if it is necessary to mix large volumes of silicone, it is recommended to use a WSS-40
. Thanks to the built-in stirrer, it allows degassing to be carried out faster and without using a vacuum chamber. Primary degassing lasts no more than 30 minutes.
Next, the flask with the suspended master model is filled with degassed silicone. The flask filled with silicone is placed in a vacuum machine for secondary degassing, the purpose of which is to remove residual air from the silicone and undercuts in the model. After secondary degassing, the mold is placed on a rack to harden. Depending on the ambient temperature and the size of the mold, the silicone can take up to 24 hours to harden.
After the required time has passed, the flask is dismantled and the silicone mold is cut. For cutting, a scalpel and a spreader are used, and the cut line is made wavy so that the shape assembles well. The master model and remaining tape are removed from the cut form, and additional holes are pierced if necessary. The mold is coated with a release agent, sealed and placed in an oven to heat. Most polyurethanes are poured into a mold heated to 70 0C. This is necessary for better pourability of the mold and proper polymerization of the material. The form is ready and you can move on to the next step.
- Casting manufacturing stage
These works are carried out using a vacuum injection molding machine. HVC machines are well suited for these tasks
(Wings Technology) and
KLM
. These equipment manufacturers offer a line of installations with different dimensions of working chambers and additional equipment.
HVC Vacuum Casting Machine
has analog control and is equipped with a German vacuum pump.
KLM vacuum casting machine
equipped with a touch display with the ability to program functions, and has a differential pressure function.
Initially, polyurethane components are measured into bowls and placed in a vacuum injection molding machine for initial degassing and removal of impurities. The primary degassing procedure, depending on the volume of material and its type, lasts about 15-20 minutes. Afterwards, a heated silicone mold is placed in a vacuum chamber and secondary degassing is carried out. After 15-20 minutes, the components are mixed and poured into a silicone mold. The mold is placed in a heating cabinet for polymerization, which usually takes place at 70 °C. Depending on the polyurethane, polymerization takes 40-60 minutes. After this time, the mold is removed from the oven, opened and the casting is removed from the mold. Next, the silicone equipment is again prepared for subsequent pouring.
Usually the mold is enough for 20-25 castings, depending on the material being poured and the complexity of the casting. Afterwards, the mold loses its elasticity and is partially destroyed, and castings from such a mold are of poor quality. Based on the described cycle, it can be calculated that no more than 4 castings can be made from one mold in an 8-hour shift. Multiple molds are required for continuous operation.
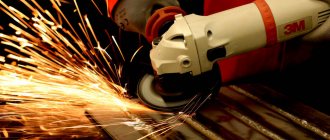
- Casting post-processing stage
At this stage, the sprues and vents are cut off on the resulting castings, the flash is removed, holes are drilled, and assembly adjustments are made. The result is a final casting that can be used for subsequent tasks.
The technology of small-scale casting in silicone molds is largely based on manual labor. The entire subsequent viability of the site depends on the experience of the specialists working on the site. Therefore, it is necessary to pay special attention to the selection of specialists, their training and advanced training.
If you are faced with the task of equipping a silicone molding area, please contact us. We will help you select and supply the necessary equipment and train specialists.
Sprue molds
The most common method used in simple injection molds for processing elastomers is a center sprue and a stub sprue. Direct connection is used in cases where injection is made by a film sprue into the dividing plane.
Multi-cavity injection molds with a star-shaped nest arrangement are connected in most cases by a trapezoidal sprue with a strip or film sprue, or through a tunnel and recessed sprue. Tunnel gates with bottom support are also used. Tunnel sprue is recommended for molded parts larger than 2.5 cm.
The precision of the separation process prevents craters or raised marks from forming on the molded product. The multi-point cold-runner gating system allows for repeated use of gates, resulting in material savings.
For cold runner sprues, needle lock or open nozzles can be used. In the first case, the closing pressure is regulated, and in the second it is changed by choosing the diameter of the nozzle outlet. The distribution channels in the injection mold must be located and insulated in such a way that cross-linking of the material does not occur.
Technologies for the production of silicone products
Technology for the production of silicone products
Speed, cost and part configuration (including material properties and dimensions) are key criteria when choosing how to manufacture a silicone product. There are actually more ways to make silicone parts than thermoplastics, for example, which makes the process of developing silicone products more complex. Currently available technologies for the manufacture of silicone products include: (RTV) room temperature vulcanizing silicone, 3D printing (SLA) and fused deposition modeling (FDM), injection molding using high-strength rubber materials HCR (high consistency rubber) and injection molding (LIM). When discussing these options, keep in mind that most new silicone products are made from LSR (liquid silicone rubber) injection molded in the 30-70 Shore A durometer range.
Review of 4 methods
Room temperature molding - Industrial silicone materials for this technology are widely available - some can even be found at the hardware store. Making parts from these materials requires a mold, which can be made from almost any metal or plastic. Most often, the production of a mold for casting occurs on a 3D printer. Although, by definition, when using this method, the material will cure at ambient temperature for several hours. Ovens are often used to speed up the curing of the material.
Pros: Use is attractive due to low capital equipment requirements and availability of raw materials. Its properties are very close to its LSR relatives. As a rule, more or less fully equipped enterprises have the ability to manufacture tools from plastic and/or soft metal materials in-house. Once the mold is made, making parts is a simple process of filling and waiting. An experienced technician can do the first part within a day.
Cons: Molding is a slow process with curing times ranging from 20 minutes to several hours. Productivity and cost per unit are largely determined by processing time.
3D Printing - 3D printing in silicone is now an option for products thanks to new elastomeric materials designed specifically for 3D printing. As additive manufacturing technologies continue to advance at an incredible rate, part production speeds and capabilities continue to improve, and equipment capital costs are rapidly falling.
Pros: 3D printing requires no mold processing and is performed unattended. Very small batches of parts can be produced in a few hours.
Cons: Elastomeric material options are not true silicone rubber. The mechanical properties and manufacturing method do not come close to LSR production. Accuracy can be an issue for thin parts and thin-walled structures. Large batches of parts (> 100) are impractical due to the high unit cost.
HCR – Compression molding is used to produce parts from HCR (high consistency rubber). In compression molding, material is placed between two plates. The heated plates are compressed, and material under pressure leaks along the separation line. This is an older technology, but can still be a cost-effective method for low volume parts. HCR is a natural mold for injection molding because the material is much more viscous than LSR.
Pros: simple tools.
Cons: Complex geometry may not be possible to manufacture. Longer cycle time than LSR.
LSR (Liquid Silicone Rubber) - The latest processing technology in silicone molding is liquid injection molding (LIM), which uses LSR material. Within LIM molding, there are many subcategories and associated technologies, including molding, double-sided molding, and micromolding.
Pros: High level of product accuracy.
Cons: May result in higher cost per part for small batches of parts because the initial cost of the tooling cannot be amortized over large numbers of parts.
Rezinoplast company is a manufacturer and supplier of various silicone products produced by two different types of molding: LIM (liquid silicone molding) and compression molding. With extensive knowledge in injection molding, compression molding and tooling, we produce products such as silicone gaskets and seals, silicone O-rings, medical grade silicone products and many other types of silicone rubber products.
For more information on production methods and the difference between compression molding and injection molding of silicone products, see the article: Manufacturing Silicone Products.
We work with many different types of silicone such as electrical insulating, EMI shielding, flame retardant and bending resistant. Another material we typically work with is rubber, an elastomer that is stable, withstands reasonable operating temperatures and provides resistance to chemicals, solvents and oils. As experienced molders, our processes are high quality, consistent, repeatable.
Manufacturing custom silicone gaskets and O-rings is one of our strengths. We produce these products in all shapes and sizes with inserts or with metal elements. Some examples include compression, metal and seal gaskets, as well as diaphragm, pump shaft and magnetic seals. Thanks to our molding capabilities, we can produce these types of products in virtually any configuration, and customers can utilize the expertise of our engineering staff to assist with design.
We can create prototypes and small samples and then move on to mass production. As part of our services, we can assemble finished products and supply them in ready-made packaging to the end user. With our versatility, flexibility and technical expertise, we offer a valuable solution for custom silicone products.
For more information about our capabilities or to place an order, please contact us directly.