Types of siphons
Modern devices in this category are made mainly of metal or plastic. Metal products are more expensive, require more careful maintenance, and are usually preferred in cases where communications are not hidden behind a cabinet or wall, but remain visible.
Metal siphon
Plastic analogues are more practical and therefore have become widespread. This option combines strength and light weight well. Such products are easy to install, and their replacement does not require significant costs. In addition, they are much less demanding to maintain and use than models made of metal.
Siphons made of plastic
Water seal options
The main options for water seals are represented by three main types:
- bottle
- corrugated
- pipe
Bottle type is traditionally in demand due to its simple and effective design. The bottle-shaped part provides a water seal, which reliably prevents the penetration of unpleasant odors from the sewer. Modern models allow you to connect not only a sink, but also a dishwasher and washing machine to the drain.
Bottle water seal
Corrugated - represented by a flexible corrugated tube connecting the drain hole to the entrance to the drain. When using this scheme, it is important to lay the tube in the correct double-bent position, due to which a hydraulic plug will form. The flexible hose takes up very little space and can be used in any limited space, such as a small bathroom. Such models are cheap and easy to install and use, but they cause criticism due to the accumulation of dirt in the folds of the corrugation. If a blockage occurs, this part will require replacement.
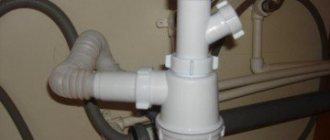
Corrugated siphon
Pipe - a current, higher quality, but also more expensive analogue of a corrugated hose - a pipe connection. Instead of corrugating the water seal, it is replaced here with a curved pipe, the material for which is metal or polypropylene. The cost of such models is higher. They are sometimes difficult to install due to the need to accurately align the rigid pipe with the drain socket, so before connecting the kitchen sink to the sewer system or providing drainage for the washbasin, the serious and responsible task of choosing and purchasing suitable equipment is solved. Careful measurements must be taken to ensure that all plumbing parameters match the piping system being purchased.
Pipe water seal
Types of drainage devices under the sink
There are many device options.
Pipe
The device is a curved pipe, which in most cases is metal. This older example of the device is called a knee. The modern version of the siphon is lightweight, has a shiny bronze or brass surface and convenient connectors.
The curved area is located at the bottom of the structure where waste accumulates. If there is a need to install 2 drain holes, then the pipe elbow is installed closer to the pipe leading to the sewer. Above the drain, pipes and adapters are assembled, making 2 drains into one up to the pipe elbow.
Tubular siphon design
Corrugated
The corrugated device is a curved tube where the bend is formed due to the corrugation. This area makes the device movable and facilitates connection to the drain. The soft hose is made of plastic, and a clamp is used to maintain the corrugation. It can be moved, straightening the folded area or making it more pronounced.
Corrugated folds have disadvantages, which include the accumulation of dirt and food deposits in them. The part is difficult to clean. The downside is the thinning of the material, which can leak. Due to the properties of plastic, boiling water should not be poured into the sink.
Corrugated siphon design
Bottle
In most cases, a bottle siphon is used for installation. It looks like a bottle, inside which water moves along a curved space formed by a double partition. The liquid moves inside the tube and enters the lower part of the device. Afterwards, the drains are directed up the space between the outer and inner partitions of the device and then, thanks to a side hole, flow into the sewer.
If there is a need to install 2 or more drains from the sink into the sewer, then a transition piece is mounted to the device.
This adapter receives the main drains from above, and on the side there is another drain from the plumbing equipment. The bottle drain can be metal or plastic. Metal structures are durable, while plastic ones are affordable.
Bottle siphon design
Dry siphon
There is no permanent accumulation of water in the design. Inside there are rubber seals that act as a water seal and block the passage of unpleasant odors. When the liquid is drained, the rubber moves, allowing the drains to pass through, and returns to its original position after they pass through. The rubber part is called a dry water seal. Due to the lack of liquid, the device is installed in cold rooms, where freezing of the water seal and deformation of pipes can occur.
In such houses, a dry structure is installed, characterized by its small size and the absence of a curved part. The dry siphon can be installed in cold and hot rooms, in small areas, in objects subject to shaking and vibration, as well as in air conditioner drains.
Dry siphon design
Basic recommendations for purchasing the necessary items
Even if you strictly follow the technology, this does not guarantee a good result; the fact is that the fittings for the kitchen sink must meet a number of requirements, which we will consider:
| Suitable design | All components must correspond to the design of the sink; be sure to make sure that both the type of connection and the size of the fasteners are suitable for your sink. It is best to purchase everything comprehensively, then sellers will independently select the necessary design options in accordance with the characteristics of the sink |
| High quality products | As for the mixer, it is better to choose options made of brass - they are heavier in weight and much more reliable than structures made of powder alloys; there should be no flaws on the surface. As for the selection of a siphon, it is better to choose either an option made of polypropylene (its price is low) or brass - this type of structure is more expensive, but can withstand hot water |
| Availability of sealing materials | To ensure system reliability and functionality, all connections must be secure. To seal threaded connections in flexible hoses, a special Unipak compound is used, and to seal sewer units, silicone sealant with antifungal additives is used. |
| Set of necessary tools | In fact, you only need a few simple tools to carry out all the work at the proper level: a plumber's wrench for clamping connections and two screwdrivers - flat and Phillips |
A special wrench fits any size of plumbing fastener and replaces a whole set of tools
Advice! It is not worth saving on quality, since not only the comfort of use, but also the durability of the assembled system depends on the reliability of the fittings - any malfunctions can lead to leaks and flooding.
Connecting a mortise sink
Plumbing fixtures of this type are made from a variety of materials. They have a variety of sizes and differ in their shape.
Installation diagram of an overhead sink.
In the case where the countertop set is made of chipboard, any man can independently install such a mortise sink. With a stone countertop everything is more complicated; here you will need the help of specialists with the necessary equipment. Let's look at how you can install a similar sink in your kitchen yourself.
You need to start installing a mortise sink by making a hole that needs to be made in the countertop, taking into account its dimensions. For this purpose, the sink template is placed on the countertop, focusing on the place where the hole will be located. The template is leveled and secured with masking tape.
The established template is outlined with a pencil along the entire contour. After this, a second contour is drawn at a distance of 1.5 cm from the first. This is where you will need to cut the hole.
A jigsaw is used to cut the hole.
In order for the cutting to proceed smoothly, it is necessary, using an electric drill, to make a special starting hole in the tabletop; the jigsaw blade will fit into it. The drill diameter for such an initial hole should be 12 mm.
- A jigsaw blade is installed into the drilled hole, with the help of which the hole itself is cut. Moving along the drawn contour, everything must be done slowly, carefully and measuredly.
- The next step is to treat the edges of the countertop with a special silicone sealant. Its use will help create protection against water ingress. The sealant should harden well. Wait a few hours.
- Insert the sink into the resulting hole, watching how tightly the sides of the sink are in contact with the countertop.
You may be interested in: Step-by-step installation of a kitchen sink yourself
At the same time, you need to check the connection of the mixer and all supply lines. The fact is that after the final installation of the sink it will be very difficult to connect all the hoses.
Preparing for installation
Determining the height of the sink mounting
An ordinary sink, which is not equipped with additional accessories, is fixed at a height of 850 mm. At this level, a horizontal line is drawn that will correspond to the level of the top surface of the plumbing fixture.
If there is a pedestal (supporting leg) or if the sink is built into a bedside table, the height of the sink does not need to be determined - it will depend on the height of the leg or the height of the bedside table.
Marking mounting points on the wall
The sink connection diagram requires marking before installing the fastening system. The sink bowl has mounting holes at the mounting points. By placing the sink against the wall and aligning its upper edge with the line marked on the wall, mark the position of the places where mounting holes must be made in the wall. It is more convenient to do this work together.
The fastening line is drawn by adjusting the location of the sink by level
In this case, one person holds the sink at the marked line, and the other, at the same time, from below marks the places where the fastening will be carried out. If there is a leg or a supporting cabinet, then the installation is simplified - the plumbing fixture is installed on a support and the mounting points are marked.
Installation of fasteners
Installation of fasteners is carried out as follows:
- According to the markings, holes are drilled in the wall.
- Dowels are hammered into them.
- Screw in the mounting pins.
Mounting pin with plastic dowel
Connecting a sink in the bathroom and kitchen involves the use of dowels, mounting pins, as well as nuts and plastic inserts, which are supplied with the sink.
When screwing in the studs, you need to pay attention to the fact that the depth of their screwing would allow you to hang the sink and tighten the fastening nut, that is, the part of the stud protruding from the wall should have a length slightly greater than the thickness of the sink plus 1.5 cm for tightening the nut.
Screwed-in mounting studs
Mounting location installation
After determining the location of the sink, you need to find out the height of its installation. It depends on its type.
The sink located in the bathroom may be installed on a pedestal or without additional details. If additional parts are not attached to the sink, the average height of its placement should be 85–90 cm; if the sink being installed has a supporting horn or other parts for support, the height of its installation must correspond to the height of the supporting parts.
The height of the sink installed in the kitchen must be the same as the height of the kitchen cabinet into which it will be installed. To fix the selected height level on the wall surface, you need to make a horizontal line.
Connecting the sink to the water supply
Mixer installation
When connecting a sink in the kitchen or bathroom, the installation of the faucet can also be done on a sink already attached to the wall, however, it is recommended to carry out this work first - before fixing the sink, since all connections and fastenings are made from below.
The mixer is installed in the following order:
- A mounting pin or two is screwed into the mixer, depending on its type.
- Install hoses for supplying hot and cold water, tighten them using an open-end wrench; Tightening is carried out carefully with moderate force, taking into account the fact that after installing the mixer on the sink it will not be possible to tighten them any tighter.
- The sink connection diagram includes running hoses through which water will be supplied through holes in the sink.
- A sealing rubber band, a pressure washer and fastening nuts are put on the mounting studs on the reverse side.
- The fastening nuts are tightened using a wrench.
Advice from a professional: Particular attention should be paid to the correct orientation of the faucet spout - the faucet itself is installed at an angle of 90˚ relative to the mounting wall or to the side of the sink adjacent to the wall.
Securing the sink to the wall
Tightening the nuts
After connecting to the water supply, the sink can be secured:
- The sink with reinforced faucet is placed on mounting pins screwed into the wall.
- Plastic inserts are inserted.
- Tighten the nuts.
Connecting a kitchen sink in the presence of a pedestal or supporting cabinet begins with installing it on the supporting elements.
Connecting cold and hot water hoses to the plumbing system
Connecting hoses
A gasket must be installed between the tap and the nut to seal. It is not recommended to tighten the nut too much. The rubber gasket will usually provide a good seal, and the nuts can be tightened after the test has been carried out, that is, after turning on the water. If there is a leak at the connection, the nut will need to be tightened more tightly.
connection and installation of the water supply system
It is necessary to connect the cold and warm water pipes attached to the sink to the piping system. They should be fixed using a wrench. The degree of curl is medium.
In order for the joint to have the highest density, it is recommended to install an intermediate gasket between the materials. It is recommended to use a rubber product.
After connecting the pipeline, you need to check its level of reliability. To do this, turn on the water and check whether water leaks form. If this occurs, you need to tighten the nuts in the places where the pipeline is attached.
The main sink connection diagram is shown in the figure:
Connecting the sink to the sewer
Bottle and S-type siphons
After the water supply is connected, you need to connect the sink to the sewer. This work begins by installing a siphon.
At the same time, it is taken into account that the presence of a special hole for overflow protection indicates the need for the siphon to have an additional pipe for water overflow. Siphons are made in both S-shaped and bottle-shaped shapes.
Pro Tip: For kitchen sinks, it is recommended to use an S-shaped siphon, as the bottle siphon is prone to clogging quickly (this type of siphon will have to be cleaned frequently).
Connecting the sink to the sewer is carried out as follows:
- The siphon outlet is inserted into the sink and secured.
- A pipe (either rigid with an angle or corrugated) is screwed to the siphon.
Connecting a siphon to a corrugated pipe in the kitchen and to a rigid pipe in the bathroom
- The screwed pipe is inserted into the sewer outlet. If the diameter of the outlet significantly exceeds the diameter of the pipe coming from the siphon, then it is necessary to use a special adapter, which is called a sealing collar (made of rubber), and fasten the pipes well.
- Next, you need to check all connections for leaks.
Selecting a siphon to connect the bathtub drain to the sewer system
Siphon diagram.
It is recommended to connect the bathtub to the sewer pipe using an appropriate siphon - a special fitting that contains components that provide connection to the drain hole and overflow hole (photo 1).
When choosing a siphon, it is recommended not to purchase models with corrugated drain tubes, as they have the following significant disadvantages:
- have high hydraulic resistance;
- quickly become clogged with dirt;
- poorly cleaned.
The best choice would be a drain device, structurally consisting of a rigid or flexible, but smooth plastic pipe. If the configuration of existing sewer pipes allows the use of a drainage device consisting of two bends of rigid pipes with the required turns, this will be the optimal solution. But if the situation does not allow the use of any of the recommended options, then all that remains is to use a structure made of corrugated plastic pipes.
Important Notes
Notes to consider before starting work:
- To connect the kitchen sink to the sewer system, it is not recommended to tightly tighten all connections using a wrench, as this can damage the rubber sealing gaskets and waste time and effort.
- If, when checking the tightness of the connections between the cuff and the sewer pipe, a stream of water oozes out, then you need to remove the cuff, dry the surfaces that are to be connected, and then lubricate the dry cuff with sealant and make the connection again.
- When connecting a double sink, you must use a special siphon with an outlet to two pipes.
Double sink connection diagram
Following simple rules will undoubtedly help every interested owner install a kitchen sink or bathroom sink in their home without calling a plumber. You can either connect the sink to the sewer system or connect the water supply to it with the installation of the mixer absolutely independently.
Installation of kitchen equipment
Connecting a mortise or counter-mounted sink to a sewer system in the kitchen differs from similar work in the bathroom in some features related both to the nuances of installing the equipment and to its design characteristics.
Water sealing devices
Water seal devices installed in the kitchen area, in many cases, have a standard appearance, but varieties are often installed that have:
- two sockets for double sinks;
- several outlets for connecting household appliances;
- garbage shredder;
- flattened wiring;
- other new models.
Accordingly, the methods for arranging a kitchen drain will also not be the same. The necessary operations here include pre-assembly or direct construction of the pipeline during installation work. In any case, this stage is usually started last.
If the structure is complex and its parts are made of plastic, before connecting them you should make sure that all components are of high quality, free from flaws and will ensure the tightness of the drainage structure.
Flask
The standard algorithm of actions at this stage includes supplying the water seal flask with a gasket, attaching the lid, combining the “glass” and drainage tube using a union nut and sealing gaskets, and, finally, connecting the siphon to the kitchen drain and fixing it.
Outlet corrugation
Then the outlet corrugation is placed in the drain and the assembly is sealed. If there is an overflow, its fixation is carried out in a manner similar to the method described above for arranging a drain pipeline in the bathroom.
Siphon with two bells
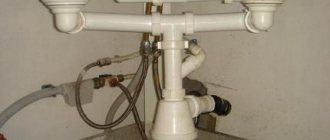
To properly connect a kitchen sink to the sewer system if there are two compartments and install a faucet, a special siphon apparatus with two sockets is used. Its connection, in essence, differs from that described above in the need for more precise fitting and standard joining and sealing operations with both connecting funnels.
In cases where it is necessary to ensure the drainage functions of a dishwasher or washing machine, two drain fittings are usually used. Dishwasher hoses are arranged in one pattern or another depending on whether the fitting is mounted straight or at an angle.
Installing a sink on brackets
This is the simplest and most common installation technology. It includes 5 stages:
- On the installation wall, draw a straight line parallel to the floor with a pencil. The height is determined individually.
- We measure the thickness of the wall of the device, the one that will be adjacent to the wall. The resulting parameter is the distance that is measured down from the drawn baseline; we draw another line at the measured mark. This is where the brackets will be attached.
- Measure the exact distance between the brackets. We attach them to the base line and mark the attachment points. We drill holes at the marks, insert dowels into them and attach the brackets to the wall.
- According to the manufacturer's instructions, we attach the bowl to the brackets.
- We connect the mixer and siphon.
Mounting a pedestal sink
The advantages of this type are that the pedestal takes on the main load, reliably supports the bowl, and hides the plumbing and siphon. But such devices have a fixed installation height. All necessary elements are included in the package. If the flexible hoses are not long enough to connect to the water supply system, you will need to purchase hoses of the required length.
Installation technology
- Marking. We place a pedestal against the wall and carefully place the bowl on it. We set it exactly level and mark the mounting points through the mounting holes. We drill holes in the marks, drive dowels into them and screw in self-tapping screws with a screw thread for the nut.
- Installation of mixer and siphon. We connect flexible hoses to the mixer. On the back of the mixer there is a special groove in which you need to install a rubber gasket-ring. Install the faucet tightly into the hole in the sink. On the reverse side you need to install a rubber seal and a washer. Then we fix the tap with a nut and a pin. Then we strip and install the siphon. The siphon is connected to the sewer outlet using a corrugated pipe, but only after installing the washbasin.
- Using the mounting holes, we put the bowl on the self-tapping screws and secure it with nuts and plastic washers (this prevents damage to the earthenware).
- We connect flexible hoses to the water supply and the siphon to the sewer outlet. Then we place a pedestal under the bowl. As a rule, installation of the pedestal does not require additional fastening to the floor; it stands stable.
Important point
When installing the bowl, do not tighten the nuts as much as possible so as not to damage the product.
Installing a sink on a semi-pedestal
Such models look elegant and save space. The semi-pedestal is a decorative element and does not perform load-bearing functions. It only hides communications. The height here is not fixed, but is determined independently.
- The package includes powerful brackets that are attached at a measured height to the wall using dowels and self-tapping screws. When attaching them, be sure to use a building level to ensure the bowl is level.
- The bowl is hung on the installed brackets and connected to the water supply and sewerage systems (we assemble and install the mixer and siphon group).
- Depending on the model, the semi-pedestal is mounted using a spring suspension or studs. Both options provide reliable fastening of the decorative leg.
Installing a sink in the bathroom
How to connect a sink in a bathroom? Installation largely depends on the type of washbasin. Today the following options are available:
- Tulip sink (on a pedestal);
- Wall-mounted (fixed to the wall using brackets);
- Overlay (installed on the countertop);
- A mortise sink is built into the furniture.
List of required tools
For installation you will need:
- Hammer, drill;
- Set of drills (for concrete and ceramic tiles);
- Measuring tools: tape measure, level, marker;
- Fumlenta;
- Set of open-end wrenches.
It is worth noting that according to SNIPs, the sink is installed at a height of 80-85 cm from the floor level. The exact height is determined by the height and personal preferences of the residents.
Connection to water supply
The planning of the washbasin installation site is carried out at the design stage. Water supply and sewerage pipes are brought to the installation site of the washbasin in advance. Connection for water is made using flexible hoses, for sewerage - through a corrugated siphon pipe. Initially, you need to turn off the water supply, after which you can remove the plugs from the water outlets intended for the washbasin. The instrument taps must be screwed to the sockets using fume tape (or other sealant). It is to these taps that the liner will be connected through the nuts.
Installation of mixer and siphon assembly
First you need to install the mixer and assemble the siphon. The mixer set usually includes a stud with nuts (one or more, depending on the design), washers, a gasket and connections for hot and cold water (they must be marked accordingly). We attach the connection to the mixer (don’t forget to tighten the nut with an open-end wrench). We fasten the studs, put on the rubber sealing gasket and install the mixer in the mounting hole on the side of the sink. On the other side, the gasket is also put on, and the entire structure is secured with nuts. Pay attention to the tightening force of the nuts - it should be strong enough, but without excessive compression of the gasket.
How to connect a sink to the sewer? This is done using a siphon. Initially, the top cover is attached to the drain and secured with a screw; the inlet pipe is installed below (do not forget to use a gasket). The “bottle” and corrugation are usually attached at the end of the installation, after which the siphon is connected to the drain.
Note. Plastic parts should not be clamped; applying too much force, the material may burst.
Installing a tulip sink
How to install a tulip washbasin correctly? First you need to try on the sink and mark the fasteners. Attention! Be sure to check the horizontal installation using a bubble level in two planes. Mark the mounting holes with a marker, after which you can proceed to drilling. It should be done to the depth of the dowel. We insert anchors into the dowel and hang the bowl on them. Afterwards, you should connect the sink to the water supply using nuts, and the siphon is connected to the sewer. You can install a pedestal on which the bowl will rest. In addition, it performs a decorative function, covering the water connection and drainage system.
Models on a semi-pedestal are quite common. In this case, the latter, like the bowl, is attached to the wall and serves more of a decorative function.
Installation of a suspended model
The installation principle is exactly the same. It is worth noting that the main disadvantage of such options is that the connection system remains visible. In this case, it is worth purchasing a decorative siphon; most often, such models are made of polished steel and look quite aesthetically pleasing. First, we determine the height at which the bowl will be fixed (remember, this is approximately 80-85 cm), try it on and make markings. Check that the installation is horizontal. Special brackets (already included in the kit) are mounted into the drilled holes, onto which the bowl is hung. After this, water and sewer connections are made.
If you have a very modest-sized bathroom, pay attention to compact wall-mounted washbasins that can be installed above the washing machine. In this case, you will need a miniature siphon of a special design (usually just a corrugation).
Installing a sink on a cabinet
First, check whether the cabinet is interfering with communications. Please note that it must be on adjustable legs so that it can be leveled horizontally. In the inner shelves of the cabinet, you may have to cut holes for the siphon; this is done using special crowns. Place the cabinet in place, then connect the water supply and siphon. You can try on the sink, check its horizontal position, after which you can mark the mounting holes on the wall. We install plastic dowels into the holes made, after which we screw the threaded pins into them; it is on them that the bowl will be held. We install a siphon grate into a special hole in the washbasin, install the mixer, after which the washbasin is finally installed in place. We complete the installation of the siphon and screw the liner to the mixer.
The nuances of installing wall-mounted and console sinks
Mounted models are equipped with a special installation system, through which their installation is carried out. Console ones can be super compact, designed with a cabinet or cabinet. A separate type of them are “water lily” washbasins, designed for installation above a washing machine. Hanging models are versatile and can be matched to any interior. In terms of installation, they are more complex and are attached exclusively to the main wall.
Installation technology
- Powerful brackets or a frame structure (depending on the model) are attached to the wall.
- The siphon is assembled. Wall-mounted/console models are equipped with a bottle siphon made of polished stainless steel, which has a direct outlet to the sewer. Its assembly must be carried out exactly according to the manufacturer's instructions.
- Installing the bowl on the brackets and fixing it with nuts.
- Installation of mixer and bottle siphon.
You can also install the washbasin on a hanging shelf, which will serve as brackets, distribute the load from the equipment, hide communication elements, and at the same time serve as a functional place for storing cosmetics.
The technology for installing a sink on a hanging shelf is not particularly complicated:
- Note the height of the device.
- Place the cup on the mark and mark the attachment points.
- We drill holes and insert plugs for dowels into them.
- We attach the sink and secure it.
- Mark the fastenings for the hanging shelf.
- We immediately mark the location of the drain hole and water pipes.
- We install the mixer before installing the shelf.
- Drill holes in the wall and install the shelf using dowels. It is important to ensure that the drain hole is aligned with the corresponding one in the shelf.
Installation of corner structure
These models are ideal for small bathrooms. Their installation is not difficult. If the washbasin is installed on a corner cabinet, then first install the cabinet, then install the sink on it.
With the standard hanging version (without stand), the height is initially determined and marked. Then we lean the device and mark the mounting points with a pencil. We double-check the marked dimensions with a tape measure. Drill holes according to the markings and insert plastic plugs. We lean the bowl and tighten the dowels. We assemble and connect the mixer and siphon.
Recessed and surface mounting
Such sinks are a priority choice for spacious rooms. They are often installed in pairs on one flat base - tabletop, cabinet. The shape of the bowl can be any, even the most non-standard. Overhead ones are installed on the surface, and built-in ones are cut into the surface. This is the most ergonomic option.
The bowl of a built-in washbasin can be installed in several ways: hidden and mounted under the countertop (important for countertops made of natural stone), the sides of the bowl protrude and are located above the countertop (ideal for rectangular bowls), semi-built-in - the bowl is embedded in the countertop, but its front part protrudes beyond its limits.
Installation technology
- The tabletop is marked for cutting a hole. As a rule, for mortise models, manufacturers include a special template for carrying precise markings.
- Using a jigsaw, a hole is cut according to the markings.
- The end of the hole must be cleaned with sandpaper and sealant applied in 2-3 layers.
- The mixer and siphon are assembled and installed on the washbasin.
- The side is covered with a special waterproof tape, which acts as a seal.
- The fastening elements included in the kit are installed on the side.
- The bowl must be carefully turned over and sealant applied to the edge.
- Next, the washbasin is installed in the hole, and the fasteners are tightened tightly.
- The siphon is connected to the sewer outlet, the mixer hoses are connected to the water intake.
How to determine a poor siphon connection?
If the siphon connection is poor, you may experience an unpleasant odor from the sink. There may also be increased humidity in the pipe leading to the siphon and the appearance of puddles under the sink.
When connecting the sink to the sewer system, experts do not recommend over-tightening the connections with a wrench, as this may damage the rubber sealing gasket.
connecting the overflow and drain from the sink
If during the process of checking the tightness a stream of water flows between the pipe and the rubber cuff, then the second element must be removed and the connection area dried. Next, the dried cuff needs to be treated with sealant and put in place.
Special Notes
Before connecting the sink to the sewer, you need to take into account some notes, namely:
- When connecting the kitchen sink to the sewer, there is no need to over-tighten the connecting elements with a wrench. If you do not take this feature into account, the rubber sealing gasket may be damaged, then it will need to be changed and tightened again;
- When checking the tightness of the connection in the area between the pipe and the cuff, a trickle of water may leak out. If this happens, then you need to remove the cuff and dry the surface of the connection area. Next, the dry cuff is lubricated with sealant and the elements are reconnected;
- if you plan to connect two sinks to the sewer system at once, it is recommended to buy a special siphon equipped with two outlets for sewer pipes.
By following simple rules during the installation process, you can quickly and easily connect the sink to the sewer with your own hands without the help of a plumber. It is also easy to connect the water supply to the plumbing fixture.
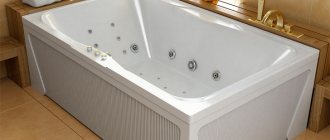
How to connect a bathtub to the sewer?
After the bathtub has been purchased and delivered to the bathroom intended for it, it must be installed correctly, taking into account the configuration of the room, existing pipes, utilities and design decisions of the owners.
Scheme of connecting the toilet to the sewer.
Having decided on its general location, which will subsequently determine the connection of water and sewerage pipes, it is necessary to adjust its stability, height and slope. Bathtubs can be installed on legs, stands or other supports. Moreover, they must withstand a mechanical load of at least 100 kg applied to the long side of the bath anywhere vertically downward, and be stable.
In addition, the height of the bath should be at least 145 mm from the floor to the bowl outlet. This is done so that the necessary height difference can be created in the area between the drain hole and the connection point to the sewer. If there is no height difference or it is insufficient, the water from the bowl will come out poorly and possibly stagnate. In addition, the resulting space between the floor and the bottom of the bowl will allow for relatively free access to the drain for possible revision or replacement of the siphon.
After installing the bathtub on the above supports or supports, make test measurements of the resulting heights: a) from the clean floor to the outlet, b) from the clean floor to the top of the side of the bowl at four points in its corners. The latest data should not differ from each other by more than 4 mm. Next, set the slope of the bottom of the bath towards the outlet through which the bath is connected to the sewer. This slope is set at the rate of 2 cm per 1 m of bathtub length. After the work on its installation and adjustment is completed and the bowl is finally fixed vertically and horizontally, you can begin connecting its drain to the sewer.
Related article: How to choose the right dining group
