Throughout the Russian climate, frequent precipitation is far from uncommon. And therefore, it is customary to install a drain in homes that controls and removes these precipitation away from the roof itself. If a house stands for a long time without a drainage system, its base, facade and walls are destroyed. There are also longer-term consequences: a flooded basement, washed-out land around the house and other problems. That's why there should always be a drain!
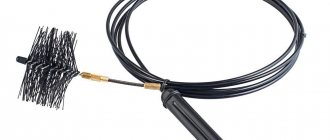
But if you have just purchased a house or cottage and have a limited budget, you can temporarily make a drain from sewer pipes with your own hands: it is not difficult, and in practice such a system will be reliable. But for such small buildings as a gazebo, a children's house in the garden or a canopy over a car, a homemade drain is quite suitable as the main one. And we will teach you how to do everything right!
What types of pipes are suitable for drainage?
Do you like the idea, but are you worried about how well the sewer pipes will be able to withstand the outside atmosphere? After all, they are designed to drain water from the house, mostly underground, and the manufacturer is unlikely to care that such plastic material tolerates ultraviolet rays well. But, in fact, many summer residents notice that cuttings of gray and brown pipes feel great in the open sun for quite a few years.
Moreover, due to the relative cheapness of sewer pipes, you can use them to construct drains of the most complex shapes and for a variety of purposes:
Your homemade drain will serve you faithfully no less than an industrial one if you choose the right material for it. Sewer pipes come in completely different types, for different parts of the drainage system. After all, you know that there are internal and external drains, and the first is used mainly only for flat roofs. It is just well hidden from the sun’s rays, and therefore almost any sewer pipes are suitable for its installation.
But for a gable or shed roof, it is important for you to learn to understand the material.
White pipes - for internal drains
White pipes are used for installing indoor sewage systems. Their material is designed mainly for high water temperatures and has a high level of sound insulation.
White pipes can be used as drainage only in areas where winters are warm and mild, because... Such plastic will not withstand sudden temperature changes. So forget about this option for now.
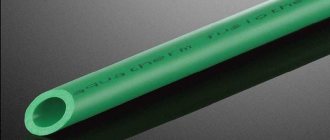
Gray pipes - for warm winters
Gray pipes are the most common. They are also used inside the house, but their plastic is stronger. It is designed for high temperatures, but does not tolerate frost and physical activity.
Therefore, if you live in the southern regions of Russia, where the climate is quite mild and there is almost no frost, it will not be a problem for you: how to make a drain from sewer pipes of this color and how long it will last you. Just remember to constantly clean them of snow and ice to prevent them from crumbling.
Brown pipes - for severe frosts
But brown pipes are used when installing sewerage systems outside. They are distinguished by a thick wall, which perfectly tolerates sub-zero temperatures and high pressure from the water mass.
The only thing such pipes are not adapted to is hot water temperature. After all, it is calculated that the sewer water from the house, before it gets into the brown pipes, after the white and gray ones, has already cooled down, plus the cooler air temperature outside will complete its work. Such pipes can easily withstand loads from snow and ice, are quite durable, but cannot withstand direct sunlight for a long time and become fragile over time.
Here's a nice drain made from a brown sewer pipe:
Do-it-yourselfers are especially pleased with the fact that the price of one sewer pipe is less than that of a gutter of the same length. But from one pipe you get two gutters!
Flat roof gutters
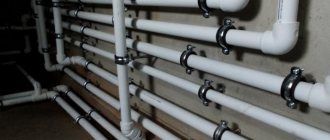
The technology described above is effective for houses with sloping roofs. Drainage from a flat roof has fundamental differences. Due to the design features, water falling on its surface does not roll off. Therefore, drainage funnels are installed directly on the surface and connected to sewer plastic pipes, forming vertical risers that are embedded in the walls. To prevent freezing, such gutters are often supplemented with a thermal insulation layer. To protect against debris, the funnels are equipped with mushroom mesh. Gutters are not required for the installation of such drainage systems.
Funnel for internal drainage
You can also watch a video on the topic of our article, which shows the installation of a finished plastic drainage system.
How to design a future drainage system?
In technical terms, a drainage system is a set of gutters and pipes that collects and removes water from the roof. A drainage system, or drain, is also often called a separate gutter or pipe. And now let's figure out how to make a good drain for your home from the pipes you purchased. First you will need to draw up a sketch and calculate the dimensions of all the parts.
How to make a drain for a pitched roof?
So, you will need a certain number of gutters, which can be easily calculated based on the parameters of the roof perimeter. You will install 17 brackets for every 10 meters. The outlet has exactly the same length as the total length of the drain pipes. You will also need funnels, pipes, 1 piece for every 10 meters, corner elements, plugs, couplings (exactly 2 times less pieces than gutters), elbows, the number of which will depend on the complexity of the easternmost system.
The easiest option for you would be to simply draw a diagram of the future water supply system on a sheet of paper. Thus, it is customary to install outlet pipes with funnels every 12 meters. If the side of the house is smaller, place them in the corners, and only two of them will be enough. Take waste pipes with a diameter of 50 millimeters, and purchase a transition tee 110 by 50 mm. The size of one drain can be 10 centimeters, which is quite enough for the roof of a private house. From one pipe you will get two trays of the same size.
Next, you will need to plug each end of the gutter. Take an inspection plug or a regular one, cut into two parts. When all the elements are already located on your sheet, count the total number:
Calculating the required pipe diameter is quite easy - the standard formula will help you:
- For a roof slope area of up to 50 square meters, you will need a pipe with a diameter of 80 millimeters.
- At 125 square meters, this is already 90 millimeters.
- For more than 125 square meters, you need to take a 100 mm pipe.
You will choose funnels and adapters after deciding on the diameter of the pipes. Therefore, at this stage, already draw up a sketch of the future water supply system and mark suitable locations for the location of drains and installation of gutters. Once you have the entire scheme ready, you can purchase the material.
How to make a drain for a flat roof?
So let's figure out how to make and install a drain from sewer pipes for a flat roof. Yes it is possible! There is a big bonus here: the drain will be built into the wall, and it will not be located outside. Therefore, sewer plastic is not afraid of either frost or destructive UV rays.
Your main task is to make sure that water easily flows from the roof to one place, in its center. This is where you need to install a drainpipe, or even several. The only thing you have to take care of is to insulate such a pipe, or place it in special insulation so that condensation does not collect on it. And after installing the funnel, simply cover it with a grill so that it does not clog.
System calculation
When calculating the drainage system, it is necessary to determine the number of pipes intended for the production of gutters and pipes that will be used as vertical drains, as well as the required number of brackets and clamps for their fixation. The easiest way to depict the calculation results is as a sketch. This will not only avoid mistakes, but also make optimal cutting of the material, based on the fact that the reliability of the system is higher, the fewer joints there are between its elements.
The total length of the gutters is equal to the perimeter of the roof. The required number of pipes will thus be half as large, since each of them will turn into two gutters when cut.
The number of pipes required to make vertical drains is calculated as follows:
- The horizontal distance between two drains should not be more than 12 meters. This means that their number can be determined by dividing the length of the perimeter by 12 (if the sides of the house are less than 12 meters, then drains can be located at each corner of the building). By multiplying the resulting number by the height of the house, we find the total length of the pipes for vertical drains. When calculating the length of vertical drains, it is also necessary to take into account the drainage system. If water from the roof pours directly onto the ground and is absorbed into the ground, the above algorithm gives a fairly accurate value. When directing wastewater into a storm drain or into an irrigation tank, it is better to draw a complete diagram of one riser and calculate its length, taking into account the vertical and horizontal components, and then multiply this value by the required number of drains.
- Calculate the required number of brackets for drainage from sewer pipes. For reliable fixation, they are placed at a distance of 500-600 mm from each other, in addition, two holders (from different sides) are installed at the corners and in the places where the funnels are installed.
Plastic bracket for installing gutters - Depending on the chosen design, fittings are selected.
- At the bottom, corners will be required to change the direction of the drains (away from the wall).
- In the upper part, corners may be needed to bring the pipe closer to the wall from the edge of the roof for subsequent fixation to a vertical surface.
- Dead-end sections of gutters are equipped with plugs, their number is also calculated according to the diagram.
Standard elements of a drainage system
For independent construction of a drainage system from sewer pipes, pipes and fittings of various diameters are used.
- Gutters are made of pipes with a diameter of 110 mm.
- Vertical drains are mounted from 50 mm pipes.
- Tees are purchased with the ability to connect different (50 and 110 mm) pipes.
- Diversion corners for changing the direction of vertical pipes for draining water into storm drains or watering tanks have a diameter of 50 mm.
How to make a mount for a homemade drain?
To secure your homemade drain you will need brackets. You can buy them ready-made or make them yourself. The only difference will be that many types of ready-made brackets are designed for the same ready-made drainpipes.
See how their edges are curved so that the bracket can easily snap onto them. But if you are simply attaching a cut sewer pipe, it does not have such a rim on the side. Therefore, it is better to purchase one bracket for testing and try on the pipe - will it hold? That is why, when making a homemade drain, many craftsmen make the brackets themselves - these are more suitable and often turn out to be even more reliable.
Ready-made brackets for drainage systems
Finished metal brackets must be bent using a special device so as not to damage the polymer coating. After all, if small microcracks appear, water can easily get into them and corrosion will begin. And this already significantly reduces the reliability of the entire drainage system!
And here are the finished plastic hooks on a homemade drainage system:
This mount is well suited for organizing gazebo drainage:
Homemade fasteners: selecting and manufacturing
And the durable fasteners that come with sewer pipes are quite suitable for drainage pipes. Moreover, they are designed to withstand the weight of water, and therefore are more durable, and go well with the color of the pipes themselves:
If you make the fastener yourself, you’d better get a special hook bender, or at least a small vice. Once you have driven in one hook, present it to the overhang and check the angle of the hook. The gutter mounted on it should then be positioned strictly perpendicular to the ground. It is important to bend the bracket so that the front edge of the gutters is only 2mm lower than the rear. This is the only way that water, if it overflows the gutter, will come out through the external screens, and not flow along the walls of the house.
Bending hooks using a regular vice is an exhausting task. The fact is that the clicks of the vice do not clamp the holder completely. Therefore, experienced craftsmen prefer to make tools for bending metal gutter holders themselves. Here are the simplest instructions:
- Step 1. Take a regular metal corner with a wall thickness of at least 6 mm, or a channel of the same parameters.
- Step 2. In the channel with a grinder, cut a slot of such length that it is equal to the width of the gutter holder.
- Step 3. Take a square pipe in which the inner walls are slightly larger than the width of the gutter holder.
- Step 4. Now mark the bend points on all holders. After this, we insert the holder into the square pipe, take a wooden block and forcefully insert it inside the pipe.
- Step 5. Set the required bend angle.
- Step 6. Now insert the holder into the slot and align it to the marked bend.
- Step 7. Now we knock out the block with another piece of wood from the opposite end of the pipe.
- Step 8. If there was already paint on the handle, it will also crack a little, but it can be touched up. But in the final result, the quality of the joke will be much higher than that bent with a vice.
By the way, here is a wonderful master class on how to make such hooks even faster and easier:
Another interesting option to bend the hook:
- Step 1. Using an angle grinder, we make a very small mark with a depth of 1 to 2 millimeters.
- Step 2. We nail one nail or one self-tapping screw through the hook into the rafter and bend the hook itself. It will bend exactly along the sawed line and will not break over time.
Once all the fasteners are ready, walk around your home and see how best you can secure it all.
Of course, it is advisable to install the gutter before you even cover the roof. The following illustration will help you understand how to install the mount:
Characteristics of materials suitable for drainage
Polymer sewer pipes are made from different materials, but not all of them are suitable for outdoor use. In regions with cold, long winters, polyvinyl chloride (PVC) loses its versatile properties at low temperatures. And temperatures from -30°C are destructive for them, although destruction occurs gradually.
In warm climates there are no problems with this material in winter, but overheating in the summer heat also destroys it. They can be used as a temporary measure. Such a drain will be light and silent, unlike metal options.
A polypropylene gutter will also be cheaper than metal structures. Thick elastic pipes sometimes have stiffening ribs, which is very convenient for an external system.
Converting pipes into drainage elements
Stage #1 - pipe preparation
Let's now prepare the sewer pipes themselves. You will need to cut them lengthwise. From one pipe you will get two excellent identical complaints. In practice, everything is quite simple! To ensure an even cut, follow these instructions:
- Step 1. Place the pipe on the boards, and attach the wall at the bottom with self-tapping screws at both ends.
- Step 2. Connect the screws with a thick thread and use a permanent marker to mark the place where you will cut the pipe.
- Step 3. Remove the thread and cut the pipe with a grinder.
- Step 4. Now do everything exactly the same on the other side. The only difference will be that now you will need two screws.
Here's a great step-by-step tutorial:
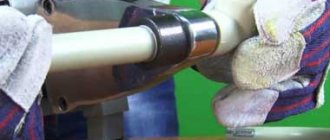
Our advice: if you are working with an angle grinder, be careful! Melted plastic is actually very hot and can even burn your hands. And flying particles can hurt your eyes. Therefore, be sure to wear gloves and safety glasses when cutting sewer pipes. As home craftsmen note, sewer pipes are also easy to cut with a jigsaw or wood saw, and the whole difficulty lies only in the correct marking of the longitudinal marks for cutting. But the most convenient way, of course, is to make gutters from sewer pipes using a grinder with a thin metal circle.
And connecting the finished elements is quite simple:
You will be interested to know that instead of ugly vertical pipes, you can use... chains. This is quite a popular method! The principles of constructing such a drain are quite simple: the chain must be firmly connected to the gutter and the base.
At the same time, it is tensioned so that it cannot move to the side, and for this purpose it is most often buried in a concrete base or in the ground. And the façade is protected from water splashes by a small canopy. Looks amazing!
The advantage of such “gutters” is that they are less noticeable against the background of the house and do not interfere with its exterior. In addition, they are usually complemented with spectacular decorative elements. Moreover, today it is fashionable not just to lower chains down, but to create complex spatial forms from them, and even alternate them with decorative bowls made of ceramics or plastic.
The only inconvenience is that modern manufacturers of plastic gutters do not produce special elements for connecting gutters to the chain. But, since you make your own drain, and you yourself are the manufacturer, then there is no limit to your imagination! And this is convenient: you will have to tinker with cutting and connecting only the horizontal elements of the drainage system, and then lower the elements of beauty down. Why not?
Stage #2 - installation work
Now we will install our drain from sewer pipes:
- Step 1. First, the shortest and longest brackets need to be secured to the front board of the cornice.
- Step 2. After this, connect the gutters with a slope of 3 mm for every 50 cm so that the rainwater arrives at the very center. Please note that the edge of the roof must be in the middle of the gutter so that snow and ice in winter do not damage the gutters and the rainwater itself hits the target.
- Step 3. Once all the horizontal gutters are ready, install the water drainage pipes.
- Step 4. Fix such pipes to the wall, and leave a gap of 20 to 80 centimeters between them and the complaints. There will be a tee and elbow here, which will provide the transition from the gutter to the pipe.
- Step 5. Now cut two pieces of pipe, 5 centimeters each, which will serve as your connectors. Install each connector and secure with self-tapping screws. Apply silicone sealant to the mounting points to protect them from rainwater.
- Step 6. Secure the vertical pipes to the wall using brackets with clamps. For every meter of such pipes you will need only two fasteners, which is not a lot at all.
- Step 7. And at the very end of the pipe, at the bottom, install a bend. This is necessary to prevent water from getting under the foundation. It should be located at a distance of at least 30 cm from the wall.
- Step 8. Finally, cover the end of the gutter with caps, which you simply cut in half.
This is what installing a drain on plastic hooks looks like:
When installing the drain, do not clamp all the parts too tightly: a little movement is needed so that the entire structure changes slightly under the influence of temperatures.
Secure all gutters to the brackets using self-tapping screws. And so that later the pipes do not twist under the influence of sunlight, secure them with antennae on the brackets, or install spacers.
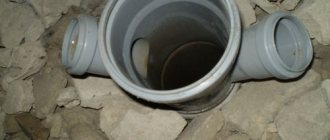
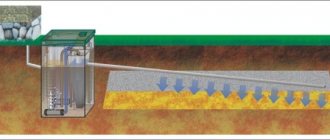
At the stage of final work, you will need to think about how to connect your homemade drainage system to the storm drain. To do this, an inspection should be made on the drainpipe - this is a section with a hatch and grates that will collect all the debris from the gutters. After all, it is important that only rainwater then goes into the sewer, without all this stuff, and does not clog the subsequent more complex system.
There are also alternative options: attach additional drainage pipes, and these will already communicate with the sewer or storm water inlet. The advantage of the latter is that it has a valve that does not allow odors to pass through and collects large debris in a special removable basket.
We make gutters from sewer pipes
To make gutters, the sewer pipe is split into two even halves along its entire length. For this purpose, you can use an electric grinder. At the same time, to prevent the protective casing from sticking with plastic, which will melt when sawing pipes, it is advisable to dismantle it. But then you need to use protective equipment, namely a face mask or, at least, glasses to avoid injury. But it’s better not to experiment, but to purchase a special disk for working with such a specific material as plastic.
Also, an electric jigsaw will cope with the task of sawing plastic. In order not to mess up when dissolving the sewer pipe into two halves, it is advisable to make guides from wooden slats that limit the movement of the power tool. The easiest way to saw is to use a cutter made from a piece of hacksaw blade. In such a situation, you can attach a ruler to the pipe using tape, which will be the main guide. In order to further ensure a high-quality connection of gutters in tees, not reaching 100-150 mm from the edge of the product, the pipe is left untouched.
Some subtleties and nuances that are important to know about
When installing a homemade drainage system from sewer pipes, keep in mind that all PVC products change their physical parameters with temperature changes. Therefore, it is very important that the gutters can move freely in the brackets. And to do this, try to leave at least 9 centimeters from the junction of the gutters to the bracket. Also, the ends of the gutters must be tightly joined.
To prevent your drainpipes, made so carefully with your own hands, from becoming dirty and clogged with leaves, install a regular plastic mesh on top. It will allow water to pass through, but leaves and branches will not:
The owner of a ready-made industrial drainage system usually does not think about this, believing that manufacturers always take everything into account themselves. But when you do something with your own hands, you always want to do it well, and you won’t forget about such details.
This is why it turns out in practice that often homemade drainage systems turn out to be both stronger and more durable. Moreover, some craftsmen also manage to get creative, for example, using a drain to bring water into their garage - catch a great idea:
If you live in a region with snowy winters, install an additional heating cable in the gutters. Don’t worry about the material of the sewer pipes: they are designed for temperatures above average, so the cable will not harm them in any way.
There is one more important rule: do not install gutters in temperatures below zero. After all, when the air temperature rises higher with the onset of spring, the pipes will simply twist. In any case, even just in cool weather, it is important to calculate all expansion joints and gaps so that the system does not “play” later.
This usually does not happen because industrial versions of drainage systems have special notches inside the parts that help to correctly connect the elements at a specific air temperature. But in the case of sewer pipes, you will have to do everything on a whim.
Is it possible to save money on drainage?
This is a question many developers ask themselves. Various models of ready-made gutters are sold on construction markets, which are a kind of construction kit from which you can easily assemble the desired system. The cost of such sets is quite high.
Home craftsmen have long learned to assemble gutters on their own and recommend a system of plastic sewer pipes. The price of such parts is low, their assortment makes it easy to select the necessary elements, and a large assortment of various adapters solves the problem of joints and connections. Another plus in favor of this solution is that plastic is easy to process. The finished gutter can be painted to match the color of the roof.
Manufacturing of fasteners
Fasteners or brackets can be used ready-made for drainage systems, for sewer pipes, or made independently.
The fasteners are a strip of metal, at least 2 cm wide (preferably larger) and 4 mm thick. You can cut fasteners from sheet iron 1 mm thick and fold them in four.
To hold the gutter, the bracket is bent using rollers or making a 1 mm cut at the bend with a grinder.
Do-it-yourself plastic drainage installation
So, everything is ready, you can proceed directly to the installation process. It starts from the top, that is, with the installation of gutters. How to do it all right?
- A place is determined that will be exactly in the middle between the risers of the structure. This is the highest point of the drainage system.
- The self-tapping screw is screwed in here. Please note that the tray itself must be installed in such a way that the roof overhang, or rather its lower edge, falls exactly into the middle of the axis of the folded gutters. A slight deviation in one direction or another is permissible.
- Now you need to determine the lowest point of the drain system. According to SNiP, the angle of inclination of the drain is established, which is equal to 2-5 mm per linear meter of the length of the structure. It turns out that if the distance between risers made of plastic pipes is 10 m, then the lowest point should be 2 cm lower than the top. This is if a difference of 2 mm is taken into account.
- At this point the bracket is installed and secured.
- After that, a fishing line is stretched between the bracket and the self-tapping screw at the top point; this is the line for installing intermediate brackets, the distance between which should be within 50-60 cm.
- We fasten the intermediate and upper fasteners.
- Let's move on to laying plastic gutters with our own hands. We start from the top point.
Attention! There is one point that will simplify the installation of plastic pipes and make the drain more durable.
To do this, it is necessary not to cut the pipe sockets lengthwise to the end. It is better to leave them as a locking connection. By the way, a rubber cuff located inside the socket will be used in this case, which will ensure the tightness of the connection.
Installation
Installation of gutters is carried out at an angle to the horizon. The recommended angle is 1 cm per 1 linear meter of communications. The mounting location depends on the house in which the work is being carried out. If the roof is not yet covered, then the drain is attached to the front eaves strip or to the rafters. If the house is residential or has a large projection, then it is suspended from the roof itself.
We recommend that you familiarize yourself with: Types of flexible corrugated chimneys and rules for their installation
The nuances of installing gutters:
- The gutter is placed 3 cm below the edge of the roof; if this is not taken care of, it will be carried away in winter by snow or ice.
- The outer edge should be 1 cm lower than the inner edge - this will allow water to pour out further from the walls of the house when overflowing.
- The gutter is oriented relative to the roof so that 2/3 of it protrudes beyond the edge - this will allow high-quality catching of jets under pressure.
- Installation begins from the corner of the roof, where the fasteners are installed. The location of the gutter is marked from it, taking into account the slope. The line is secured with twine and the remaining fasteners are screwed on.
- Horizontal segments of the drain are marked in a similar way.
- The gutters are connected using cold welding with additional aluminum clips.
- Installation of funnels is carried out without the use of glue in the socket, limited to ready-made fitting gaskets.
- Vertical posts and their bends are assembled into a socket, like a regular sewer system.
- Assemble the drainage system from top to bottom. First, the assembled gutters are suspended, then the vertical sections are installed.
What can it be made from?
In our article we have already talked a lot about the material that can be used. To save money, use a pipe, metal or plastic of your choice. Despite all the advantages, any metal will corrode over time.
Using a metal pipe will significantly increase operating time and also increase costs. The reason is the use of a more professional tool with expensive consumables.
Plastic
Making rainwater drainage from a plastic pipe is the most optimal option in terms of cost and quality. We have said more than once that a plastic sewer pipe meets all the requirements that we place on a drainage system. Below we will introduce you in detail to how you can carry out the installation yourself.
Where to start installation
In order to imagine how the work happens, we recommend watching the video lesson that we have prepared for you.
Complete a design drawing in order to determine where and what drainage element will be located. In order not to be distracted when installing the system, prepare the necessary tools:
- drill or screwdriver with attachment;
- grinder with cutting wheel for metal;
- thread;
- building level;
- stationery knife;
- sealant.
Manufacturing of gutters
The length of the gutter is selected so that there are as few joints as possible on one plane. To make a gutter, mark the pipe exactly in half. Using a grinder, make a cut first on one side and then on the other. Using a utility knife, trim the edges of the cut to remove any burrs. Cut the gutter to the required length.
Bracket installation
The installation of brackets should be approached responsibly. You need to decide on the side into which the water should flow. If it is a two-sided slope, install the fastener from the middle to the edge. You need to install the first and last brackets in the same plane, then pull the thread between them and check for a slope. After checking all the data, we install the remaining brackets at a distance of 1.5-2 meters according to the tensioned cord.
Installation of risers
The installation of drain risers is carried out along the wall, and is secured to a special bracket with clamps in the form of a ring, which you can find in any store. Due to the fact that the drainage system may not be installed flush against the wall, there is a need for two corner connections. The upper part of the riser is connected to the drainage system with a special funnel.
The lower part of the riser is diverted into the underground sewer system, in the absence of one, simply away from the house.