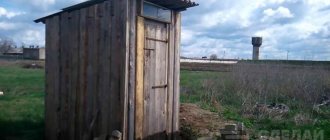
Building a toilet in the country
Country toilet project
Making a toilet booth is akin to building a model of a house: design (sketch), marking on the ground, foundation, lower frame, erection of walls, top frame and rafter system, roofing, flooring, door hanging, glazing, interior design and exterior decoration. All construction elements are simplified, minimized, almost toy-like, but they allow you to gain experience and practice working techniques.
The project (sketch) determines the shape, main dimensions of the toilet, as well as the initial building materials and their quantity. The appearance of the future structure is determined by the presence of one or another building material.
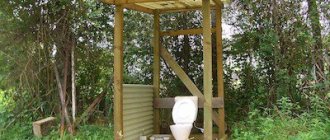
Usually the toilet is made of wood, but you can use asbestos-cement slab (flat slate) and even foam concrete blocks. The most common form of toilet, the “birdhouse,” is the most rational: it is technologically advanced and has a large functional volume.
If the project (sketch) has been drawn up, that is, the main dimensions have been determined, the site is marked on site: pegs are hammered in and cords are pulled to define the boundaries of the building. The rectangularity of such a small area can be set using an unfolded sheet of newspaper, and the accuracy can be checked using a tape measure, measuring the diagonals.
Below you can see several examples of drawings of country toilet projects. To view you must click on any of the images.
Drawings of country toilets
Toilet foundation
For most toilet stall designs, four concrete blocks measuring 260x330x440 mm installed in the corners are suitable as a foundation. To install them, you only need to remove the top soil layer (15-20 cm). It is important that the upper surfaces of the blocks lie in the same plane. The plane can be checked using a level and a piece of a suitable board. Two or three layers of roofing felt are placed on top of each block for waterproofing.
The lower trim is installed on the foundation blocks. The easiest way is to make it from pieces of timber, tied “in half a tree” and tightly tied with staples (the rod of the staple is recessed into a specially hollowed-out socket on the surface of the beams). It is preferable to use an edged board (40 or 50 mm thick) for the bottom trim.
The sides of the bottom trim are made from two pieces of edged board, nailed through a spacer of the same thickness, as shown in the figure below.
In this case, grooves are naturally formed in the lower trim, into which the tenons of the enclosing walls can then be inserted. The sides of the lower trim are fastened using cap screws (diameter 8-10 mm).
Walling
Due to their small size, the walls of the toilet booth can be made in the form of panels from upholstery boards (lining). Sections of upholstery boards of a given size are stuffed onto two planed frame boards, which have the same thickness as the bottom trim boards. The front shield is stuffed onto three boards so that you can frame the doorway.
To give rigidity to the panels, a strut must be inserted between the frame boards. The pictures below show the front, rear and side shields. The parts of the frame boards protruding from the bottom of the boards are spikes, which, when installing the booth, are inserted into the grooves of the lower frame.
Installation of walls consists of sequential installation of panels into the grooves of the lower trim and fastening the frame boards of adjacent panels using wood grouse screws (3-4 pieces per corner). In essence, these cap screws perform the function of the upper frame, as they impart the necessary rigidity to the entire structure.
Country toilet roof
The rafter system is just two boards embedded in the upper part of the side panels (picture below).
The sheathing is placed on these two boards, which is best made of solid clapboard face down. In this case, there is no need to hem the ceiling and roof overhangs.
A reliable and simple roof is made from two layers of roofing material. The roofing felt is attached to the sheathing with felt pins at intervals of 15-20 cm.
Flooring
The floor is laid from edged boards 50 mm thick. The front and side surfaces of the floorboards are cleanly trimmed and nailed to the inner boards of the bottom frame with gaps (slots) of 5-10 mm. The gaps will facilitate ventilation, as well as drying the floor after wet cleaning.
Door hardware
The door to the toilet consists of a frame with a strut and trim. The brace cuts diagonally across the frame, running from the top corner of the narthex to the bottom hinge. The cladding is made of lining placed vertically. It is advisable to equip the door with a rim lock for locking at the end of the season.
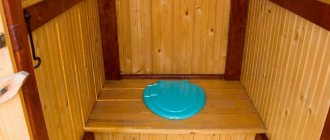
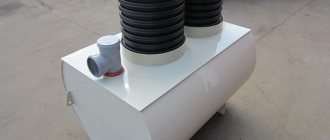
Toilet container
The collection container is placed in the frame shown in the figure below.
The frame is made of bars with a cross-section of 40×40 mm or 50×50 mm. In the frame, the front wall is completely covered with clapboard, and the upper wall, in which a hole is cut, is made entirely removable. In this form, this structure is most convenient for hygienic cleaning (washing and frying in the sun). The removable top cover allows you to conveniently attach a simple “apron” (a piece of vinyl chloride film). In the powder closet booth there should be another box or other container with peat, ash or sawdust.
Choosing a place
Choosing a place for a toilet
It should be noted that there are certain requirements and standards for placing such buildings on the street. This is especially true for those toilets in which sewage has direct contact with the ground or groundwater.
The following rules must be adhered to:
- The distance to the nearest body of water must be at least 25 meters. If the territory is located on sloping terrain, the structure must be installed below the water source. This will prevent sewage from entering the source.
- The distance from the cellar or basement of the house to the toilet is at least 12 m.
- From a bathhouse, sauna or other structure - at least 8 m.
- The distance to the place where the animals are is at least 4 meters.
- From the trunk of the nearest tree - 4 m, and from the bushes - 1 m.
- The distance from the fence of the adjacent territory is one meter.
- When choosing a location, be sure to take into account the wind rose; this is necessary so as not to annoy yourself and your neighbors with unpleasant odors.
- The door must be installed so that it opens towards your home.
It is worth considering not only the distance to your water source, but also the location of your neighbors’ well or well!
All these requirements must be taken into account not only in relation to your own territory, but also to the neighbor’s (regarding the location of bushes, bathhouses, cellars, etc.). But these requirements directly apply only to a toilet with a cesspool. The rest should be guided by ease of use.
Flat slate toilet
Flat slate toilet
Wood, of course, is the most affordable and technologically advanced material, but if for other buildings (garage, outbuilding) it is planned to use an asbestos-cement slab (flat slate), then it is also suitable for a toilet booth.
To work with asbestos-cement slab, you will need an electric cutting machine (grinder) equipped with a stone abrasive or diamond cutting disc. Asbestos-cement sheets 8-10 mm thick are cut to form the front, back and both side walls of the toilet booth (similar to Figure 2 above). These walls are assembled with screws using frame boards, and then installation is carried out in the same way as described above. In this case, the door leaf is also made from an asbestos cement sheet mounted on a wooden frame, which is used for inserting hinges, locks and other mounting devices.
For convenience and safety of using products made from asbestos cement sheets, it is advisable to cover them with film-forming compounds (varnish, drying oil, paint, etc.).
However, experts recommend using the universal environmentally friendly building material VP-30 slab for external wall cladding.
Kinds
There are four most common types of toilet:
- With a cesspool.
- Backlash closet.
- Powder closet.
- Bio.
Pit toilet
A backlash closet is a sealed cesspool, which can be large in size, and its cleaning is carried out by a sewer machine.
Backlash closet
If we talk about a powder closet , then this is a type where there is a container under the toilet seat that needs to be cleaned from time to time. Each time you use it, you need to sprinkle a small layer of peat on the dirt. A bucket of peat is placed nearby. This option is the simplest for any dacha, however, the process of removing feces is quite unpleasant.
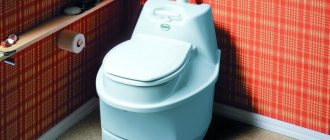
Well, the last alternative option is a bio- or chemical toilet . Here all impurities are broken down by special bacteria. This process is completely environmentally friendly.
Dry toilet
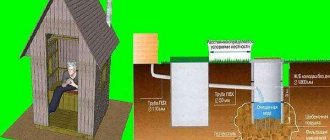
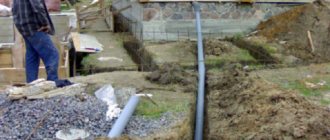
Let's start building. Cesspool and wall reinforcement
cesspool
It is the pit toilet that is the most popular due to its ease of use. All impurities fall into a deep hole. When it is 2/3 full, it needs to be cleaned. There is also the option of transferring it, but we will talk about this below.
The size of the cesspool can be 1.5×1.5 meters and the depth up to two meters.
To strengthen future walls, several optimal options are used. For example, you can take boards pre-treated with an antiseptic, concrete rings, bricks, a barrel without a bottom, or old tires. Care must be taken to remove sewage from the cesspool.
If brickwork is used, the bricks are laid in a checkerboard pattern, and the last six rows are laid solid. If a backlash closet is being installed, then excellent sealing of the pit is necessary. Therefore, a screed is poured to the bottom, or it is simply covered with crushed stone. If a brick cesspool is made, then a concrete floor is poured on top. For this, formwork is made from bars and boards. After the concrete has hardened, the frame must be dismantled.
It is extremely important to leave an opening for the toilet, as well as for ventilation. Moreover, an additional hole is needed to pump out feces.
If you don’t want to constantly clean the hole, you can fill it up and move the house itself to another place. After several moves, it can be returned to its original place, and the rotted waste can be used to fertilize the beds.