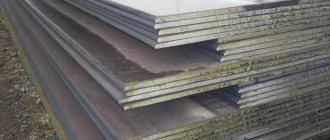
Sheet surface quality
The GOSTs mentioned above define the general technical conditions (GTU) for the production of sheet and other types of rolled metal. Part of the general technical specifications is quality control of finished products. The quality of rolled sheets is controlled by such indicators as:
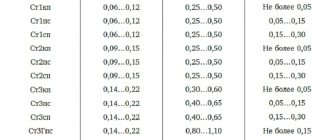
- compliance of the chemical composition of steel in terms of the mass fraction of its components and other characteristics of the alloy with the established requirements;
- geometric dimensions (length, width) and thickness of rolled sheets - they must be within tolerances in accordance with manufacturing accuracy classes (normal and increased);
- edge quality;
- characteristics of elongation (tear) and bending strength;
- surface quality – normal (PN), improved (PU), high (PV) and especially high (PO); Surface quality (flatness) categories are also designated by Roman numerals from IV to I in the same order.
Please note that sheet thickness tolerances are set higher and lower than the nominal value. Tolerances on the width and length of the sheet are only positive. The surface quality of rolled sheets is assessed by the presence of the following defects:
- tarnished flowers;
- ripples;
- blisters;
- rolled out burnt stick;
- accordions;
- cuts;
- traces of abrasive cleaning, etc.
The complete list of defects in rolled metal surfaces includes over 60 items. Most of them are unacceptable for sheet metal of all quality categories.
However, the presence of some flaws on sheet steel, including the software category, is allowed. These include tarnished colors, traces of abrasive cleaning, and scratches. For example, GOST 16523-97 regulates the permissible types of surface defects for different categories of quality of rolled sheets, their placement on the front and/or back side of the sheet, depth, length and other characteristics.
Defects in the surfaces of rolled sheets of different quality categories are acceptable within the following limits:
- rental category I - on the front side of the sheet there can be only individual marks and scratches no more than 20 mm long, on the back side the depth of defects cannot exceed a quarter of the total tolerances for the sheet thickness;
- Rolled products of category II - on the front side, risks and scratches with a length exceeding 50 mm are not allowed, on both sides of the sheet the depth of defects cannot be more than half the total value of tolerances for the thickness of rolled products; tarnish colors should not be located at a distance of more than 50 mm from the edges of the sheet;
- category IIIa - the same requirements for surface quality in terms of depth of defects, but tarnish colors can be located at a distance of up to 200 mm from the edge of the sheet;
- category IIIb - the same requirements, but tarnish colors can occupy the entire surface of the sheet;
- Category IV rolled products - the depth of defects cannot exceed the full total value of the tolerances for the sheet thickness.
When it comes to the permissible depth of defects, in fact it should not go beyond the minimum thickness of rolled products.
For sheet metal of category I with a glossy, matte and rough surface, the roughness index is also standardized: up to 0.6 microns; St. 0.6 to 1.6 microns and St. 1.6 µm respectively. The size of each area of the sheet surface cleared of defects should not exceed 100 cm2.
The consumer can determine the presence of surface defects in rolled sheet metal visually, but to assess their depth you will need special laboratory equipment. Any deviation from the specified requirements is grounds for filing claims against the manufacturer, including from the point of view of lowering the metal grade with appropriate monetary compensation.
GOST 14918-80 thin-sheet galvanized steel with continuous lines
| Weight of 1 m2 of steel according to GOST 14918-80 | From 1 kg - more details in the table |
| Status for 2021 | Active |
| Replaced with what? | The validity period was lifted according to Protocol No. 3-93 of the Interstate Council for Standardization, Metrology and Certification (IUS 5-6-93) |
| Effective date | 1981-07-01 |
| Update date | Edition (August 2007) with Amendments No. 1, 2, approved in September 1981, June 1986 (IUS 11-81, 9-86). |
| In return | GOST 14918-69 |
| Download free GOST 14918-80 | |
| Name RUS | Galvanized thin sheet steel with continuous lines. Specifications |
| Name EN | Continuously galvanized sheet steel. Specifications |
1. Steel classification.
2. Assortment.
3. Technical requirements.
4. Acceptance rules.
5. Labeling, packaging, transportation and storage.
Technical conditions. (extracts)
This standard applies to sheet and coil cold-rolled steel, hot-dip galvanized in continuous galvanizing units, intended for cold profiling, for painting, production of stamped parts, utensils, containers and other metal products.
The technical level indicators established by this standard meet the requirements of the highest and first quality categories.
Classification
1.1. Galvanized thin sheet steel (GTS) is divided into:
Assigned to groups
- For cold stamping - ХШ,
- For cold profiling - HP,
- For coloring (training) - PC,
- General purpose - OH;
According to drawing ability (steel group XSh) into categories
- Normal hood - N,
- Deep drawing - G,
- Very deep drawing - VG;
According to the uniformity of the thickness of the zinc coating
- With normal thickness variation - HP,
- With reduced thickness variation - UR.
1.2. By agreement between the consumer and the manufacturer, galvanized steel can be produced:
- with crystallization pattern - KR,
- without a crystallization pattern - MT.
1.3. Depending on the thickness of the coating, galvanized steel is divided into 3 classes in accordance with those indicated in the table. 1.
Table 1
| Thickness class | Weight of 1 m2 of coating layer applied on both sides, g | Coating thickness, microns |
| P (increased) | St. 570 to 855 incl. | Over 40 to 60 inclusive. |
| 1 | St. 258 to 570 incl. | From 18 to 40 incl. |
| 2 | From 142.5 to 258 inclusive. | From 10 a.m. to 6 p.m. inclusive. |
When producing steel with a differentiated coating, its thickness on one side of the sheet must correspond to class 2, and on the other side - class P (for sheets) or class 1.
Assortment.
2.1. Galvanized steel is made with a width from 710 to 1800 mm inclusive, and a thickness from 0.5 to 2.5 mm inclusive.
2.2. Dimensions, maximum deviations and other requirements for the assortment must comply with the requirements of GOST 19904-74.
Examples of symbols
Galvanized steel 0.8 thick, 1000 wide, 2000 mm long, normal rolling accuracy B, normal flatness PN, with unedged edge NO group OH, crystallization pattern KR, first class zinc coating according to GOST 14918-80:
| OC | B-PN-NO-0.8x1000x2000 GOST 19904-74 |
| ON-KR-1 GOST 14918-80 |
Galvanized rolled steel 1.2 thick, 1000 mm wide, increased rolling accuracy A, with cut edge O, grade 08kp, very deep drawing VG, without MT crystallization pattern, with reduced thickness variation UR, second class coating according to GOST 14918-80
| OC | A-O-1.2x1000 GOST 19904-74 |
| 08kp VG-MT-UR-2 GOST 14918-80 |
Galvanized rolled steel with a differentiated coating, thickness 0.5, width 710 mm, increased rolling accuracy A, high flat PV, with cut edge O, grade BSt3kp, for PC painting, without MT crystallization pattern with reduced thickness variation UR, with coating on one side first, and on the other second class according to GOST 14918-80:
| OC | A-O-1.5x710 GOST 19904-74 |
| BSt3kp PK-MT-UR-1/2 GOST 14918-80 |
Note. The steel category XSh is not indicated in the order, and the drawing ability index (N, G or VG) is indicated in the symbols.
Technical requirements
3.1. Galvanized steel must be manufactured in accordance with the requirements of this standard according to technical documentation approved in the prescribed manner.
3.2. Galvanized steel is made from carbon cold-rolled coiled steel with a surface quality in accordance with GOST 16523-70. Steel grades must correspond to those given in Table 1.
Table 1
| Cink Steel | Cold rolled steel grade for making galvanized steel | ||
| Group | Hood category | First quality category | Highest quality category |
| XIII | N, G | Steel grades with chemical Composition according to GOST 9045-80, GOST 1050-74 and GOST 380-781 | Steel grades with a chemical composition in accordance with GOST 9045-80, as well as GOST 1050-74 with a sulfur content of no more than 0.035% and phosphorus - no more than 0.020% and GOST 380-71 with a mass fraction of sulfur no more than 0.035% and phosphorus - no more than 0.025 % |
| XIII | VG | O8ps, 08kp, o8Yu according to GOST 9045-80 08PS, 08KP, 10KP according to GOST 1050-74 | 08ps, 08kp, 08Yu according to GOST 9045-80 08ps, 08KP, 10kp according to GOST 1050-74 with a mass fraction of sulfur no more than 0.030% and phosphorus no more than 0.020% |
| XII, PC | — | 08ps according to GOST 9045-80 08.08ps according to GOST 1050-74 Bst0, Bst1, bst3 of all degrees of deoxidation according to GOST 380-71 | 08ps according to GOST 9045-80 08.08ps according to GOST 1050-74 BST0, BSt1, BSt2, BSt3 of all degrees of deoxidation according to GOST 380-71 with a mass fraction of sulfur no more than 0.04% and phosphorus no more than 0.0035% |
| HE | — | Steel grades with chemical composition according to GOST 9045-80, GOST 1050-74, GOST 380-71 | Steel grade with a chemical composition in accordance with GOST 9045-80, GOST 1050-74, GOST 380-71 with a mass fraction of sulfur not exceeding 0.045% and phosphorus not exceeding 0.04%. |
3.3. For galvanizing, zinc grades Ts0 and Ts1 are used according to GOST 3640-79 with the addition of aluminum, lead and other metals to the bath. Alloying with lead through the introduction of zinc grade Ts2 is allowed.
3.4. The surface of galvanized steel must be clean and completely coated.
3.4.1. Violation of the continuity of the coating in the form of cracking on small beads located on defects in the steel base, the classification and dimensions of which are provided for by GOST 16523-70, is not allowed.
3.4.2. On sheets and strips with unedged edges, flawed edges with a depth exceeding the maximum deviations in width are not allowed.
3.5. For galvanized steel of groups XIII, HP and OH, small sagging (sagging, layering), grains and uneven crystallization of zinc, traces from bends of the strip and control rollers, local roughness of the coating (rash), light scratches and abrasions that do not destroy the continuity of the zinc coating are allowed. light and dull spots, uneven coloring of the passive film.
3.6. For galvanized steel of the PC group, dark spots and tracks (traces) from deformed small deposits (sagging, layering), grains of local coating roughness (rash), matte zinc crystallization pattern, traces of bends, stripes, light scratches and abrasions that do not violate the continuity are allowed zinc coating, light and matte spots, uneven coloring of the passive film.
3.7. At the consumer's request, the passive film must have a uniform color.
3.8. The reduced thickness difference of the zinc coating UR should be no more than 16 for class P, no more than 10 for class 1, no more than 4 microns for class 2. Galvanized steel of normal thickness HP must have a coating thickness within the limits specified in Table 1.
Galvanized steel of the highest quality category is produced with a different thickness of the zinc coating for steel groups XIII, HP and PC of class P - no more than 12, class 1 - no more than 8 and class 2 - no more than 3 microns.
3.9. At the point of bending of galvanized steel up to 1.0 mm thick inclusive, when testing the adhesion strength of the coating to the base metal when bending 180°, there should be no peeling of the zinc coating exposing the steel surface. A network of small cracks along the entire length of the bend and peeling of the coating at a distance of up to 6 mm from the edges of the sample are allowed.
3.10. Mechanical galvanized steel must comply with the standards specified in table. 1b.
- the depth of the spherical hole of galvanized steel of group XSh must comply with the standards given in table. 1b.
- For galvanized steel of group XIII of the highest quality category, the relative elongation should be 1 unit. more than the norms of the table 1b, and the depth of the spherical hole is 0.2 mm more than the norms in the table. 1st century
Table 1 b
| Cink Steel | Temporary resistance | Yield strength | Relative elongation s 4, %, not less, at L0=80 mm for steel thickness, mm | ||||
| groups | hood categories | rupture s in, MPa | s t, MPa, not less | up to 0.7 | St 0.7 to 1.5 | St 1.5 to 2.0 | St 2.0 |
| XSh | N G VG | 300-490 275-430 255-410 | — — — | 21 23 26 | 22 24 28 | 23 25 29 | 24 26 30 |
| HP, PC | — | — | 230 | 20 | 22 | — | — |
| HE | — | — | — | — | — | — | — |
Note. The values of temporary tensile strength and relative elongation for galvanized steel of group XSh of drawing categories N and G; relative elongation for steel of groups KhP and PK are optional until 07/01/89.
When calculating the tensile strength and yield strength, the thickness of the zinc coating is not taken into account.
Table 1c
| Thickness of galvanized steel | Depth of spherical hole for hood categories, not less | ||
| VG | G | N | |
| 0,5 0,6 0,7 0,8 0,9 1,0 1,1 1,2 1,3 1,4 1,5 1,6 1,7 1,8 1,9 2,0 | 8,5 8,9 9,2 9,5 9,9 10,1 10,3 10,5 10,7 10,8 11,0 11,3 11,4 11,5 11,6 11,7 | 8,0 8,5 8,9 9,3 9,6 9,9 10,1 10,3 10,5 10,6 10,8 11,0 11,1 11,2 11,3 11,4 | 6,9 7,2 7,5 7,8 8,2 8,6 8,7 8,8 8,9 9,0 9,1 9,5 9,6 9,7 9,8 9,9 |
Notes:
- For galvanized steel of intermediate thicknesses, the depth of the spherical hole must correspond to the standards established for the nearest smaller thickness.
- The depth of the spherical hole for galvanized steel with a thickness of over 1.5 mm is optional until 07/01/89.
- When tested on devices such as MTL-10 g, the norms for the depth of a spherical hole are reduced by 0.3 mm.
3.11. Galvanized steel of the XSh group is produced with a ferrite grain size of points 7, 8, 9, 10 according to GOST 5639-82 for exhaust categories VG and not lower than point 6 for exhaust categories G.
For galvanized steel of drawing category VG, grain unevenness is allowed within two adjacent numbers, for sheets of category G - within three adjacent numbers.
3.12. For galvanized steel of group XIII, drawing category VG, the presence of structurally free cementite is allowed within points 0, 1, 2 and 3 of scale 1 according to GOST 5640-68. For hood categories G and N, the presence of structurally free cementite is not standardized.
3.13 The number of bends without fracture of galvanized steel of the KhP, PK, OH groups must comply with the standards established in table. 1 year
Table 1d
| Thickness of galvanized steel, mm | Number of bends |
| up to 0.8 mm St. 0.8 to 1.2 mm St. 1.2 to 2.0 mm St. 2.0 | 8 5 3 2 |
Note. The norms for bending galvanized steel with a thickness of more than 1.5 mm are optional until 07/01/89.
3.14. (Deleted, Amendment No. 2).
Acceptance rules
4.1. Galvanized steel is accepted in batches. The batch must consist of sheets or rolls of one group of galvanized steel, one size, one type and class, coating thickness, type, preservation, one grade and melt (steel of groups XSh, XP and PK) drawing category (steel of group XSh), must be drawn up and accompanied by a quality document in accordance with GOST 7566-81 with the addition of values of optional quality indicators.
The batch weight should not exceed the shift production of the unit.
4.3. To control the size and quality of the surface, 6% of the sheets or one roll from the batch are selected.
4.4. To control the adhesion strength of the coating, mechanical properties, and microstructure, one sheet or one roll from the batch is selected.
4.5. If unsatisfactory test results are obtained for at least one of the indicators, a second attempt is carried out in accordance with GOST 7566-81.
Labeling, packaging, transportation and storage.
5.1. Labeling, packaging, transportation and storage - in accordance with GOST 7566-81 with additions.
5.2. To protect the surface of galvanized steel from corrosion, preservation is carried out: passivation, oiling or passivation and oiling.
At the request of the consumer, galvanized steel is not preserved.
When shipping to the Far North and hard-to-reach areas, conservation is required.
5.3. Sheets of galvanized steel are formed into a stack, placing one sheet on top of another. For sheets with a differentiated coating, the side with the 2nd class of coating thickness should be facing the bottom of the pack.
The end and side surfaces of the bundle are covered with channels made of annealed steel sheet with a thickness of at least 0.4 mm according to the regulatory and technical documentation.
Wooden bars in accordance with GOST 8486-86 and GOST 2695-83 with a cross-section of at least 80x80 mm or metal bars in accordance with regulatory and technical documentation must be attached to the bottom of the pack. The number of wooden and metal bars for a pack width of up to 1200 mm is 2 pcs.; over 1200 mm - respectively 3 pcs. and 2 pcs.
5.4. Rolls of galvanized steel with differentiated coating are rolled so that the side with the 2nd class of zinc coating thickness is located inside the roll.
5.5. Packs and rolls must be tightly tied. The number of straps is in accordance with GOST 7566-81.
5.6. The weight of one package must be at least 3 tons and must not exceed 10 tons.
Until 01/01/88, at the request of the consumer, the weight of a pack of galvanized steel sheets should not exceed 5 tons.
5.7. Transport marking of packages must be applied in accordance with GOST 14192-77 with dark paint on the end surface of the pack and the side surface of the roll and contain basic, additional and informational inscriptions.
5.8. Transportation of galvanized steel by rail is carried out by open rolling stock in accordance with the rules for the transportation of goods in force for transport of this type and the conditions for loading and securing cargo, approved by the Ministry of Railways.
5.9. Storage of galvanized steel must comply with conditions Zh3 according to GOST 15150-69, which excludes its presence together with chemically active substances.
GOST 16523-89: Rolled thin-sheet carbon steel of high-quality and ordinary quality
Home / GOSTs / GOST 16523-89: Rolled thin-sheet carbon steel of high-quality and ordinary quality
GOST 16523-89: Rolled thin-sheet carbon steel of high-quality and ordinary quality
GOST 16523-89
Rolled thin sheet carbon steel of high quality and ordinary quality for general purpose
Technical specifications For thin-sheet hot-rolled and cold-rolled carbon steel of high-quality and ordinary quality for general purpose, manufactured with a width of 500 mm or more, thickness up to 3.9 mm inclusive.
Rentals are divided into:
- by production method:
hot rolled,
- cold rolled;
- sheets,
- cold rolled:
especially high finishing - I,
- advanced finishing - III,
- deep - G,
In terms of product range, rolled products must comply with the requirements of GOST 19903 hot-rolled, GOST 19904 cold-rolled. Rolled products are produced:
- made of carbon steel of ordinary quality of strength groups OK300V, OK360V, OK370V, OK400V;
- made of high-quality carbon steel of strength groups K260V, K270V, K310V, K330V, K350V, K390V, K490V. Steel grades and chemical composition requirements for each strength group are given in Table 1.
Table 1
Steel grades used and chemical composition requirements
| Strength group | Steel grades | Mass fraction of elements and maximum deviations, % |
| K260V | 08kp | According to GOST 1050 For rolled steel grades 08kp and 08ps, the lower limit of the mass fraction of carbon and silicon is not limited |
| K270V | 08ps, 08, 10kp, 10ps, 10 | |
| K310V | 15kp, 15ps | |
| K330V | 15, 20kp | |
| K350V | 20ps, 20 | |
| K390V | 25, 30 | |
| K490V | 35, 40, 45, 50 | |
| OK300V | St1, St2 (for all degrees of deoxidation) | According to GOST 380 The mass fraction of chromium, nickel and copper is formed at the request of the consumer. The lower limit of the carbon mass fraction is not limited. For rolled steel with grade numbers 3, 4, 5 (all degrees of deoxidation), the mass fraction of manganese can be reduced by 0.10%. When deoxidizing semi-quiet steel with aluminum, titanium or other deoxidizing agents that do not contain silicon, as well as several deoxidizing agents (ferrosilicon and aluminum, ferrosilicon and titanium, etc.), the mass fraction of silicon in the steel is allowed less than 0.05%. In this case, the mass fraction of aluminum is allowed up to 0.07%. Deoxidation with titanium, aluminum and other deoxidizing agents that do not contain silicon is indicated in the quality document. |
| OK360V | St3 (all degrees of deoxidation) | |
| OK370V | St3ps, St3sp | |
| OK400V | St4 (all degrees of deoxidation St5ps, St5sp) |
The weldability of rolled steel of strength groups OK300V and OK360V, OK370V categories 4 and 5 is ensured by the manufacturing technology and chemical composition of the steel. Categories of rental depending on the standardized characteristics are given in Table 2.
table 2
| Category | Standardized characteristics | Mode of production | Strength group | |||
| K260V, K270V, K330V, K350V, K310V | K390V | K490V, OK400V | OK370V | |||
| 1 | Bend test | Hot rolled Cold rolled | — | — | — | + |
| 2 | Spherical Well Draw Test | Cold rolled | + | — | — | — |
| 3 | Spherical dimple bending and stretching test | Cold rolled | + | — | — | — |
| 4 | Mechanical properties test | Hot rolled Cold rolled | + | + | + | + |
| 5 | Mechanical and bending testing | Hot rolled Cold rolled | + | + | — | + |
| 6 | Testing of mechanical properties, spherical dimple stretching and bending | Cold rolled Hot rolled (according to customer's request) | + | — | — | — |
The mechanical properties of rolled products and the diameter of the mandrel when tested for 180-degree bending in a cold state must comply with the requirements of Table 3.
Table 3
| Strength group | Tensile strength N/mm2 (kgf/mm2) | Relative elongation in %, not less | Bending until the sides are parallel (a is the thickness of the sample, d is the diameter of the mandrel) | ||||
| hot rolled steel | cold rolled steel | ||||||
| up to 2 mm will turn on. | over 2 mm | up to 2 mm will turn on. | over 2 mm | up to 2 mm will turn on. | over 2 mm | ||
| K260V | 260-380 (27-39) | 25 | 28 | 26 | 29 | d=0 (without gasket | d=a |
| K270V | 270-410 (28-42) | 24 | 26 | 25 | 28 | ||
| OK300V | 300-480 (31-49) | 21 | 23 | 24 | 26 | ||
| K310V | 310-440 (32-45) | 23 | 25 | 24 | 27 | ||
| K330V | 330-460 (34-37) | 23 | 24 | 24 | 25 | ||
| K350V | 350-500 (36-51) | 22 | 23 | 23 | 24 | ||
| OK360V | 360-530 (37-54) | 20 | 22 | 22 | 24 | d=a | d=2a |
| OK370V | 370-530 (38-54) | 20 | 22 | 22 | 24 | ||
| K390V | 390-590 (40-60) | 19 | 20 | 20 | 21 | ||
| OK400V | 400-680 (41-69) | 17 | 19 | 19 | 21 | No | No |
| K490V | 490-720 (50-73) | 12 | 13 | 13 | 14 | ||
There should be no tears, cracks or delaminations at the bend. Hot-rolled steel is produced by heat treatment, cold-rolled steel is produced by heat treatment and tempering. Hot-rolled steel from continuous rolling mills may be produced without heat treatment. Hot-rolled steel is produced with both pickled and unetched surfaces. Sheets must be cut on all sides. Sheets obtained from coils rolled on continuous rolling mills may be manufactured with uncut edges, except for cases specified in the order. Rolled products are produced with unedged and trimmed edges. Defects are not allowed on the edges, the depth of which exceeds half the maximum deviation along the width of the rolled product, and which would take it beyond the nominal width size. Rolled products should not have ends and edges turned at an angle of more than 90 degrees. The length of part-width rolls should not exceed the width of the roll. The depth of the hole during the extrusion test must comply with the requirements of Table 4
Table 4
| Rolled thickness | Hole depth, not less, for rental, mm | |||
| deep drawing strength groups | normal drawing of strength groups | |||
| K260V, K270V | K310V, K330V, K350V | K260V, K270VA | K310V, K330V, K350V | |
| 0,35 | 7,5 | 7,2 | ||
| 0,4 | 8,0 | 7,5 | 7,4 | 7,4 |
| 0,5 | 8,4 | 8,0 | 8,0 | 7,6 |
| 0,6 | 8,9 | 8,4 | 8,5 | 7,8 |
| 0,7 | 9,2 | 8,6 | 8,9 | 8,0 |
| 0,8 | 9,5 | 8,8 | 9,3 | 8,2 |
| 0,9 | 9,9 | 9,0 | 9,6 | 8,4 |
| 1,0 | 10,1 | 9,2 | 9,9 | 8,6 |
| 1,1 | 10,4 | 10,2 | ||
| 1,2 | 10,6 | 10,4 | ||
| 1,3 | 10,8 | 10,6 | ||
| 1,4 | 11,0 | 10,8 | ||
| 1,5 | 11,2 | 11,0 | ||
| 1,6 | 11,4 | 11,2 | ||
| 1,7 | 11,6 | 11,4 | ||
| 1,8 | 11,7 | 11,5 | ||
| 1,9 | 11,8 | 11,7 | ||
| 2,0 | 11,9 | 11,8 | ||
The surface of cold-rolled steel must be free of films, through breaks, blistering bubbles, rolled bubbles, adhesion-welding spots, cuts, tears, rolled-in scale, over-etched, under-etched, cold-working stripes, rolled-in metal and foreign particles. Layering is not allowed. The same is true for hot-rolled steel. An unetched surface may retain a non-removable layer of scale, allowing surface defects to be identified. Characteristics of the quality of surface finishing are given in Table 5.
Table 5
| Finishing group | Mode of production | Characteristics of surface finishing quality | |
| II | cold rolled | Defects are not allowed on both sides of the rolled product, the depth of which exceeds 1/2 of the sum of the maximum deviations in thickness and taking the rolled product beyond the minimum dimensions in thickness, as well as tarnished color at a distance exceeding 50 mm from the edges. On the front side (the best surface quality) scratches and scratches longer than 50 mm are not allowed. | |
| III | cold rolled | Defects are not allowed on both sides of the rolled product, the depth of which exceeds 1/2 the sum of the maximum deviations in thickness, and which do not take the rolled product beyond the minimum thickness dimensions. | |
| IIIa: tarnish colors are not allowed at a distance of more than 200 mm from the edges | IIIb: tarnish colors are allowed over the entire surface of the rolled product | ||
| hot rolled | Defects are not allowed on both sides of the rolled product, the depth of which exceeds 1/2 the sum of the maximum deviations in thickness, and which take the rolled product beyond the minimum thickness dimensions. | ||
| IV | hot rolled | Defects are not allowed on both sides of the rolled product, the depth of which exceeds the sum of the maximum deviations in thickness and that would take the rolled product beyond the minimum dimensions in thickness. | |
Characteristics of the quality of surface finishing are given in Table 6.
Table 6
| Surface condition | Characteristics of the state of surface finishing | Surface quality characteristics |
| glossy | roughness no more than 0.6 microns | Defects are not allowed on the front side of the rental. Individual risks and scratches longer than 20 mm are also not allowed. |
| matte | roughness 0.8-1.6 microns, roughness density no more than 0.20 mm | Defects are not allowed on the reverse side of rolled products, the depth of which does not exceed 1/4 of the sum of the maximum deviations in thickness |
| rough | roughness more than 1.6 microns | Spots of dirt and tarnished colors are not allowed on both sides of the rolled product. |
