0
9748
27.11.2013
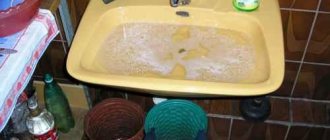
A leaking faucet means money leaking out of the pipes, and besides, it gets on your nerves. Most often, the reason lies in a small part of the faucet - a rubber gasket designed to tightly block the lumen of the faucet when it is closed. There can be several reasons for damage to the gasket: mismatch in gasket dimensions, poor quality rubber, misalignment during installation. Often the cause is a foreign body getting under the gasket - grains of sand, corrosion products. By exerting point pressure, they gradually deform the rubber and it breaks. Repairing the faucet in this case is quite simple, and anyone can change the gasket in the faucet.
How to replace a faucet gasket
Gasket location and signs of wear
Rubber O-rings are located inside the faucet to prevent water from entering the gap between the seat and body. The valve design uses a screw or worm that presses the seat with a seal to the body part, which has a channel for supplying liquid.
Additional gaskets are located at the place where the jib is attached to the mixer body and at the points where the device is connected to the water mains. A sign of wear on the rubber gaskets is water leaking from the gander when the taps are turned on.
What do you need when replacing a faucet gasket?
As practice shows, our people do not prepare for possible malfunctions, but take frantic actions at the moment when the problem has already happened. Since a leak from a faucet in the bathroom or kitchen happens quite often, it is best to prepare for it in advance. The main reason why water flows suddenly become uncontrollable is a small rubber gasket that has worn out over time or too frequent use. There are, of course, other cases, but this is the most common.
Worn rubber tap gasket
All stores that sell plumbing or building materials sell sets of plumbing gaskets for faucets that exist today. These devices have not changed for decades, so there will be no error with the standard. In addition to the kit for replacing a worn-out gasket, you will need:
- A towel or piece of cloth. They need to be placed at the bottom of a ceramic sink in the kitchen or bathroom, because tools during work tend to unexpectedly fall, slipping out of your hands, and split fragile cases, and a textile product can soften the fall;
- A saucepan or bucket of water. In them you can wash the parts of the water shut-off device;
- A set of wrenches, you can also use universal ones - adjustable and gas, but this is a last resort, since they will not be very convenient;
- Screwdrivers. Modern faucets usually require a cross-type faucet, but if the device is 30–40 years old, then an ordinary flat one will also be needed;
- A stationery, penknife or table knife, perhaps scissors will also come in handy;
- Tangit-unilok thread or fum sealing tape.
Tools and consumables
To replace the gasket in your bathroom faucet yourself, you need to prepare:
- gas or special adjustable wrench for plumbing work;
- a screwdriver with a flat and Phillips blade for removing the valve head;
- a set of spare rings;
- stationery knife;
- pliers.
Since during the repair process it may be necessary to remove the faucet, you should prepare flax tow to seal the threads. Instead of tow, synthetic tape or a special sealant can be used. For the manufacture of non-standard seals, sheet rubber with a thickness of 2.5-3 mm is used. The part is cut out with scissors or a metal punch of the appropriate diameter.
Replacing a gasket is a very neat job that does not require rushing.
Prevention of breakdowns
To prevent premature failure of the product, adhere to the following rules when working with it:
- Open and close the tap all the way, but do not use much force.
- From time to time, disassemble the mixer, clean it from dirt and lubricate the moving elements. This will increase the operating life of the product by about 3-4 times.
- Install the filter. As a rule, the main reason for faucet breakdowns is insufficiently clean water entering our homes from main water pipes. To solve this problem, install a coarse water filter.
Replacing the gasket in a water tap does not take much time, and this work can be done by any person who knows how to think technically. The above instructions and recommendations will help you cope with this simple task perfectly.
Preparation for repair
Before you start changing the seals, you must shut off the water supply using the valves located on the water pipes. The taps are located in the bathroom or placed in a separate panel at the entrance of the mains into the room. If the apartment valves are faulty, then you need to contact the management organization with a request to shut off the water supply to the house. In this case, the repair begins with replacing the taps. The enameled surface of the bath is covered with sheet cardboard or an old blanket, and foreign objects are removed from the bathroom.
Repair of a single lever ball mixer
Replacing the gasket here at first will be similar to the option indicated above. Let's look at this in more detail.
- Remove the decorative plug, unscrew the screw and pull it out.
- Unscrew the threaded connection. Remove the ball from the mechanism.
- Replace the gaskets (seals) and reassemble the mixer in the reverse order.
Working with such a mixer must be done very carefully! Sometimes it is recommended to replace the ball itself with a new one, so if you do not understand such complex designs, it is best to consult with a specialist in this matter.
In most cases, it is recommended to replace the springs inside the ball in addition to the seals. I think it becomes clear that the more reliable and modern the mixer, the more complex its design.
Step-by-step instruction
The repair process depends on the valve design; standard screw valves use several gaskets. The elements come into contact with the surface of the brass body, and during operation, wear is formed on the parts. In this case, installing a standard size gasket does not eliminate the leak. The owner can mount a ring with increased dimensions, but it is recommended to replace the assembly.
During repairs, it is necessary to remove the layer of salts and limescale that forms on the surface of the mixer. Household chemicals or vinegar are used to remove foreign substances. The softened coating is removed with water, and then the surfaces are wiped with a dry cloth.
Valve tap
A classic faucet with a worm axle drive is used in budget-class faucets. Water may leak from the O-ring underneath the valve body or leak through the gap between the rotating stem and the faucet's outer shell. Due to a leak, liquid may leak or drip from the gander (with the taps fully closed). Before starting work, remove the plastic plugs from the heads and pry off the elements with a knife or scissors. It is recommended to place the parts on a shelf, since spare parts are not supplied with plugs.
The cause of faucet leakage in most cases is wear of the sealing gasket.
Description of actions step by step:
- Using a Phillips screwdriver, remove the screws securing the valve head. When unscrewing, difficulties may arise due to damage to the head (for example, during previous repairs). In this case, screwdrivers with different blade sizes should be used, and the screw must be replaced.
- Using a plumbing tool, unscrew the valve from its seat in the mixer body.
- Disassemble the tap; the parts are secured with a nut and a locking ring. Disassembly is carried out in a vice; an additional key is required for operation.
- Remove damaged gaskets and install new elements (factory type or self-made).
- Reassemble the assembly in the reverse order and screw the body into the mixer until it stops.
- Replace the head and then check the functionality of the equipment.
Ball mixer
The ball valve is characterized by reduced dimensions; the design uses a steel spherical element with a through channel. The position of the locking part is adjusted using a lever, which allows you to change the water pressure at the outlet of the gander. The design uses gaskets, and a bushing made of a special material is installed around the ball.
Sequence of actions when replacing gaskets in a ball valve:
- Using a sharp tool, remove the plug with the marking indicating the temperature of the water in the lines.
- Unscrew the fastening screw and pull the lever or wing off the slots.
- Using an adjustable wrench, unscrew the clamping nut.
- Clean the hole from salt deposits, and then pull the ball out of the seat.
- Remove the damaged ring.
- Install the original seal, which is located in the shaped groove. It is not recommended to use rings that are not intended for the type of faucet being repaired, since the connection will not be tight.
- Check the condition of the bushing; if increased wear or grooves are detected on the surface of the part, the unit must be replaced.
- Insert the ball into the standard socket, and then tighten the nut. After installing the control lever, you need to make sure that there is no water leakage.
To repair a ball valve, you need to understand its structure.
Single lever design
The single-lever mixer is characterized by reduced dimensions; the design uses a single cartridge with lever control. Deflection of the control allows you to adjust the water pressure and temperature. The lever design uses a fastening threaded element with an internal hexagon. After removing the handle, you need to unscrew the decorative cap and then unscrew the locking ring.
Then the cartridge is removed from the cavity of the mixer, under which there is an o-ring. It is recommended to visually check the condition of the cartridge; if damage is detected, the unit must be replaced. The mixer is assembled in the reverse order; the repair procedure is shown in the video.
Bathroom faucet design
A simple, at first glance, mixer for regulating the supply of cold and hot water consists of more than ten main parts:
- Eccentric fittings with union nuts. With their help, the mixer is installed on the threaded outlets of pipes with cold and hot water. Each of the two mounting nuts is sealed along the threads with Teflon tape and a rubber gasket;
- Two taps, for hot and cold water. Inside each faucet there is a movable hexagon - an axle box with a small end gasket - a patch, with which, in fact, the faucet closes the water supply hole;
- A shower switch with a corrugated hose and a water divider, popularly called a “microphone.” All connections, from the first union nut of the hose to the microphone mount, are sealed with rubber gaskets.
For your information!
The average service life of rubber is one year in hard water and three years when working in conditions of standard salt content, so gaskets have to be changed almost every two years during the life of the mixer. In addition to the listed parts, the mixer is equipped with a gander, or main water drain. The gasket under the gander nut is usually one of the first to siphon. In some cases, the gasket will need to be changed within a couple of months after installing the mixer.
This type of rubber seal is the easiest to change; just unscrew the nut, remove the gander pipe, and replace the worn rubber with a new thin ring. It takes just over five minutes to change the gasket on a faucet.
In a similar way, you can replace the gasket under the union nut of the flexible shower hose and the mounting location of the water divider. The nut on a new mixer is quite easy to unscrew by hand; after three years of service, the metal sticks, and you have to use a coccyx wrench so as not to crush the thin-walled nut; before unscrewing and changing the rubber, it is wrapped in paper or thick cloth.
Checking the correctness of the repair
Functionality check is checked by water supply. It is forbidden to turn on the flow at full pressure, since the liquid can damage or tear off the installed gaskets from their seats. The tap opens gradually at 50% of the valve stroke, and then pauses for 1-2 minutes. After this, the valve is smoothly turned in the direction of increasing pressure, while at the same time the absence of leaks is visually checked. After closing the tap, the mixer is inspected for leaks; drops of water and extraneous sounds from the body (humming) are not allowed.
After the tap is repaired, it is checked for leaks.
Repair of worm type crane
The cost of gaskets for such a mixer will not exceed 30 rubles on average. Such mixers were actively used in Soviet times, but are still on sale today, although not in such quantities.
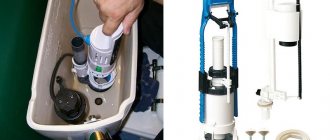
Let's look at the structure of such a crane. Look at the photo below. We see that under the valves there are water supply mechanisms (taps), on which there are gaskets that we need to replace.
So, below is a diagram - instructions for removing the gasket, as well as a text guide.
Let's look at everything in more detail.
While disassembling the faucet, you can periodically take photos to make it easier for you to reassemble it later!
- The plastic plugs must be removed. They are only decorative, so even if you damage them, nothing bad will happen. Pry off the plugs with sharp scissors and set them aside.
- Now you need to remove the mounting bolt! It is located immediately behind the trim, unscrew it with a screwdriver suitable for the parameters, and then remove the wing, which is no longer secured.
- For the next step, grab an adjustable wrench. Carefully unscrew the core to which the gasket is attached, and then, using sharp scissors, remove the worn gasket.
- Now you need to clean the metal from oxides and other unpleasant deposits. To do this, you can use alcohol, window cleaner, or, in general, any mild solvent that you have on hand.
- We put on a new gasket. This must be done tightly so that no water leaks out!
- Now we assemble the faucet in the reverse order, open the valve going to the mixer and check. If all is well, the repair is complete! Well, if problems arise, then you should think about buying a new mixer.
When screwing the core back in, do not use too much force! You risk damaging the new gasket you just installed!
Let's move on to repairing the next type of crane.
Possible problems and their solutions
List of main problems that arise when replacing gaskets in a mixer:
- After installing the axle box or cartridge in place, water leaks through the gaps are observed. In this case, it is necessary to carefully tighten the threaded connection by 1/8 or 1/4 turn, and then check the tightness of the joint. It should be remembered that over-tightening increases pressure on the rubber gasket, it collapses, and water begins to leak again.
- Water leakage due to the destruction of gaskets made of soft or poor-quality rubber. The parts are destroyed by the metal edges when tightened with little force. It is recommended to purchase a set of rings from another manufacturer.
- Filtration of water from the tap assembly due to improper installation of gaskets or the use of non-standard elastic elements. If during the assembly process the rings are installed skewed, then the pressure of tap water squeezes out the parts, and water begins to flow from the faucet body.
- Error when identifying a defective element. For example, in addition to wear of rubber parts, metal structural elements may be destroyed. If, after replacing all gaskets and properly assembling the mixer, water continues to ooze from the gander or valves, then disassembling the device is necessary to search for damaged elements.
- Damage to the outer chrome surface of the mixer bodies and knobs using metal tools. To protect parts, a rag or cloth is used, which is placed on the surface of the mixer before starting repair work.
The gasket should be changed after diagnosis
Before starting repairs, it is important to determine that it is the gasket that is causing the problem. The main sign will be a dripping faucet in the bathroom. You can make sure that the breakdown was caused precisely by disassembling the mixer and carefully inspecting it.
Often, it is visually easy to determine how worn it is. There may be a noticeable dented area or the product may have lost its original elasticity. In extreme cases, it may be completely destroyed.
Recommendations from experts
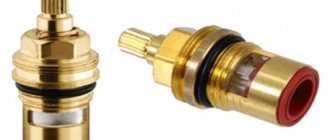
Experts recommend using axle boxes and mixers made of non-ferrous metals (for example, brass). Steel structures with an external protective coating have a reduced cost, but are susceptible to corrosion.
It is not recommended to purchase products made from silumin, since the parts do not have high strength and are destroyed when exposed to water. There have been cases of destruction of the mixer body when unscrewing the axle box.
The most convenient mixer to use is the lever design with a replaceable cartridge. The equipment has a simple design; repair consists of replacing the O-ring or cartridge assembly. To increase the service life of the ceramic element, it is recommended to install filter elements that separate scale particles and sand from the water flow. Additional cartridges allow you to capture salts dissolved in water, reducing the amount of deposits on the surface of the mixer.
Similar articles
How to replace glass in a shower yourself
How to change bathroom pipes with your own hands
Causes of leakage in shower cabin elements
How to properly check the mixer for functionality after repair
To check the operation of the mixer, you do not need to immediately open the water all the way! This may damage newly installed components.
Never supply full water pressure to a faucet whose parts have recently been replaced!
First open the mixer halfway, then increase the pressure. Thus, you slowly increase the water pressure in small “steps”. Check the areas where the faucet is most likely to leak. Now turn off the water. Make sure that when closed the mixer does not whistle or drip. If so, then there is nothing wrong with your faucet.
Reasons for wear of gaskets
The gasket for the mixer is an indispensable element of its device, which is a silicone or rubber seal that visually resembles a ring, the diameter of which corresponds to the diameter of the pipe. It is a consumable material that is used to seal the connecting parts of the crane. The gasket seals the joints, preventing leaks through these most vulnerable areas of the structure. From time to time, these consumables wear out and require replacement. The most common cause of wear on the sealing gaskets inside the bathroom faucet is:
- The size of the seal does not match the diameter of the tap. When installing a faucet in a bathroom, it is extremely important to accurately select the size of the gaskets, otherwise they will wear out faster during operation or even become deformed, losing the ability to perform their function.
Leak - Small grains of sand getting under the gasket. During installation, small particles of metal, rust, and debris may penetrate under the seal. Due to the friction of these elements on the rubber during use of the tap, the gasket wears out and becomes unusable.
- Low quality material. Faucet gaskets are usually made from rubber, latex or silicone. If the product is of poor quality, the material may have lower elasticity, it may deform and wear out.
- Poor water quality. Tap water usually contains a large amount of impurities that have a negative effect on the rubber from which the faucet seal is made. In addition, constant temperature changes lead to deformations and the appearance of cracks.
Note! The service life of the mixer seal is influenced by many factors, ranging from the quality of the material and whether the size corresponds to the diameter of the taps. However, most often the cause of accelerated wear of the gasket is trivial mistakes made by inexperienced craftsmen during installation.