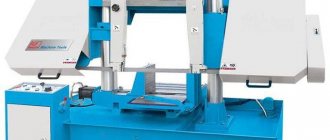
Setting up a metal band saw table
Proper tension of the saw blade is an important factor affecting the quality of the cut and the service life of the saw. Band saws are tensioned according to the type of saw blade selected, so when installing the saw blade, you should always follow the manufacturer's recommendations. After attaching the saw blade, tighten it slightly so that it does not fall off the wheels; fasten the bolts to the saw blade; tension the saw blade until it is set to the recommended tension.
Monitoring the progress of the band saw
Next, you need to check the progress of the band saw on the guide “cubes” and wheels. It is necessary to turn on and after 10 seconds turn off the saw drive. If the band saw drive unit cannot be turned on, the band saw tension limit switch should be adjusted. Turn off the main switch. Make sure the saw blade is seated correctly on the guides. Open the guards and check the position of the saw blade on both wheels. If the distance between the back of the belt and the wheel ledge is 1 - 2 mm, then the installation is correct. If the distance exceeds 1 - 2 mm, or the band moves along the shoulder of the wheel, then the stroke of the saw blade must be adjusted on the bandsaw machine. Afterwards, you need to close the saw blade covers.
Installation of band saw support rollers Installation of support rollers made of hard metals is one of the criteria affecting the cutting accuracy and service life of the saw blade. For this reason, it is necessary to regularly check the condition of the support rollers and their correct adjustment. Tighten the adjusting screw on the back of the guide block until the saw blade does not move. Loosen the screw and at the same time check with your hand whether the guides are creating too much resistance when moving the saw blade. As soon as the saw blade begins to move freely and without resistance, this means that the carbide support rollers are adjusted correctly. Make sure that the support rollers do not create too much resistance when moving the saw blade. Otherwise, the service life of the saw blade and motor drive will begin to decrease.
Specialists from the metalworking department are always ready to advise you on the installation of band saw rollers, monitoring of the band saw and other aspects of servicing band saws, press brakes, hydraulic guillotine shears and hydraulic profile benders. For any questions you are interested in, you can contact us by phone: Moscow | Saint Petersburg
Installation of the guide “cubes” The service life of the saw blade and the quality of the cut largely depend on the correct setting of the guide “cubes”. Therefore, their settings must be checked regularly. Loosen both guide mounting screws and gently press them against the top edge of the tape. At the same time, make sure that the tape does not bend, otherwise the guide “cube” will put pressure on the tape and damage it. Retighten the mounting screws. If the guide cube is adjusted correctly, its top edge and ruler will be parallel.
Adjusting the stroke of the band saw The installation of the band on the impeller and in the guide “cubes” must be regularly monitored. When changing the saw blade, it is especially important to set the saw blade stroke correctly.
Control of the blade stroke If the belt stroke is set incorrectly, problems may arise such as: the saw blade coming off the impellers and, as a result, damage to the saw blade and the protective casing; running of the band saw along the ledge of the tension wheel - in this case, the saw blade and the ledge of the wheel may be damaged. In such situations it is necessary:
- Turn on and after a short period of time turn off the saw drive.
- Turn off the main switch.
- Open the casing.
- Check the installation of the tape on the impellers.
If the distance between the back of the belt and the wheel ledge is 1 - 2 mm, then the installation is correct. If it exceeds 1 - 2 mm, or the tape moves along the shoulder of the wheel, it is necessary to adjust the stroke of the saw blade.
Adjusting the saw blade stroke
- The progress of the saw blade is adjusted using a hex screw in the tension “cube”.
- The required distance between the back of the belt and the wheel shoulder is 1 mm.
- If you turn the screw to the right, the tape will move closer to the shoulder of the tension wheel.
- If you turn the screw to the left, the tape will move away from the shoulder of the tension wheel.
- After all the settings, you need to check the tape progress again.
Installation of the brush The brush affects the cutting performance and accuracy, the service life of the saw blade, impellers, and support roller made of hard metals. For this reason, the brush must be checked during each shift. Make sure that the ends of the brush bristles do not touch the bottom of the saw blade teeth .
Source
Preventing the wave defect
There is such a problem as the appearance of unevenness on the surface of the sawn board, called a “wave”. The appearance of a defect is influenced by several factors:
- inexperience or inattention of the machine operator;
- incorrect settings (or lack thereof) of band saws;
- tape quality;
- type of wood.
Worker (operator)
Quality depends on the worker at the sawmill
The correct settings of the band sawmill, the choice of sawing speed and band in accordance with the type of timber depend on his professionalism.
At low speeds, the board turns out to be “ribbed”; if it exceeds the permissible speed, unsawn sections appear in the form of a “wave”.
Setting plays a big role in the smooth and high-quality operation of the machine.
Machine. The working units of a band sawmill affect the quality of log processing; wear of one of them or a misconfiguration will lead to a “wave” defect.
Guide rollers
Diagram of band sawmill rollers
With their help, the position of the saw relative to the support table of the machine is set. The accuracy of the location of the rollers is verified by the adjusting ruler, which is included in the band sawmill kit. The working surface is monitored for wear, which leads to vibration of the saw blade; deep risks are not allowed.
Worn studs and locknuts must also be replaced.
After the damaged components have been replaced, the saw rollers are fully adjusted. The roller guide drive assembly should be checked for clearance.
Bed rollers. When worn out, these parts are replaced and adjusted. Vertical guides are aligned perpendicular to the frame and control the correct fit of the rollers (upper and lower) to the guides.
Machine installation
When installing, it is important to ensure that the position does not move, especially if it is not bolted to the floor, as indicated in the instruction manual. Gaps are not allowed. If play is established, a steel plate of the required thickness is placed under the legs of the machine. Some models of sawmills provide additional support legs that prevent the bed from sagging.
Sawmill installation diagram
Wood
Some characteristics of the timber influence the quality of the cut, in particular the appearance of a “wave”.
Different densities of wood. In the middle, the log is less dense than in the upper layers, so more chips are formed when sawing the central part. When cutting these areas, the saw cannot cope with the removal of sawdust, it begins to heat up and bend, resulting in a “wave”.
Types of wood
It is difficult to select the parameters of a band sawmill so that the hard outer and soft inner layers can be sawed well at the same time. It is necessary to redo the cutting pattern or carry out an additional operation to level the beam.
A “wave” is formed when processing frozen wood. If the timber is frozen equally, then this problem does not arise, but if you have to saw partially frozen logs, then a “wave” defect will arise, as when processing wood of different densities.
When sawing logs with a large number of knots, there is a risk of “waves” appearing. It is necessary to gradually reduce and then increase the cutting speed when processing them.
When processing the resinous surface of a log, sawdust sticks to the sawmill blade, which leads to its thickening, it heats up, the tension weakens, and a “wave” is obtained.
Recommendations for the tension force of band saws
Fig. 1: Schematic diagram of the belt tension mechanism
There are several basic designs for the band saw tension mechanism:
— the tension of the band saw is carried out manually due to the muscular efforts of the worker and is supported by a set of special “disc” springs; — the initial tension is carried out manually, and then the hydraulic system of the machine provides the required working tension of the saw; — the hydraulic system of the machine fully provides the required tension force on the saw blade.
The tension force depends mainly on the width of the tape web. This is a tabular value that applies to all types of bimetal, carbide and diamond saws. It is measured in N/mm2 (see Table 1).
| Saw blade width, mm | Tension force, N/mm2 |
| 20 | 150 |
| 27 | 180 |
| 34 | 200 |
| 41 | 250 |
| 54 | 300 |
| 67 | 300 |
| 80 | 350 |
Table 1: Recommended tension force for band saw blades
* Notes: When designing band saw machines, the tension force is calculated as 1/4 of the yield strength of the blade. For high-performance sawing, the blade must be tensioned with a force of 300 N/mm2, however, not all machine tool builders provide the necessary parameters for the saw frame components. For example, this occurs in low-cost equipment designs where the rigidity of the saw frame and band drive units is neglected to reduce the cost and life of the machines.
If the tension is excessive, cracks quickly form on the band blade and the saw breaks, and if the tension is insufficient, the saw makes non-linear cutting, which can lead to jamming of the blade in the cut and chipping of the teeth.
Therefore, you should always remember that: - setting the correct belt tension has a significant impact on its durability! - to control the correct tension of the band saw, special devices are used - TENSIOMETERS
; The operating principle of a tensiometer is based on the ability to measure the plastic elongation of a band saw blade.
Sequence of steps for measuring belt tension using a tensiometer
1.
Install the new band saw on the machine.
At the same time, make sure that the saw blade does not slip off the pulleys. 2.
Place the tensiometer on a vertical section of the web between the movable and fixed guide posts.
3.
Securely fix the device to the canvas using two screws.
4.
Align the “zero” position of the indicator scale with the position of the arrow (see Fig. 2):
Rice. 2: “Zero” position of the tensiometer indicator needle
5.
Tension the band saw using the tension unit.
In this case, the arrow of the device will begin to rotate towards the “green” zone on the indicator scale. 6.
When the arrow reaches the required tension force value, stop tensioning the blade (see Fig. 3):
Rice. 3: Required web tension value
A slight deviation of the tension force from the recommended values is allowed, no more than ± 10%.
If the tension force is insufficient or is significantly greater than the recommended values, it is necessary to adjust or repair the belt tension unit, because Over time, the parts and mechanisms of the tension unit wear out and fail, which does not allow the required tension force to be provided and leads to a decrease in the service life of the tool.
Source
Setting up the band saw
All moving parts of the band saw must be well lubricated so that all sliding guides will work without additional resistance. This ensures that the linear dimension is maintained during repeated cuts. Fittings are lubricated with high quality paste and other machine surfaces are lubricated with general industrial lubricating oil. Check the bearings on the wheels to ensure they are seated flush with the belt. A worn bearing can cause the blade to rotate slightly, creating a beveled cutting motion. Depending on the design of your band saw, you may have to replace the entire wheel assembly. Be sure to follow the manufacturer's recommendations and specifications. Inspect the blade cleaning brush to ensure it is making sufficient contact with the belt blade. If the metal bristles have worn down, consider replacing with a nylon bristle brush. Nylon brushes don't wear out as quickly because the bristles are flexible and can last longer.
A crooked cut may be a sign of vibration and belt slip. If the band saw is old, check the drive for wear. A worn drive can cause vibration in the clamping system, which can be transmitted to the belt. This produces a wavy cut. Usually the drive cannot be replaced, or the cost to repair it is almost equal to the cost of a new bandsaw. If it's time to replace it, choose a new, high-quality band saw instead. Don't let price be your only consideration when making this choice. If your band saw drive is still working, then you need to take a serious look at how you maintain the machine. In most cases, a crooked cut can lead to irreparable defects. In other cases you will need to conduct a full inspection. Did the tape really take away? Is the belt tension too low? Ultimately, by understanding all of these five key factors listed above, you are sure to achieve a quality cut every time.
| You can order any of your materials at our production Contacts: , , , |
Additional technical information can be read in the “Articles” section.
Toolmaker's Quick Guide
Band saw blade information
Band saws for cutting metals
For modern band saw technologies for metal processing, the market today offers band saws made of carbon steel and bimetallic ones - with a spring base and teeth made of high-speed steel or carbide. The variety of design parameters of band saws in combination with the use of optimal cutting modes makes it possible to ensure high productivity and reduce the cost of the technological process of processing on band saw machines compared to other methods of separation cutting of workpieces.
Types of band saws
Band saws made from high-quality high-carbon tool steel are designed for economical cutting of a wide range of alloyed and non-alloyed steels with a tensile strength of up to 80 kPa/mm?, but in terms of their technical and operational indicators they are inferior to bimetallic blades.
The most widely used in modern band saw technology are bimetallic saws, especially with a high-speed steel tooth. The cutting part of the teeth is made of high-speed steel M42 (analogous to 11Р2М10К8). This steel, highly alloyed with molybdenum and cobalt, has high hardness (up to 950 HV) and red resistance. Specially selected spring steel of the saw base provides it with strength and durability, and a reliable electron beam welded connection with the cutting teeth allows these saws to be used in the most difficult production conditions. Saws of a new design with a combined pitch are most suitable for cutting pipes, profiles and workpieces of variable cross-sections. The variable pitch of the saw tooth can significantly reduce vibration, increase the stability and efficiency of the process of cutting workpieces of variable cross-section.
Band blades with carbide teeth are used for the most difficult cutting conditions. They are used on high-performance and rigid double-column band saws for cutting difficult-to-cut materials such as cast iron, non-ferromagnetic alloys, rare earth metals and alloys such as Monel, Inconel, Hastelloy, etc. with high nickel and titanium content, and at the same time significantly reduce the cost of separation cutting . The design of the socket for placing the carbide plate guarantees the strength of its connection with the saw blade. The saw teeth are set, which provides the necessary clearance when sawing and removal of chips. These saws are used for cutting only solid sections with a diameter of 60 mm or more.
Tape cloth
A sharp and well-oiled blade will produce a quality cut. As the cutting edge of the gear blade becomes dull during operation, more heat is generated, and at some point this amount of heat produced may become greater than the ability of the coolant to remove this heat from the cutting zone, especially if the coolant is already old or has an incorrect ratio with water. Make sure the blade tooth pitch is correct for the material being cut. Using too small a tooth pitch may cause chips to become lodged in the small chip grooves of the blade and interfere with the cutting process, as well as create a rough cut surface on the workpiece.
For most applications, a coarser belt tooth pitch is more efficient and increases productivity. Inspect the resulting chips after cutting. It should be small and curled. If not, check the sliver and the sliver cleaning brush to make sure chips are not getting caught in the flutes. Blue chips are a sign of too much heat being generated. Make sure the band saw feed is set correctly for the workpiece. Even a small adjustment to this parameter can significantly improve the quality of the cut. You need to check this parameter in the tape manufacturer's catalog. Also check the guides of the band saw, including the placement and accuracy of the inserts and rollers. Make sure the guide rollers can rotate freely. A jammed or damaged roller can jam the belt.
