Description of a homemade plasma cutter
If you need a plasma cutter for domestic use, as well as for the use of such equipment in construction, then such a cutter can be made with your own hands from a simple welding inverter . Subsequently, self-made equipment will be distinguished by its versatility in use and will allow you to effectively cut non-ferrous metals and thick sheet steel.
Making such a cutter with your own hands from an inverter will not be particularly difficult. You can easily find diagrams for the implementation of such devices on the Internet and, using the calculations obtained, make such an easy-to-use device. We can recommend that you make plasma cutters based on compact welding inverters, which will significantly simplify the design and guarantee the necessary efficiency of such devices.
Homemade plasma cutting machines are not equipped with CNC, so it will be impossible to use such equipment for work that is fully controlled by automation. You must understand that using such homemade plasma cutters it will be impossible to make two perfectly accurate parts.
A homemade plasma cutter will consist of the following elements:
- Plasmatron.
- DC source.
- Compressor or gas cylinder.
- Oscillator.
- Power cables.
- Connection hoses.
Step-by-step manufacturing procedure
The process of creating a CNC-controlled structure consists of several main stages:
- Preparation of the base. It is very important to level the surface perfectly even, so it is best to use a level for this purpose.
- The frame is being cooked. The “legs” of the product are additionally strengthened. For manufacturing, you can use pipes of various diameters.
- In order for the product to serve its owner for more than one year, it is necessary to take care of its protection. For this purpose, the surface is treated with a special agent, which is used to prevent the formation of corrosion.
- The supports, water table and slats are installed.
- After the main elements are ready, it is necessary to mount the guides and also paint the table.
When the bulk of the work is completed, all that remains is to worry about installing the final elements of the system. The portal is placed on the guides, and sensors and the engine are placed on it. After this, a rack, a motor for each axis, and surface sensors are attached.
It is important to consider that if a limiter is not installed on the portal, then during operation it may simply slide off the surface.
To avoid damaging the product during operation, you must carefully hide the wires!
Principle of operation
The operating principle of such equipment is extremely simple:
- The current source used, and in our case it is an inverter, generates voltage and supplies it through cables to the plasmatron.
- The plasma torch contains two electrodes, between which a high-temperature arc is excited.
- Through specially twisted channels under high pressure, a stream of air or gas is supplied to the working area with a ignited arc.
- A work cable is pre-connected to the product being cut, which closes to the surface being cut and provides the ability to work with metal.
DC power supplies
Plasma cutting technology will invariably require high operating current power, the performance of which should be at the level of semi-professional and professional inverter welding machines. It is not recommended to use transformer welding machines as a power source, since such devices are bulky and inconvenient to use. But an inverter will be an excellent choice, since such devices combine compact dimensions and provide high-quality electric current.
Schemes and drawings of a plasma cutter with your own hands are simple, while the costs of manufacturing such equipment are significantly reduced. A hand-made compact plasma cutter made from a welding inverter will be able to cope with cutting metal whose sheet thickness will reach 30 mm. If we talk about the advantages of such home plasma cutters made using an inverter, we note the following:
- No metal sparks.
- Smooth edges.
- Line accuracy.
- Overheating problems resolved.
Important: making a homemade plasma cutter based on an inverter is not difficult. It is only necessary that the device generate an electric current with a force of at least 30 Amps.
The current source used must meet the following requirements:
- Power supply from a network with a voltage of 220 Volts.
- Ability to operate with a power of 4 kW.
- The idle speed should be 220 Volts.
- The current adjustment range is in the range of 20−40 Amperes.
Plasma torch design
The plasma torch is the second most important element of a metal cutter. Let's take a closer look at the design of the plasma torch and the principle of its operation. It consists of a main and auxiliary electrode. The main electrode is made of refractory metals, and the auxiliary electrode, which has the shape of a nozzle, is usually made of copper.
In a plasma torch, the cathode is the main electrode made of a refractory metal, and a copper electrode-nozzle is used as an anode, which makes it possible to provide high-quality electric current and a high-temperature arc for cutting metal.
The completed plasma torch is responsible for creating and maintaining an arc that is located between the workpiece and the cutter. The thickness of the cut, as well as the temperature created by such a cutter, will depend on the shape and design of the nozzle. The nozzle used can be hemispherical or conical, providing an operating temperature of 30,000 degrees Celsius.
During operation of the plasma torch, the main electrode and nozzle may wear out, which leads to a deterioration in the quality of metal cutting. If these elements become so worn, they should be replaced with new ones, which will ensure excellent quality of work with metal.
The plasma torch is supplied with working gas from a cylinder, using special heavy-duty gas hoses that can withstand high pressure. In each specific case, depending on the material being worked with, the gas used, which is necessary for cutting the metal, may differ.
The working gas is supplied through special channels, and the presence of numerous turns in the supply tube makes it possible to provide the necessary air turbulence, which, in turn, guarantees a high-quality cutting plasma arc that will have the correct shape. This improves the quality of metal cutting and welding and minimizes the thickness of the seam.
Oscillator
A special feature of plasma cutters is the fact that to start work, it is necessary to first ignite the arc , only after that gas is supplied to the plasma torch, the arc is created at the required temperature and the metal is cut. An oscillator is used as such a kind of starter, which serves to pre-ignite the arc. The implementation scheme of the oscillator is not difficult.
On the Internet you can find functional and electrical diagrams of oscillators, which will not be difficult to complete. It is only necessary to use high-quality electrical circuits and capacitors, which will be suitable in their parameters to the electric current generated by the inverter. Depending on its type, such a torch can be connected to the plasma torch power circuit in series or in parallel.
Schematic diagram of the device
A typical drawing of a homemade plasma cutter shows the following elements:
- Electrode. This component receives voltage from the power supply, due to which the gas environment is ionized. To produce the rod, refractory metals are used - titanium, hafnium, zirconium.
- Nozzle. The unit allows air to pass through and creates a directed stream of ionized gas.
- Cooler. Removes heat from the nozzle, preventing overheating of the plasma torch.
We recommend reading How to make your own induction heater from a welding inverter
The device, assembled according to a standard scheme, has the following operating principle:
- Pressing the “Start” button turns on the relay. It supplies electricity to the control unit.
- The second relay directs current to the inverter. After this, the burner purge system is turned on. A powerful air stream enters the chamber, cleaning it.
- The oscillator is activated, which ionizes the working gas circulating between the anode and cathode. At this stage, the primary arch appears.
- When the torch is brought close to the metal, a discharge occurs. A cutting arc is formed.
- Using a reed switch, the ignition current supply is turned off. If the cutting arc disappears, it is resumed.
- After cutting is completed, the relay turns on the compressor. The air it pumps cools the nozzle and removes metal combustion products.
Working gas
Even before choosing a specific design for manufacturing a plasma cutter, you should decide on the scope of use of such equipment. If you plan to use the device exclusively for working with ferrous metals, you can exclude gas cylinders from the circuit and use only a compressor with compressed air. If you plan to use such equipment for brass, titanium and copper, then you need to choose a plasma cutter with a nitrogen cylinder. Aluminum cutting is performed using a special gas mixture with hydrogen and nitrogen.
Setting up equipment when performing plasma cutting operations
The plasma cutting process and its quality characteristics are standardized according to GOST 14792-80 and contain indicators that must correspond to:
- by the surface roughness of the end edge;
- by influence on the thermal zone;
- by linear deviation;
- non-perpendicularity of the end surface.
- To maintain high cut quality, two indicators are especially regulated:
- The cutting width is adjusted by selecting the diameter of the nozzle outlet and the arc current. As the control values increase, the cutting width automatically increases. If it is necessary to change the cutting direction, a compensator is used to ensure the accuracy of the specified program.
To cut metal pipes, plasmatrons produced by specialized companies are used:
Features of using a plasma cutter
Let's figure out how plasma cutting of metal is done with our own hands. After turning on the inverter, the generated electric current enters the plasma cutter onto the electrode, and the oscillator ignites the electric arc. Its temperature can initially be 6-8 thousand degrees. Immediately after the arc is ignited, air or gas is supplied to the nozzle under high pressure, through which an electric charge passes. The air flow is heated and ionized by an electric arc, after which its volume can increase hundreds of times, and the gas and air itself begins to conduct electric current.
Read also: Guides for sharpening drills
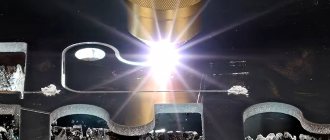
A plasma cutter produces a thin jet of plasma, the temperature of which can reach 30,000 degrees. Subsequently, such a high-temperature plasma jet is supplied to the metal being processed, which makes it possible to cut heavy-duty metal elements.
One of the features of using plasma cutting is the fact that the metal being processed is cut and melted exclusively at the point where it is exposed to the plasma flow. It is extremely important to correctly position the plasma impact spot, which should be located strictly in the center of the working electrode. If this requirement is neglected, the air-plasma flow is disrupted, which deteriorates the quality of metal cutting.
The quality of work with such a plasma cutter will also depend on the air flow rate. It is recommended that all work be carried out with a current of 250 Amperes, while the speed of the air stream will be 800 meters per second. This will allow you to easily work with metals with different refractoriness characteristics, ensuring high-quality cutting without thermal effects on the structure of the alloy.
A plasma cutter is a special device that allows you to quickly, efficiently and effectively cut metal of various structures. You can either purchase plasma cutters that have already been manufactured in a factory, or make them yourself. You can easily find suitable schemes for making plasma cutters from an inverter or transformer welding machine, which will allow you to make such equipment yourself, saving on buying it in a store.
Recommendations from professional welders
Working with a plasma-type device differs from welding metals with electrodes. The process of processing a workpiece with a device of the first type consists in the peculiarities of the technological process. For a manual plasma cutter, you will need a supply of gaskets for hoses; the lack of consumables can lead to damage to the unit.
A torch should always be available as a spare element , since the nozzle undergoes rapid heating and cooling when performing tasks. It is also important to have refractory electrodes made of zirconium, thorium, beryllium or hafnium in stock. When using special-purpose electrodes, it should be remembered that when heated, beryllium releases radioactive oxides, and volatile toxic elements are released from thorium.
To cut metal according to the same type of program, it is best to use a plasma cutter of a separate modification, which is equipped with protective covers for the operator’s hands. Operation of the equipment is associated with a threat to the life and health of personnel; only highly qualified specialists are allowed to work with the plasma installation.
Originally posted 2018-03-28 15:30:45.
DIY plasma machine
DIY plasma machine
Alex Kost » Jul 10, 2021 11:21 am
Gentlemen, help the amateur.
There’s a wild amount of money poured in, so there’s a risk of screwing it up somehow, tell me how to put it all together?
Thanks in advance to everyone who responded!
Re: DIY plasma machine
odekolon » July 10, 2021, 11:59 am
deliver the bottle to the electronics engineer!
I would take one power supply, 48 volt amperes at 20.
Where is the THC?
Re: DIY plasma machine
aftaev » Jul 10, 2021, 12:20 pm
You bought the slag, when you connect it you will understand why there are Nema 42 and 51 steppers on the plasma? The plasma must travel quickly, but it will crawl.
This is the source of problems.
They don’t install Nema 42 on heavy milling machines, but you’re about to screw it up on plasma. I have never seen such cruelty
Re: DIY plasma machine
odekolon » 10 Jul 2021, 13:16
Yeah, I didn’t even look at the sizes.
Right now I’m running homemade plasma 1700x2700. engines 23 x 110 x 2 pcs., Chinese nonname, excellent at carrying the portal 12 m/min. More is possible, I just don’t see the point for this project..
scheme (though without THC) here
Enable circuits are drawn “just in case” - in fact, they are wired, but not connected anywhere. Drivers are always enabled when power is applied.
Don’t worry, everyone makes mistakes, think about how to get out of the situation with the least losses.
for example, if the machine is on racks, put larger gears directly on the axis of the engine - everything will fly at amazing speed!
Re: DIY plasma machine
Alex Kost » 10 Jul 2021, 13:51
I don’t understand why it has to crawl, they will work on a rail, approximately 160 mm per revolution (portal 4x2 meters). Let me explain, I took it with a power reserve, because... The portal is planned to be multifunctional with the ability to change the working element on the Z axis. The X beam will ride on 1 drive (51), the portal will have a gusset, the weight will be stored there. Z will be on Ballscrew 2021.
I agree, the option is not the best, for the first time, there is no money left for “hypertherm”.
They were at a big discount.
Does a super board for 6 axes even support TNS? [/quote] What kind of beast is this? (I'm an electronics amateur) I planned to connect the board to a computer.
Thank you for not kicking too hard yet.
Re: DIY plasma machine
Alex Kost » 10 Jul 2021, 14:06
Thank you so much for the diagram!
Thanks to everyone who responded.
Re: DIY plasma machine
odekolon » 10 Jul 2021, 14:10
yes, it’s fine, it will fly, I think it will accelerate to 30 meters per minute easily
It’s a bit much, but it’s quite alright, in principle the engine can be changed to a weaker one, but the fact that it’s 20 mm per revolution is very good!
Please also note that some of your engines are pure steppers, and some are hybrid servos. But for you, it doesn't really matter
Yes, and put it on, it’s not scary, the dynamics will drop a little. When starting, set the current to a minimum, as the axes move in, something will start to work, you will increase it.
THC – search for “plasma thc” and read. Without it, the machine loses greatly in functionality. Although you can install a mechanical one
Re: DIY plasma machine
aftaev » 10 Jul 2021, 14:12
On plasma/gas cutting portals measuring 3x12 meters, on which there is a booth in which a person sits and rides along with the portal, there are often 400 watt servos (this is less than 2 Nm) + gearbox + rack. Look how many steps you have
If you buy steppers with a reserve that you don’t really need, then you won’t have enough money for normal plasma. As soon as this Chinese miracle burns out from the metal dust, the cut will be crooked/oblique; there will immediately be enough money for normal plasma
Re: DIY plasma machine
aftaev » 10 Jul 2021, 14:20
Re: DIY plasma machine
odekolon » 10 Jul 2021, 14:56
Re: DIY plasma machine
Alex Kost » 10 Jul 2021, 14:59
All the engines of the house are on the windowsill.
In the description they all say “hybrid”, tell me which one is a pure stepper. In the first message I confused the Z drive with the Y drive.
Re: DIY plasma machine
odekolon » 10 Jul 2021, 15:05
Re: DIY plasma machine
Alex Kost » 10 Jul 2021, 15:14
I don’t argue, maybe I didn’t do it quite right, you can scold me for this as much as you like, but it’s too late, the drives are at home. I ask for help given that they already exist.
I hope filters and careful operation will help, but then we’ll think about it.
Re: DIY plasma machine
aftaev » Jul 10, 2021, 03:23 pm
Re: DIY plasma machine
Alex Kost » 10 Jul 2021, 15:37
Re: DIY plasma machine
aftaev » Jul 10, 2021, 03:51 pm
Steppers have a property: the higher the speed, the lower the torque. That is, when the stepper is at its maximum torque, as soon as it starts to step (spinning) the torque drops. At some rpm the engine simply stops due to lack of torque. This depends on the inductance of the windings. The greater the motor, the greater the inductance. Nema 17 rotates at 3000 rpm, and Nema 42 at 150 rpm (that's approximately). Inductance can be thought of as a barrel into which you need to pour water. When the stream of water (voltage) is small, the barrel does not have time to fill quickly enough. And the faster the speed, the faster you need to manage to fill. This is how it is with motor windings, when the voltage is small and the inductance is large, the windings simply do not have time to be saturated with current. My drive was 80V constant, yours says 220V alternating. If the drive is really 220V, and not some clever way to cut the voltage in the drive, then it can rotate faster. Such large motors are more suitable for rotary axes.
The servo torque is small, but the same throughout the entire rev range.
Re: DIY plasma machine
Alex Kost » 10 Jul 2021, 20:25
Please tell me which of the engines is a clean stepper?
In addition to 6 axes, the board also allows you to connect pnp sensors. Does anyone have a software algorithm based on the sensor signal?
Re: DIY plasma machine
aftaev » Jul 10, 2021, 08:39 pm
What's the difference between clean/dirty/hybrid? The main thing is that it spins with the right torque, at the right speed.
This board works via USB. And cheap plasma has high-frequency ignition = strong interference = problems. And USB loves interference. These scarves work great on our plasmas https://www.ebay.com/itm/1pcs-5-Axis-CN. xyBjBTWMPR
What does algorithm mean? It is connected to the board, and then the signal is inverted in Mach3 if necessary.
Read also: Drawings for a manual jigsaw on wood
Alex Kost, to assemble a machine you don’t need to put all the problems together. The task needs to be split into parts. We screwed on one stepper and set it up in Mach3. We set up another one, then the third one can be installed with HOME sensors (although we work without them), and when everything is already absolutely super/perfectly working, install the TNS and metal detector sensor. We have been working fine without them for 5 years now, since a clumsy TNS creates more problems than it helps.
Re: DIY plasma machine
Alex Kost » 10 Jul 2021, 21:22
I would like not only power, but also a little precision. All the same, they will work on the rail.
Initially I wanted to build a map of the plane and work on jumping to the desired height. But I think the thermal deformation of the sheet during the cutting process will not allow such an algorithm.
Plasma cutting is actively used in many industrial fields. However, a plasma cutter is quite capable of being useful to a private master. The device allows you to cut any conductive and non-conductive materials with high speed and quality. The technology of work makes it possible to process any parts or create shaped cuts, which is carried out by a high-temperature plasma arc. The flow is created by basic components - electric current and air. But the benefits of using the device are somewhat overshadowed by the price of factory models. To provide yourself with the opportunity to work, you can create a plasma cutter with your own hands. Below we provide detailed instructions with the procedure and a list of equipment that is needed.
DIY chain pipe cutter | The best homemade products
A piece of pipe can be cut in many ways, be it a hacksaw or a grinder, but the cut may not be very even, and sometimes this is quite critical.
For a more even cut, pipe cutters are used, which are very expensive if the diameters of the pipes you plan to cut with them are large enough, from 40 mm and above. But you can make such a tool yourself without spending a lot of money on it, since we will make a pipe cutter from a chain and a piece of square pipe and a couple of other parts that you probably have in abundance in your garage. You will only have to spend money on a cutting roller for a pipe cutter; this is a consumable item, so they are sold separately in stores. This pipe cutter can cut steel, copper, duralumin and PVC plastic pipes. Plus, such a tool works quietly and does not require electricity to operate. What is needed to create a pipe cutter:
- Square steel profile;
- A piece of chain from a motorcycle;
- Cutting roller for factory pipe cutter;
- Strips of sheet metal 5-7 mm thick;
- Bolt with nut;
- A section of steel pipe (sleeve).
DIY chain pipe cutter
How to make a pipe cutter from a chain and profile, manufacturing process:
First, we make holders for the cutting roller, for this we drill holes in strips of sheet metal; I already had such mounts ready-made.
We assemble the holder; to do this, we place the roller between the fasteners and tighten them with a bolt and nut.
DIY chain pipe cutter
Next, we insert the holder into a piece of profile pipe that will serve as a handle, but we insert it not quite all the way, but so that the roller can rotate and weld the holder to the handle.
DIY chain pipe cutter
DIY chain pipe cutter
Next, we need to cut small pieces the width of the handle from a thick steel rod and weld them at the beginning of the handle near the roller so that the chain does not ultimately interfere with the roller.
DIY chain pipe cutter
DIY chain pipe cutter
Then you need to weld one end of the chain to the handle.
DIY chain pipe cutter
Now we will weld a piece of a pin to the second end of the chain.
DIY chain pipe cutter
Then you need to weld a piece of round sleeve to the end of the handle through which the pin should move freely.
DIY chain pipe cutter
That’s it, we select a nut for the stud and our DIY chain pipe cutter is ready!
DIY chain pipe cutter
Now all that remains is to test it; to do this, we place the pin in the bushing and screw the nut onto it.
DIY chain pipe cutter
We clamp the pipe in a vice, put the pipe cutter on the pipe and tighten the nut, then simply twist the pipe cutter by the handle around the pipe, gradually with each turn tighten the nut on the pipe cutter with a wrench and then twist the tool around the pipe until the piece of pipe is completely cut off.
DIY chain pipe cutter
DIY chain pipe cutter
bestdiy.ru
What to choose: transformer or inverter?
Due to the presence of features and parameters of plasma cutting devices, it is possible to divide them into types. Inverters and transformers have gained the most popularity. The cost of the device of each model will be determined by the declared power and operating cycles.
Inverters are lightweight, compact in size and consume minimal electricity. Disadvantages of the equipment include increased sensitivity to voltage changes. Not every inverter is able to function within the specific conditions of our electrical network. If the device’s protection system fails, you must contact a service center. Also, inverter plasma cutters have a rated power limitation of no more than 70 amperes and a short period of switching on the equipment at high current.
A transformer, traditionally, is considered more reliable than an inverter. Even with a noticeable drop in voltage, they lose only part of the power, but do not break. This property determines the higher cost. Plasma cutters based on a transformer can operate and be switched on for a longer period of time. Similar equipment is used in automatic CNC lines. The negative aspect of a transformer plasma cutter will be its significant weight, high energy consumption and size.
The maximum metal thickness that a plasma cutter can cut is from 50 to 55 millimeters. The average power of the equipment is 150 - 180 A.
general rules of use (120 photos)
Often, when performing various manipulations with pipes during plumbing work, we are faced with one common problem: we have nothing to cut the pipe into pieces of the required length. In this case, such an indispensable tool as a pipe cutter comes to our aid.
This device allows you to cut pipes at any desired angle, requiring a minimum of your effort. The cuts are smooth. In dividing pipes into parts, no other tool can compare with a pipe cutter (we are talking about universal tools), because the only purpose of this device is to cut the pipe.
But don’t rush to immediately run to the store and grab the first pipe cutter you come across. The fact is that these devices are different, just like the pipes for which they are used, and therefore you first need to decide what your purpose is and which device is suitable for you.
Brief contents of the article:
Manual option
This type of device is a simple (both to use and to assemble) and convenient tool that allows you to cut small (mostly plastic) pipes using human muscle power and without any problems.
The manual pipe cutter easily fits into a standard man's hand, which ensures ease of use. Using the principle of leverage, this tool lowers the blade step by step, which slowly but surely cuts the pipe.
Photos of a manual pipe cutter can be seen in our gallery or on the Internet.
Roller pipe cutter
A roller pipe cutter has wider functionality than a manual one, allowing its owner to cut metal pipes using rotating rollers (hence the name).
This tool is also hand-held, but due to its more complex assembly, it allows you to cut metal without much effort. This type of pipe cutter takes up less space to work with and is generally superior to its manual counterpart.
Chain pipe cutter
Perhaps the most advanced pipe cutter in existence is the electric chain pipe cutter. This device allows you to cut pipes with a small diameter made of cast iron, concrete and ceramics (fragile materials). It is a power tool equipped with a chain with rollers or disks that compress the pipe and cut it.
General rules of use
Before you try out a new cutting tool, you should read the instructions supplied with the pipe cutter, the general provisions of which boil down to the following rules:
Before using the pipe cutter, open the latch, followed by the tool itself. The pipe cutter must be installed on the pipe at the location of the intended cut. If there is a latch, be sure to close it to prevent the rollers from becoming damaged.
Once the guides touch each other, align the rollers. Turn the existing screw until the cutting rollers touch the pipe.
Tighten the screw a little more, about 180 degrees. If you find yourself using too much force to cut in the future, loosen the screw a little.
Ready! Now you can start cutting. To do this, you need to make a pendulum motion with the handle about 130 degrees, turning the handle 180 degrees after every third swing. Repeat the last 2 steps until you cut the pipe.
Once you understand how to use a pipe cutter, it is advisable to learn how to care for the tool. You should always use only sharp rollers, as dull ones can lead to unpleasant cut deformations.
Slowly, turning the handle counterclockwise, open the slide at least halfway to begin replacement. Make sure which way the unnecessary roller mount is knocked out, and then remove it. Replace the used roller with a new one. Insert the roller and its pin into its original position.
When using a pipe cutter, hold it directly to the axis of the pipe being cut, this will significantly reduce the load and your tool will last much longer.
Do not install rollers that are different in relation to each other; they must be of the same size and quality, otherwise they will all simply break.
Do not forget to remove rust before work, this will significantly reduce the load on the working part. Thoroughly lubricate the cutting rollers before use and the entire tool before storage.
Average cost of factory devices
The range of plasma cutters for manual cutting of materials is now truly huge. Price categories are also different. The price of devices is determined by the following factors:
- Device type;
- Manufacturer and country of production;
- Maximum possible cutting depth;
- Model.
Having decided to explore the possibility of purchasing a plasma cutter, you need to be interested in the cost of additional elements and components for the equipment, without which it will be difficult to fully operate. Average prices for devices, depending on the thickness of the metal being cut, are:
- Up to 6 mm – 15,000 – 20,000 rubles;
- Up to 10 mm – 20,000 – 25,000;
- Up to 12 mm – 32,000 – 230,000;
- Up to 17 mm – 45,000 – 270,000;
- Up to 25 mm – 81,000 – 220,000;
- Up to 30 mm – 150,000 – 300,000.
Popular devices are “Gorynych”, “Resanta” IPR-25, IPR-40, IPR-40 K.
As you can see the price range is wide. In this regard, the relevance of a homemade plasma cutter is increasing. Having studied the instructions, it is quite possible to create a device that is in no way inferior in technical characteristics. You can select an inverter or transformer at a price significantly lower than the prices presented.
Features and purpose of a plasma cutter
Inverter plasma cutting is used to perform work in both home and industrial environments. There are several types of plasma cutters for working with different types of metals.
There are:
- Plasma cutters operating in an environment of inert gases, such as argon, helium or nitrogen.
- Instruments operating in oxidizing agents, such as oxygen.
- Equipment designed to work with mixed atmospheres.
- Cutters operating in gas-liquid stabilizers.
- Devices operating with water or magnetic stabilization. This is the rarest type of cutter, which is almost impossible to find on the open market.
A plasma cutter or plasmatron is the main part of plasma cutting, responsible for direct cutting of metal.
Disassembled plasma cutter.
Most inverter plasma cutters consist of:
- nozzles;
- electrode;
- protective cap;
- nozzles;
- hose;
- cutter heads;
- pens;
- roller stop.
The operating principle of a simple semi-automatic plasma cutter is as follows: the working gas around the plasma torch is heated to very high temperatures, at which plasma appears that conducts electricity.
Then, a current passing through the ionized gas cuts the metal by local melting. After this, the plasma jet removes the remaining molten metal and a neat cut is obtained.
Based on the type of impact on metal, the following types of plasmatrons are distinguished:
- Indirect action devices. This type of plasmatron does not pass current through itself and is suitable only in one case - for cutting non-metallic products.
- Direct plasma cutting. Used for cutting metals by generating a plasma jet.
The design of a plasma cutter and recommendations for working with it vary greatly depending on the type of device.
Operating principle
After pressing the ignition button, the source of electricity starts, supplying high-frequency current to the working tool. An arc (pilot) occurs between the tip located in the cutter (plasma torch) and the electrode. Temperature range from 6 to 8 thousand degrees. It is worth noting that the working arc is not created instantly; there is a certain delay.
Then compressed air enters the cavity of the plasmatron. This is what a compressor is designed for. Passing through the chamber with a pilot arc on the electrode, it is heated and increases in volume. The process is accompanied by ionization of the air, which transforms it into a conductive state.
Through a narrow plasma torch nozzle, the resulting plasma flow is supplied to the workpiece. The flow speed is 2 – 3 m/s. Air in an ionized state can heat up to 30,000°C. In this state, the electrical conductivity of air is close to the conductivity of metal elements.
After the plasma contacts the surface being cut, the pilot arc is switched off and the working arc begins to operate. Next, melting is carried out at the cutting points, from which the molten metal is blown with supplied air.
You can read in detail about plasma cutting technology and working with equipment in the corresponding article.
Recommendations for work
Plasma cutting technology drawing.
When working with a plasma cutting machine, to achieve the best results, you must follow the following recommendations:
- regularly check the correct direction of the gas plasma jet;
- check the correct choice of equipment in accordance with the thickness of the metal product;
- monitor the condition of plasma torch consumables;
- ensure that the distance between the plasma jet and the workpiece is maintained;
- always check the cutting speed used to avoid dross;
- from time to time diagnose the condition of the working gas supply system;
- eliminate vibration of the electric plasmatron;
- Maintain a clean and tidy work area.
Differences between direct and indirect devices
There are various types of devices that differ in operating principles. In direct acting equipment, the operation of an electric arc is assumed. It takes on a cylindrical shape and is directly connected to the gas stream. This equipment design makes it possible to provide a high arc temperature (up to 20,000°C) and a highly efficient cooling system for other components of the plasma cutter.
In indirect-acting devices, operation is assumed to be less efficient. This determines their lower distribution in production. The design feature of the equipment is that the active points of the circuit are placed on special tungsten electrodes or a pipe. They are used more often for heating and spraying, but are practically not used for cutting. Most often used in car repairs.
A common feature is the presence in the design of an air filter (extends the life of the electrode, ensures quick start-up of the equipment) and a cooler (creates conditions for long-term operation of the device without interruption). An excellent indicator is the ability of the device to operate continuously for 1 hour with a 20-minute break.
Design features
Structurally, pipe cutters differ according to the type of cutting unit:
- rotary or rotary;
- with ratchet mechanism;
- telescopic;
- chain;
- with ratchet mechanism;
- incisal;
- roller
The latter are most often used for cutting steel pipes. There can be several cutting rollers - up to three. In addition, the design also includes guide rollers that hold the workpiece in the desired position. The more rollers, the larger the diameter of the pipe the pipe cutter can cut.
Roller pipe cutter
Single-roller models cope with diameters of 15-50 mm; for three-roller models this range expands to 100 mm.
A pipe cutter is a holder with one or two cutters attached to it. The movement of the working unit occurs under the influence of the threaded rod.
The action of chain pipe cutters is to gradually tighten a chain equipped with cutting rollers around the pipe.
A special machine called a pipe bender is used to bend water supply pipes. Do-it-yourself pipe bender - types and drawings of the device, as well as manufacturing instructions.
We will consider methods for connecting metal-plastic pipes here.
And here https://aquacomm.ru/vodosnabzenie/zagorodnyie-doma-v/avtonomnoe-vodosnabzhenie/trubyi/plastikovyie/polipropilenovyie/payalnik-dlya-polipropilenovyx-trub-kak-vybrat.html you will find useful recommendations on choosing a soldering iron for polypropylene pipes See an overview of characteristics and manufacturers.
Design
With the proper desire and skill, anyone can create a homemade plasma cutter. But in order for it to function fully and effectively, certain rules must be followed. It is advisable to try on an inverter, because It is he who is able to ensure a stable current supply and stable arc operation. As a result, there are no interruptions and electricity consumption will be significantly reduced. But it is worth considering that an inverter-based plasma cutter can cope with a thinner metal thickness than a transformer.
Required components
Before starting assembly work, it is necessary to prepare a number of components, materials and equipment:
- Inverter or transformer with suitable power. To eliminate error, it is necessary to determine the planned cutting thickness. Based on this information, select the right device. However, taking into account manual cutting, it is worth choosing an inverter, because... it weighs less and consumes less electricity.
- Plasma torch or plasma cutter. There are also some peculiarities of choice. It is better to choose direct action for working with conductive materials, and indirect action for non-conductive materials.
- Compressed air compressor. It is necessary to pay attention to the rated power, because it must cope with the load imposed and match the other components. Cable hose. Required for connecting all components of the plasma cutter and supplying air to the plasma torch.
Selection of power supply
The operation of the plasma cutter is ensured by the power supply. It generates the specified parameters of electric current and voltage and supplies them to the cutting unit. The main supply unit can be:
It is necessary to approach the choice of power supply taking into account the features of the devices described above.
Plasma torch
A plasma torch is a plasma generator. This is a working tool in which a plasma jet is formed that directly cuts materials.
The main features of the device are:
- Creation of ultra-high temperature;
- Simple adjustment of current power, start and stop of operating modes;
- Compact dimensions;
- Reliability of operation.
Structurally, the plasma torch consists of:
- Electrode/cathode containing zirconium or hafnium. These metals are characterized by a high level of thermionic emission;
- The nozzle is basically isolated from the electrode;
- A mechanism that swirls plasma-forming gas.
The nozzle and electrode are consumables of the plasma torch. If a plasma cutter processes a workpiece up to 10 millimeters in size, then one set of electrodes is consumed within 8 hours of operation. Wear occurs evenly, which allows you to change them at the same time.
Read also: Connecting elements of surface-mounted installation with wires
If the electrode is not replaced in a timely manner, the cutting quality may be impaired - the geometry of the cut changes or waves appear on the surface. The hafnium insert in the cathode gradually burns out. If it has a production of more than 2 millimeters, then the electrode can burn and overheat the plasmatron. This means that electrodes replaced at the wrong time will lead to rapid failure of the remaining elements of the working tool.
All plasmatrons can be divided into 3 volume groups:
- Electric arc - has at least one anode and cathode, which are connected to a direct current power source;
- High-frequency - there are no electrodes and cathodes. Communication with the power supply is based on inductive/capacitive principles;
- Combined - operates when exposed to high-frequency current and arc discharges.
Based on the arc stabilization method, all plasmatrons can also be divided into gas, water and magnetic types. Such a system is extremely important for the operation of the instrument, because it forms a compression of the flow and fixes it on the central axis of the nozzle.
Currently, various modifications of plasma torches are available for sale. You may need to study the offers and buy a ready-made one. However, it is quite possible to make a homemade one at home. This requires:
- Lever. It is necessary to provide holes for wires.
- Button.
- An appropriate electrode designed for the current.
- Insulator.
- Flow swirler.
- Nozzle. Preferably a set with different diameters.
- Tip. Splash protection must be provided.
- Distance spring. Allows you to maintain a gap between the surface and the nozzle.
- Nozzle for removing carbon deposits and chamfering.
Work can be carried out with one plasma torch due to replaceable heads with different diameters that direct the plasma flow to the part. It is necessary to pay attention that they, like the electrodes, will melt during operation.
The nozzle is secured with a clamping nut. Directly behind it there is an electrode and an insulator that prevents the ignition of the arc in the wrong place. Next, a flow swirler is placed to enhance the arc effect. All elements are housed in a fluoroplastic casing. You can do some things yourself, but others will have to be purchased at the store.
The factory plasma torch will allow you to work without overheating for a longer time due to the air cooling system. However, for short-term cutting this is not an important parameter.
Oscillator
An oscillator is a generator that produces high-frequency current. A similar element is included in the plasma cutter circuit between the power source and the plasma torch. Capable of acting according to one of the following schemes:
- Creation of a short-term impulse that promotes the formation of an arc without touching the surface of the product. Externally, it looks like a small lightning bolt supplied from the end of the electrode.
- Constant voltage support with high voltage value superimposed on welding current. Ensures the preservation of stable arc maintenance.
The equipment allows you to quickly create an arc and start cutting metal.
For the most part they have a similar structure and consist of:
- Voltage rectifier;
- Charge storage unit (capacitors);
- Power unit;
- Pulse creation module. Includes an oscillatory circuit and a spark gap;
- Control block;
- Step-up transformer;
- Voltage monitoring device.
The main task is to modernize the incoming voltage. The frequency and voltage level increase, reducing the period of action to less than 1 second. The work sequence is as follows:
- The button on the cutter is pressed;
- In the rectifier, the current is leveled out and becomes unidirectional;
- Charge accumulates in capacitors;
- Current is supplied to the oscillatory circuit of the transformer windings, increasing the voltage level;
- The pulse is controlled by a control circuit;
- The pulse creates a discharge on the electrode, igniting an arc;
- The impulse ends;
- After stopping cutting, the oscillator purges the plasma torch for another 4 seconds. Due to this, cooling of the electrode and the treated surface is achieved.
Depending on the type of oscillator, it can be used in different ways. However, the general characteristic is an increase in voltage to 3000 - 5000 volts and a frequency from 150 to 500 kHz. The main differences are in the intervals of action of the high-frequency current.
For use in a plasma cutter, it is advisable to use an oscillator for non-contact ignition of the arc. Similar elements are used to work in argon welders. The tungsten electrodes in them will quickly become dull if they come into contact with the product. Including an oscillator in the apparatus circuit will allow you to create an arc without making contact with the plane of the part.
Using an oscillator can significantly reduce the need for expensive consumables and improve the cutting process. Properly selected equipment in accordance with the planned work allows you to increase its quality and speed.
Electrodes
Electrodes play an important role in the process of creating, maintaining an arc and direct cutting. The composition contains metals that allow the electrode not to overheat and not prematurely collapse when working with an arc at high temperatures.
When purchasing electrodes for a plasma cutter, it is necessary to clarify their composition. Beryllium and thorium contents create harmful fumes. They are suitable for work in appropriate conditions, with adequate protection for the worker, i.e. additional ventilation is required. Because of this, it is better to buy hafnium electrodes for household use.
Compressor and cable - hoses
The design of most homemade plasma cutters includes compressors and hose lines to direct air to the plasma torch. This design element allows you to heat the electric arc up to 8000°C. An additional function is to purge the working channels, clearing them of contaminants and removing condensate. In addition, compressed air helps cool the components of the device during long-term operation.
To operate the plasma cutter, it is possible to use a conventional compressed air compressor. Air exchange is carried out by thin hoses with suitable connectors. An electric valve is located at the inlet, which regulates the air supply process.
An electrical cable is placed in the channel from the apparatus to the burner. Therefore, it is necessary to place a hose with a large diameter here, which can accommodate the cable. The passing air also has a ventilation function, as it is able to cool the wire.
The mass must be made of cable with a cross-section of 5 mm2. There must be a clamp. If there is poor ground contact, switching the working arc to the standby arc will be problematic.
Transformer based cutter
Like other components of the system, the power supply is assembled or modified with your own hands. Detailed instructions help you easily cope with this task.
Device diagram
The electrical circuit of the device includes the following components:
- welding transformer with rectifier;
- start relay;
- oscillator;
- a resistor that reduces the pilot arc voltage;
- start button;
- a contactor that deactivates the initial arc;
- compressor with controls.
An example of a competent drawing
A correctly compiled diagram should display all elements, regardless of their location.
The main goal of developing a drawing is to establish connections between equipment components and familiarize the user with the operating principles of the future plasma cutter.
What details will be needed
In addition to the welding inverter, to create the machine you will need:
- Holder with replaceable rod. When the current is up to 100 A and the thickness of the workpiece is up to 5 cm, the element is made of copper. The holder of a more powerful unit is equipped with channels for liquid cooling. To ignite the arc, leave a distance of 2 mm between the nozzle and the electrode. The main rod is made movable.
- PTFE insulator. Due to rapid wear, the part is replaceable.
- Housing with nozzle.
- Cables: power and for igniting the pilot arc.
- Hoses. In liquid-cooled units, the bare wire is located in the tube that supplies water to the torch. You will also need a separate hose to remove gas to the nozzle.
We recommend reading: What types of welding devices are there?
Plasma cutter assembly
Work begins with remaking the welding transformer. The number of turns of the winding is selected taking into account the future characteristics of the equipment and the parts being cut.
With a sheet thickness of up to 1.2 cm, a current of 50 A and an open circuit voltage of 20 V, set the following values:
- core cross-section – 107 mm²;
- the number of turns of the primary winding is 225, the secondary is 205.
After remaking the transformer, other elements are connected:
- Compressor with a capacity of 140-190 l per minute. The pressure generated by the unit must be more than 4.5 bar.
- Cables and hoses for connecting components. The cross-section of the supply wire depends on the power of the plasma cutter. At a current of 50 A it is 6 mm². The wire cross-section for the pilot arc is 1.5 mm². The recommended diameter of the air hose is 1 cm.
- Oscillator. When creating a plasma cutter from a transformer, you can use a car electronic ignition system as this block.
At the final stage of assembly, the ground, welding rod and initial arc cables are connected to the terminals on the power supply.
The air hose is connected to the compressor outlet. The start key wire is connected to the control unit.
Features of use
When working with a cutter from a transformer from a semi-automatic welding machine, carefully follow safety rules, which is explained by the influence of the following harmful factors:
- Melt splash. Under the influence of plasma, the metal is heated to extreme temperatures. The air flow blows it out of the cut line. Splashing some materials will cause them to catch fire. Contact of the melt with human skin leads to deep burns. Therefore, the plasma jet is directed in the direction opposite to the welder and flammable materials.
- Dust and air pollution with harmful gases. During plasma cutting, metal begins to burn. Smoke is dangerous to the human respiratory system. Therefore, a hood is installed above the desktop. The master puts on a respirator.
- Bright light. The plasma torch is a powerful generator of ultraviolet radiation, which causes burns to the retina of the eye. Therefore, the carver puts on a protective mask and equips the work area with a mobile shield.
- Temperatures. The edges of the resulting blanks retain heat for a long time. You can touch them only with gloves after the parts have cooled.
Scheme
Now you can find many schemes using which you can assemble a high-quality device. The video will help you understand the symbols in detail. A suitable schematic drawing of the equipment can be selected from those presented below.
Assembly
Before starting the assembly process, it is advisable to clarify the compatibility of the selected components. If you have never assembled a plasma cutter with your own hands before, you should consult with experienced craftsmen.
The assembly procedure assumes the following sequence:
- Prepare all assembled components;
- Electrical circuit assembly. In accordance with the diagram, an inverter/transformer and an electrical cable are connected;
- Connecting the compressor and air supply to the apparatus and plasma torch using flexible hoses;
- For your own safety net, you can use an uninterruptible power supply (UPS), taking into account the battery capacity.
Detailed equipment assembly technology is presented in the video.
Plasma cutter
It is impossible to make a homemade working plasma cutter, despite advertising on the Internet and advice from “experts”. Too complex processes occur in the plasma torch, and it is impossible to maintain a constant temperature level and a stable arc, which a CNC machine requires on a handicraft product. You will need to buy one of the plasma torch models designed for long-term operation.
When the cost of welding equipment is high, it is best to choose tools from well-known brands, for example, Brima, TBi or ESAB. There is no need to buy elite equipment for a homemade machine - the level of products of these companies is quite professional, and the price is affordable even for home production. There is no need to buy Chinese cheap plasma torches even for reasons of economy. It is better to give up the idea of a DIY CNC plasma machine than to keep it in your workshop as furniture.
We choose an inverter current generator. Transformers are characterized by low efficiency and low current stability. They are quite functional as part of manual plasma cutters, but are not suitable for mass production - current pulsations can negatively affect the cutting accuracy. In addition, energy consumption when using a transformer is an order of magnitude higher than that of an inverter. If you have to work on the machine often and for a long time, then the difference is very noticeable.
Checking the plasma cutter
After all nodes are connected into a single structure, it is necessary to test for functionality.
Please note that testing and working with the plasma cutter must be carried out in protective clothing using personal protective equipment.
It is necessary to turn on all the units and press the button on the plasma torch, supplying electricity to the electrode. At this moment, an arc with a high temperature should form in the plasmatron, passing between the electrode and the nozzle.
Next, the supply of compressed air begins. When passing through the plasma torch nozzle, subjected to heating from the arc, the air will expand, turning into a plasma stream.
If the assembled plasma cutting equipment is capable of cutting metal up to 2 cm thick, then everything is done correctly. It should be noted that a homemade device made from an inverter will not be able to cut parts with a thickness of more than 20 millimeters, since there is not enough power. To cut thick products, you will need to use a transformer as a power source.
Varieties
A pipe cutter does not belong to the category of universal tools - it will not be possible to cut steel and plastic pipes with one device.
True, there are models designed for different materials, but this is rather an exception to the general rule. Therefore, you should buy a device only after you have definitely decided on the choice of pipes.
In some cases, pipe cutters designed for cutting steel pipes cut softer materials, but the quality of the cut suffers. For example, a copper pipe can be deformed with such a tool.
Plastic pipes are cut with roller pipe cutters.
Their productivity is low, but the cut is perfect. Propylene pipes can be cut with a cordless pipe cutter designed specifically for this material. It provides high speed operation, but the pipe size is limited to a diameter of 42 mm. Thin plastic pipes can be cut with special scissors . They are inexpensive and easy to work with. But for large volumes, scissors are not suitable - your hands get tired quickly.
Advantages of a homemade device
The benefits provided by an air plasma cutting machine are difficult to overestimate. It is capable of cutting sheet metal accurately. After work, there is no need to further process the ends. The main advantage is the reduction in work time.
These are already compelling reasons for assembling the equipment yourself. The circuit is not complicated, so anyone can cheaply remake an inverter or semi-automatic device.
In conclusion, let us draw your attention to the fact that it is necessary for an experienced specialist to work with a plasma cutter. It's best if it's a welder. If you have little experience, we recommend that you first study the technology of working with photos and videos, and then begin to complete the assigned tasks.
What tool and how is it not recommended to cut polypropylene pipes?
Of course, in addition to the specialized tools listed above, polypropylene pipes can be cut with others, and those most often found in any home workshop are a hacksaw for metal or wood, an electric jigsaw or an angle grinder.
It is not recommended to cut pipes with a hacksaw for metal or wood.
However, it is necessary to take into account that as a result of the impact of such tools on the pipe, the cuts will often turn out torn, with numerous burrs, or with melted ends, and this is unacceptable for subsequent welding.
Therefore, before welding work, it is necessary to level and clean the ends of the pipes from damage and irregularities, otherwise the connections may not be strong enough. And such cutting of pipes often leads to problems during the operation of the pipeline.
- The “grinder” cannot be used because the rotation speed is too high - the plastic pipe will heat up and begin to melt. The same thing can happen when using an electric jigsaw if it is turned on at a high frequency of saw friction. And at low speed, the cut turns out torn, microcracks can form along the edges
- Whatever tool is used to cut pipes, you cannot put too much pressure on the polypropylene walls - this applies to both improvised and special devices. Excessive force may cause the edge of the product to crack or the material to jam. Such damage can in the future lead to rupture of the pipeline in the area of the connecting nodes.
- You cannot use a circular saw or band saw to cut polypropylene, since the material is quite fragile, so it cannot be avoided without damage in the form of cracks and chips. In addition, the pipe can simply be torn out of your hands under such an impact.
- It is also not recommended to use pipe cutters for cutting PP, which are intended exclusively for cutting metal products, since they often begin not to cut, but literally tear the plastic. The exception to the rule is universal pipe cutters, which can be used for any material.
