When working with wood, in addition to simple sawing and trimming operations, there are quite complex finishing procedures. These include grinding.
Before grinding, planing is carried out whenever possible. At this stage of processing, burrs are removed and the surface acquires a smooth appearance. When planing using a thicknesser (a machine that allows you to obtain workpieces of the same thickness and width), a semi-finished product of the specified parameters is obtained.
High-quality finishing is performed on hardwoods, which are used to make high-quality products. Birch, oak, ash, maple, walnut, apple, cherry and others have a dense structure. Such material can even be difficult to cut with a regular hacksaw. But in furniture production they are used to make a wide variety of furniture and interior items.
Even traditional pine, spruce and aspen also require a quality finish by sanding. For example, by leveling floor boards using manual or electric tools, they achieve a single plane. Difficult and low-productivity work, but without it it is impossible to achieve good quality.
What is grinding done?
In cutting theory, when determining a tool to perform the process itself, a cutter is considered. It has cutting edges. They introduce the processed material into the body. The sharpening angles determine the features of the cutter's penetration into the material, as well as the formation of chips.
When it comes to the grinding method of processing, here we observe the work of not one cutter, but several at once. Their number is often measured in the thousands. The more small cutters involved in the work at the same time, the higher the quality of the machined surface. The abrasive grains act as cutters - these are grains of sand with a fairly high hardness, glued to paper or fabric.
To classify grinding tools, the concept of the number of grains of 1 square centimeter was introduced. For example, the designation P36 implies that on average there are 36 grains per square cm. If the abrasive is designated P200, then, accordingly, there are on average 200 grains per square cm.
When roughing of a part is required and a fairly thick layer needs to be removed, abrasive materials with a small number of grains are used. As the quality of the processed surface improves, the size of the grains themselves decreases and their number increases.
The table provides recommendations for using abrasive cloths for their intended purpose.
Attention! When using abrasives with a high grain count, rapid clogging occurs. To increase the duration of use, it is recommended to regularly shake off the sandpaper. Then it will have to be replaced less often. Before starting finishing work, an audit of the abrasive material is carried out. Assess the amount of sandpaper available.
Coarse grinding is also performed using hard brushes. They are made from spring wire. Using a similar tool, brushing (artificial aging of wood) is performed.
To sand logs, plastic bristles are used instead of wire. It is made from rigid fishing line with a diameter of 3.0...4.5 mm. To increase productivity, such brushes are made on disks.
Hand blocks for sanding wood
When processing any board, you can rub sandpaper over the surface. There will be some result. Only your hand will get tired quite quickly, and the abrasive will heat up and become uncomfortable to hold.
For fixation, many people use a regular block. They wrap it around a piece of sandpaper. This is enough to do the simplest work. However, real craftsmen make more convenient devices (Fig. 1).
The grinding block is made in the following sequence.
- Two wedge grooves are sawn into a hardwood board. 2.
- Pairs of wedges are also made. 3.
- Cut the skin to a suitable length so that the ends fit into the wedge grooves.
- Then the skin is fixed in the grooves with wedges.
- The finished sanding block is ready for use.
Rice. 1 Wedge-mounted sanding block
A simpler block can be made using two self-tapping screws and two paper clothespins (Fig. 2).
- Self-tapping screws are screwed in on the non-working part of the block (it is more convenient to use self-tapping screws with a press washer).
- The fastening loop of one of the clothespins is inserted under the head of the screw on one side, the other is installed on the back of the device.
- Cut the sandpaper to such length that it can be secured in clothespins.
- The block is ready. For ease of operation, it is advisable to secure the handle on top.
Rice. 2 Sanding block with self-tapping screws and clothespins
Rice. 3 Sanding block for machining large radius concave surfaces
When working with wood, sometimes you have to process more than just planes. Often, to give an original shape, curved grooves are sawn or a complex shape is given. In order to grind the surface in this case, the pads are made with a curved working surface (Fig. 3 and Fig. 4).
Rice. 4 Sanding block for machining concave surfaces of small radius
If there is a need to obtain a strict angle, then use a corner block (Fig. 5). There is only one work surface on it. The other surface is used to maintain the exact angle. Most often they are made for processing at a right angle (90°), but a similar grinding device can be made at any desired angle.
Rice. 5 Angle sanding block
Three, screwing, varnishing
Polishing different types of surfaces - untreated, painted or varnished - has its own nuances. You will definitely need special substances and devices to achieve good results. In general, the process involves applying several layers of varnish, followed by drying and sanding each but the last.
Sand each crevice
A job done brilliantly
Before polishing varnish on wood, you need to prepare polish, pumice, a swab/velor roller (ideally a spray gun), and denatured alcohol.
- Polish is thickly applied to a dry varnished surface with a swab and polished with pumice until shiny.
- After 3 days of drying, a second layer follows to level out roughness and is left to dry for 5 days.
- The third portion of polish is applied.
- Polishing with alcohol is carried out to a mirror shine.
The photo shows how to hold the tampon and what movements to apply the material with
Old beautiful furniture definitely needs, if not repair, then restoration of the varnish layer, which is wiped out and becomes covered with bald patches.
The restoration process includes the following surface treatment steps:
- Removing the old varnish layer using ammonia, denatured alcohol, turpentine or other solvent.
Note! Polishing varnish after painting involves the use of toxic substances - do not forget to protect yourself as much as possible. Do not neglect gowns, gloves, goggles and respirators or gauze dressings
Health comes first
- Processing with coarse and then fine-grained sandpaper.
- Rub in the filler (in a circular motion).
- Treat with stain several times, allowing each layer to dry completely.
- Direct polishing of varnish on wood - with wax, varnish (in several layers, each is dried, sanded; do not sand the last layer).
Technologies from time immemorial
I wonder how, in ancient times, woodcarvers, carpenters, and architects managed to preserve their products from moisture and drying out? The secrets of distant ancestors have survived to this day and naturally fit into modern production.
It has long been known how to polish wood with wax, which gave the product a soft, calm glow and was guaranteed to protect it from the vagaries of the weather.
The waxing procedure looks like this:
- The material is applied to the wood with a cloth or brush.
Liquid wax is easy to apply with a brush
- The wax dries out slightly.
- Rub it in until the grains disappear.
- Final polishing with a clean cloth until shiny.
There are no problems with wax - scoop it up and rub it in
The second way to polish wood without harm to health is to use natural drying oil, the main component of which is linseed oil. It is simply rubbed in until it stops being absorbed. It does not give shine, but protects the surface, making its color more saturated (see also the article “OSB on a wooden floor: preparation and installation of the coating”).
Mechanized wood sanding
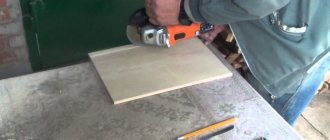
Handmade is appreciated. But when using the simplest means of mechanization, wood processing occurs faster. The most widely used for grinding various materials are elastic supports for electric drills (Fig. 6) and angle grinders (Fig. 7) with Velcro. Somewhat later, manufacturers of supports began to sell a similar universal support (Fig. 8).
Rice. 6 Elastic support with Velcro for electric drill
Rice.
7 Elastic support with Velcro for an angle grinder (grinder) Important! When using such a support on an angle grinder, you should not press it too hard against the surface being treated. The speed of the working body is high, wood burning is possible
Rice.
8 Universal elastic support with Velcro for an electric drill or angle grinder When working with such mechanical equipment, safety rules must be strictly observed.
- A lot of wood dust is generated, so a respirator and glasses will protect your vision and breathing.
- Gloves with a rubber working surface will protect the worker’s hands.
- It is advisable to wear an apron, then it is easier to shake out the dust from your clothes.
Special grinding wheels are available for working with elastic support (Fig. 9). They are installed and removed in one motion.
Rice. 9 Replacement abrasive wheels for power tools
How to make a grinder from a grinder?
This question can be confusing, because this is exactly what an angle grinder is - an angle grinder. But it is very universal and must be prepared for each operation. To prepare the grinder for grinding, you need to purchase a support wheel that is installed directly on the machine shaft.
To process wood, you need to stick an emery pad on this circle. The number of sandpaper is selected for the immediate moment of work. On sale you can find both a grinding wheel of the required diameter and sanding wheels of the appropriate size. Sanding wheels with Velcro are also available for sale, which are very easy and quick to change on the tool.
To convert our grinder for concrete grinding, it would be a good solution to purchase a special protective boot. It is good because it has a connection for connecting a vacuum cleaner. Well-known housings are produced by Hilti. The casing from this company has a sliding sector that opens part of the wheel for grinding in the corners.
Grinding metals with a grinder is usually performed with standard metal grinding wheels. They have different diameters, different thicknesses and different grains of the grinding surface. But, if you are going to sand an indecently rusted surface, then first you need to go over it with a metal brush. Such brushes of the required diameters are also available for sale.
Vibratory grinders
To process large areas of wooden surfaces, it is convenient to use a vibratory sander (Fig. 10). It has a vibrator that causes the sole to make small back-and-forth movements relative to the body. A strip of abrasive sandpaper is attached to the sole. She grinds the surface under the sole of the tool.
Rice. 10 Vibratory sander
The performance of such small electric machines is quite high. In an hour of work you can finish several square meters of surface. The only drawback is that they need to be stopped after 5...7 minutes of operation. The vibrator needs to be cooled. It has no fans.
You can attach sandpaper of different roughness to the sole. Manufacturers recommend using a fabric-based abrasive. Then it lasts longer.
How to choose sandpaper for working with wood
When choosing a consumable, quite a few different points can be taken into account. Let's take an example:
- Grain size.
- Type of abrasive used.
- For what purposes is the consumable material intended?
As a rule, the marking indicates the abrasive grain size according to ISO. When selecting, special tables can be used. Wood is processed with fine-grained sandpaper for a small number of defects and before polishing. Dry or wet sanding
Dry grinding is most often carried out. This technology is easy to implement and consumables are cheap. There is also wet sanding, which involves the use of special paper.
Wet grinding and polishing involves supplying water to the processing area. Due to this, the wood softens. Today, such technology is used extremely rarely.
Surface belt sanders
The most productive are surface belt grinders. They use abrasive sandpaper glued into a tape (Fig. 11). All such tools are equipped with a small bag for collecting wood dust. During operation, more than 80% of the dust generated accumulates inside this bag.
Rice. 11 Belt sander
Manufacturers recommend intermittent operation: grind for 5...7 minutes, and then give the tool a break. Even the presence of a fan inside does not effectively cool the device. After a three-minute break, you can continue working.
Manufacturers supply the tool with auxiliary devices with which you can fix the grinding machine in space (Fig. 12).
Rice. 12 Installing the belt sander on the table
Craftsmen make special stands for belt sanders, with the help of which the scope of application of the devices is significantly expanded (Fig. 13). With the help of such options, it becomes possible to polish the ends of products with high quality. The underframe itself can be fixed at any angle, which will allow for high-quality processing.
Rice. 13 Stand for belt sander
The industry produces stationary belt sanders (Fig. 14). They are called grinders. With the help of such devices, it becomes possible to grind products by resting them on a special support table. A grinder is similar in many ways to a belt sander. In fact, it is a stationary machine where you can carry out quite complex wood finishing operations.
Rice. 14 Grinder
Flap grinding tools
Another large class are special petal ones. They are manufactured in radial (Fig. 15) and end (Fig. 16) versions. They are quite convenient to use. The surface of the wood is easily and quickly processed with such a tool.
Petal Drum
Petal disc
These abrasive drums and discs are installed on drills and grinders. Craftsmen adapt them to specialized woodworking machines.
Processing of grooves and ends of logs
Grinding the grooves of logs is always done with a grinder. The grooves are processed with a nozzle smaller than the disk. If the attachment and disc are the same size, this may cause the machine to jam.
To process the ends, use a grinding wheel with 40-grit sandpaper. Usually in these places they limit themselves to rough and medium processing, without grinding the ends to perfect smoothness. Immediately after grinding, the ends are treated with protective impregnations and antiseptics.
Tags: log, what kind, good, sander, grind
« Previous entry

