Main wood species
All wood is divided into two large groups: coniferous wood and deciduous wood.
Coniferous wood is highly durable and resistant to decay. Wood of this type is relatively light in weight.
The most commonly used wood in the country is pine. It is used for the production of poles, lumber, veneer, plywood, for the production of pulp and paper.
Cedar wood has the same properties as pine, but cedar is used primarily for furniture production.
Spruce wood is used the least often - mainly for the manufacture of musical instruments. Fir is used to make roofing boards. Larch wood contains a large amount of resinous substances, which is why it is difficult to rot, incl. when placing it in the ground.
Hardwood is most often used to make dowels:
- acacia;
- birch;
- oak;
- nut
And only if there is no choice, it is allowed to use larch and pine. If a house is built from larch wood, preference is given to dowels made from this wood. Spruce is not suitable for making pins. Birch is considered the best tree for making dowels. For pine timber, dowels are made from acacia or oak.
Connecting parts with dowels and screws into a dowel L-120 means that dowels 120 mm long are used during assembly. Accordingly, the inscription connection with dowels and screws in dowel L-150 means that the parts are connected using a dowel 150 mm long. The value following the pin indicates the length of the pin in question.
What is a dowel and how to attach it
What is a dowel and how to attach it to a beam, what types exist: builders answer
A dowel is a long pin made of wood that connects several crowns. The use of wooden pins prevents the walls from deforming and gives them strength. By the way, “nagel” is translated from German as “nail”.
Even in Rus', when building a wooden house, they used the installation of dowels in the log house.
Dowel in timber
This construction technology is still proving its strength today. Such a simple example was built in Siberia in the 20s. a wooden elevator for 10,000 tons of grain - and with the help of dowels. This elevator was unique and was proof of the strength of the technology.
In those days there were not enough nails during construction, and it was built without a single nail. The elevator would probably still be there, but in the 90s. it was burned by homeless people due to negligence. By the way, if you believe the documents, the elevator was designed by Kondratyuk. He is one of the founders of astronautics. Kondratyuk calculated the flight path to the Moon and it was his calculations that were used in the Apollo lunar program. It is clear that such a person knew the physical properties of dowels.
What types are there?
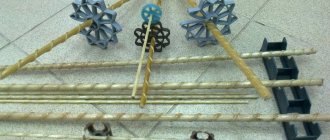
Pins can be wooden, steel and plastic. Their shape can be varied - from ovals and hexagons to cross-sectional stars. The most commonly used are plate, cylindrical or square.
Steel dowels are made from reinforcement or pipes. It is not recommended to use dowels made from reinforcement in architecture, since the timber may “hang” on them during the shrinkage of the house, which causes gaps to form.
It is better to use wooden dowels. This is explained by the fact that they take the load in bending. The disadvantage of such dowels is that they do not press the beams, and this leads to bending of the last lightly loaded crowns. But such dowels do not react to temperature differences, do not corrode, and decrease in diameter along with the timber as it shrinks. In addition, the wooden dowel has the same thermal conductivity as the timber itself. So far, this is the ideal option for connecting timber in wooden architecture.
What types of wood are used to make dowels?
Wooden dowels are made from acacia, birch, oak, larch, walnut or other hard wood. As a last resort, pine is used. The dowels are selected to match the type of wood that is used in the construction of the house.
For example, for larch timber, a dowel made from the same tree is suitable.
In construction, birch dowels are most often used, with a square cross-section of 25 mm or round dowels with a diameter of 24-25 mm. Although oak or acacia dowels are also suitable for pine timber.
Fastening timber with dowels
After laying two beams, strictly perpendicular holes are drilled into them in a checkerboard pattern. The distance between the holes is 1.5-2.0 m. This all complies with the requirements of SNiP 2.01.07-85.
Drilling
The holes are made slightly smaller in diameter and deeper than the dimensions of the dowel themselves. For a square dowel with a side of 23 mm, it is enough to use a 30 mm drill. This dowel should fit tightly into the hole.
Assembling timber on dowels requires a certain degree of freedom to compensate for changes in linear dimensions.
Fastening with dowels
Calculation of the required amount of dowel
In Russia there are no strict standards for the amount of dowel used. As an example of calculation, to answer the question of how much dowel is needed for a log house, we will give the standards in Norway.
There, pins are installed at a distance of 2.5 m and additional ones near window and door openings.
Let's say your house has a perimeter of 36 m. There are 7 windows in the house. 40/2.5=16 This is the amount for one crown. We will have 25, which means 16×25=400. Let's add 6-8 dowels to each window and 12-14 dowels to the doors. 400+5×8+14=454 pcs. We calculate the stock: 454×1.8≈817 pcs. If you want to fasten every 1.5 m, then the quantity will be as follows: (40/1.5×25+5×8+14) ×1.8≈1297 pcs.
Safety precautions at work
To avoid unpleasant injuries, you must always follow basic safety rules to protect your body from harm.
When working, you must strictly follow several instructions:
- Under no circumstances should you start drilling without safety glasses, as a piece of concrete may break off and get into your eye. If this happens, you should immediately wash the damaged area with water and ask someone in the house to carry out a thorough inspection and remove all foreign bodies. If after a few hours the pain still bothers you, then you should seek help from a specialist.
- The drill cannot be operated with gloves on, as it can get screwed onto the rotating drill. This can seriously damage your fingers.
- Do not try to change the drill immediately after drilling, as it will be very hot. This can cause you to get seriously burned. First, cool the drill in water.
- Keep children away from the appliances. If the baby is running nearby, then all tools that are connected to the electrical network should be placed at such a distance that the child cannot reach them. Also, remove all cutting and piercing objects away.
Follow these simple safety rules and your work will only be a pleasure.
Thus, from a structural point of view, a screw, which is used for fastening to concrete, is a rod with a thread that can be high, or alternately become low or high. The dowel also has a countersunk head, the inner side of which is equipped with a notch. Typically, these types of fasteners are used for screwing plastic and wooden windows, door frames to some kind of solid base. When working, it is always necessary to first qualitatively drill holes to the required depth, and then you can screw in the dowel, which will fit tightly into the part. All fastenings can be made independently.
Dowel against groove and tenon re-
BackgroundWhen I wrote my joint strength test article, I concluded that the mortise and tenon joint was slightly stronger than the laminated pin. Having a small stake in the matter, I have removed all references to their jig and company name. If I had been wiser, that would have been the end of the story. However, a few weeks later, I noticed on a public forum where my tests were being discussed, the following statement from one of the people working for the jig dowel manufacturers (who shall remain anonymous in this article):
[name removed] to check if a strength test can be performed using the optimally designed joint [name removed] compared to a similar M&T joint. We have done this already with Steve M. from the Canadian Woodworking Forum. " I thought this would be an interesting test, so I contacted the makers of this Jig dowel again, and within a few emails we agreed to collaborate on another test, with the geometry of the joints nailed in advance. Real furniture joints tend to be stressed by more moderate forces over a longer distance, which is why I like my tests better. Think about the stress on the joint between the part that makes up the back of the chair and the legs and the part that holds the seat up when the fat guy leans back in the chair. The force stress is applied at a sufficient distance from the joint itself. Running tests
For each joint, I pumped up the jack until the pieces of the joint itself were physically separated to such an extent that it was clear that the force required would not increase any further.
For all but one piece, the force required to actually break the individual pieces was greater than the initial force required to break the post separately. It is a controversial issue which force is the actual point of failure of the joint. Splitting the post is definitely a point of failure. But if the force was removed after this point, the gap that opened would close again, and no one would be the wiser that that joint had truly "failed." The joint shown on the left is actually hacked just like the joint in the previous image. But once the dowels were released, the crack closed again, so that the crack is not even visible in the photograph. But secondary failure is also unreliable. By the fact that the dowels or tenon were actually released from the forest in which they were, everything was quite rejected. There was also variability where the wood actually split. The closer it splits to the joint, the less wood there is left to hold there. So, using the final separation force may also not be so realistic. It always surprises me that when woodworking magazines do joint tests, they don't go into that kind of stuff. A good final number certainly sounds better than muddying the waters with a lot of analysis and discussion. I suspect tests done in woodworking magazines often have similar problems, but I imagine they think people just want an answer rather than a lot of discussion o the reliability of the results. I decided that I should present both the strength of the initial break and the force required for the final separation in my results, but this is where I started having problems with the manufacturer. only wanted forces of the initial hack to be considered as results, and all the other numbers that should be omitted from the report, that would make the dowel the winner. I didn't feel that would be realistic. It is normal to test the connection at least to the point of maximum strength. The initial hack open didn't even break the joint itself, so was that even a measure of the joint's strength? Of course, the cracking force was, on average, greater for the pins. This may be because the dowels cut slightly less wood from the vertical piece, thereby weakening it less. Of course, each of us had our own motives and prejudices. The makers of the jig dowel take pride in the claim that their joints are stronger than mortise and tenon joints and were probably looking for another test to back up that claim. I don't sell dowels, but I do make some money selling slot mortiser plans and jig plans. thus, I wasn't particularly interested in making the mortise and tenon joints look bad. And so perhaps it's not surprising that when dowel manufacturers test their joints against mortise and tenon joints, the dowel wins, whereas when I test it, the mortise and tenon joint does slightly better. Of course, if I wanted to, manipulating the results would be trivially easy. With tree variability, all one has to do is select the right parts and the right results for the results to ultimately go one way or another. numbersGlue9019019 92519 9259 The forces are counted in pounds for my weight. Each pound represents two pounds pounds of moment applied to the joint. I made two bandsaw cuts to the left and right of the mortise and tenon joint and then what was left just fell apart along the line that had previously split. And here is the dowel, split in the same way. This split the ends of the dowels. The tapered ends of the dowels did not provide a useful gluing surface, so the split extends slightly from the ends of the dowels. In this case, a mortise and tenon joint takes place, with the adhesive surface expanding. completely into the flat-bottomed hole. ConsequencesGiven the way the joints initially opened next to the seam, I realized how much wood was left on either side of the joint was a key factor in this test. tests? This all seemed a little strange to me. The pins actually perform quite well in my tests, almost as good as the dent and tenon joints. Repeatability in testing wood joints generally leaves much to be desired, and with all the variability, it is difficult to say for sure that one joint is better than another. But the dowel makers insisted that their joints were always stronger. We could not agree on the interpretation of the results, and I did not want to omit the patterns and separation forces that the supposed mortise and tenon joints were stronger. And so, to be on the safe side, I think it's best if I keep the jig-dowel creators anonymous. Considering all this, I was glad I only used some of the connections they sent me, as opposed to accepting one of their fancy dowel clamps from them. I think working with any manufacturer for review purposes puts one in a difficult position, especially if the review is of a jig one doesn't like. So while corporate sponsorship would be nice at times, life is much easier without it. On the go I doubt the producers tend to approach me |
