We don’t spend as much time at the dacha as in a private house, but there should still be a “secluded corner” where you can relieve your natural needs.
As you may have guessed, in this case we are talking about the toilet. And, of course, many will agree that it is very convenient (and much easier) when the toilet is located in the country house itself.
But, firstly, not everyone at their dacha has a spacious house (and some don’t have it at all) to accommodate a bathroom.
Secondly, even if there is a house, there may be no sewerage or running water. And not everyone can afford the installation of utilities. Yes, and in the country this is impractical.
Therefore, the best option is to build a toilet outside the house, that is, on the street. In this article we will look step by step at how to make a toilet at minimal cost.
Most often, summer residents use materials that remain after renovation or construction. For example, if you decide to build an outdoor toilet from boards, then in this case the savings will be obvious.
However, if there are no leftovers, you can buy all the necessary materials (including used ones) by first drawing up a project and drawing a drawing on paper, as well as calculating the required quantity.
Building a street toilet for a dacha with your own hands is, in principle, a simple process, and if you do everything strictly in accordance with the plan, then everything will work out.
By performing the main stages of work step by step, we will quickly achieve the desired result. And you won’t be ashamed to show your homemade structure to your neighbors.
And first you will need to decide on the size of the booth, as well as the type of structure being built.
If we talk about the types of outdoor toilet stalls, we can distinguish several main design options:
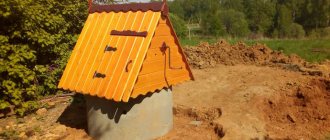
- with a pitched roof - these are the so-called “birdhouses”;
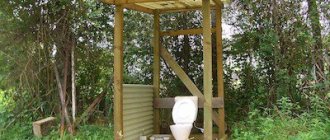
- with a gable roof - huts, houses and huts (teremki).
Where is the best place to place a country toilet?
The optimal place is the corner of a summer cottage. It's good if it's shaded. The toilet must be located at least 1 m from the property boundaries. There are also sanitary and hygienic requirements that must be strictly observed. A toilet with a cesspool should be located 10-12 m from residential buildings, 25 m from a source of drinking water, or even further. Other minimum distances:
- 1.5 m - from berry bushes;
- 4 m - from fruit trees;
- 8 m - from the bathhouse, summer shower.
It is necessary to take into account even those objects that are located in neighboring areas. If the project provides for a sealed septic tank, it is necessary to ensure the possibility of unhindered access for a sewer truck. The wind rose is also taken into account, otherwise the smells wafting from the bathroom can greatly spoil the mood of the owners, their guests and neighbors.
Backlash closet for a summer residence
You can build a backlash-closet type toilet in your dacha next to the house (see drawing) or even in a specially designated room inside. However, first familiarize yourself with its main feature - since the cesspool is located outside, using the toilet becomes problematic in winter, so the cesspool is heated.
Sometimes, in order to avoid spending on heating, such a toilet is used only in the warm season, completely cleaning the pit before the onset of cold weather. In this case, in winter they resort to using a powder closet or dry closet.
So, look at the drawing of the country toilet and familiarize yourself with the features of its design:
- The cesspool is only a sealed type, with an electric heating circuit in the walls.
- An exhaust pipe is required . Ventilation can be done through a stove or fireplace. Sometimes the pit is heated with warm air from the dacha heating stove.
- A hatch or cover of double construction with intermediate insulation is installed above the cesspool
- A mandatory requirement is the presence of a slope at the bottom of the pit away from the house.
Despite the obvious convenience of using backlash closets, they are not widely used, as they require additional costs for heating the pit in winter.
Before you start building a toilet in your country house, look at photos and drawings of existing structures. Perhaps you just want to repeat one of them, or maybe take the most original ideas in order to create a toilet stall according to your own design.
Types and dimensions of “rooms of reverie”
The sizes of country toilets vary. These parameters are influenced by the features of the structure, its location, and the presence or absence of a cesspool. Main types of structures:
- A traditional “village” structure equipped with a cesspool.
- "Backlash closet." There is also a pit for sewage here, but it is absolutely sealed. Such a toilet is required if the place allocated for it is located close to a source of water or housing. If the groundwater level is high, a “backlash closet” is the only option.
- “Powder-closet” is a bathroom with a house, but without a pit. It is replaced with a plastic tank, barrel or bucket. They fight unpleasant odors with the help of adsorbents - they dust the contents of the container with wood ash or sawdust, sand, or peat.
The usual dimensions of a toilet are: height from ceiling to floor - 2000-2100 mm (for a “hut” - 3000), where the toilet seat is located - 1900-1950. The toilet seat rises 400-500 mm above the floor. The depth of the building is 1500 mm, the width is 1200. These values for the “hut” houses are 1500, 2000, for the “hut” - 1500, 1000, respectively. The most popular birdhouse model, it has a pitched roof. The height of the “facade” is 2300 mm, the rear wall is 2000. Width and depth are 1000 mm, this is the minimum.
Combined shower-toilet
The second most necessary building at the dacha is a shower. And if so, then why build two separate structures if they can be built under one roof. Several drawings of country toilets with a shower for self-construction are published below.
Option of a combined toilet for a shower (to enlarge the size of the picture, click on it with the left mouse button)
The second project of a toilet and shower under one roof.
Appearance and drawing of a toilet and shower for a summer house in one building (to enlarge the size of the picture, click on it with the left mouse button)
View and dimensions of the toilet + shower from the front and side (to enlarge the size of the picture, click on it with the left mouse button)
As you guessed, the structure is simply doubled in width. If you want, you can create your own project, according to your desires and needs. The drawing of a utility room with a toilet will be exactly like this. You may need to make one of the rooms a little larger. Just provide for this when planning and manufacturing supports for construction.
Source
Materials for construction and shapes of toilets
It is necessary to select a suitable material in advance, and after this stage, do the project yourself or look for a suitable ready-made drawing. Typical materials:
- Wood is a classic option for an outdoor toilet. Such construction will not take much time, but the wood requires protection from moisture and fire.
- Brick is a material from which a toilet will be strong and durable, but such a country cabin needs a strong foundation and a craftsman who is familiar with the art of masonry.
- Metal is an option for those who are used to saving time and money. Plus - ease of construction. The downside is the heat in the building in the summer and the need for internal cladding if the owners are at the dacha in the winter.
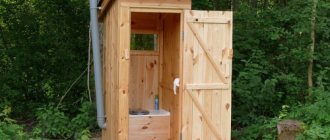
There is a wide variety of types of wooden models. The most popular form of toilet is the “birdhouse”, but there are others that vary in the complexity of construction:
Hut house
This cabin is compact and economical. Its simple geometric shape impresses with its ease of construction, and its drawing is also elementary. The side walls double as roof slopes; construction of the above-ground part of the toilet takes only a few hours. Roofing material (for example, soft tiles) is laid on the side walls. The façade and rear wall of the structure require finishing.
Toilet-teremok
It has a diamond shape, which makes the job a little more difficult. To give a fabulous look, various carved decorations are used. The frame is lined with round timber sawn in half, ordinary overlapping boards, block house or thick lining.
Toilet combined with shower
In this case, the drawing of such a structure is the addition of a second similar diagram on one side. If necessary, the size of this cabin can be slightly increased.
Choosing a toilet model
A latrine made of boards at the dacha can be built with a cesspool (backlash-closet) or with a container for waste (powder-closet). The first option is necessary for summer residents with a large family who permanently live on the site, and the second is suitable for those who care for the garden several days a year. In this case, the container with biological waste can be emptied approximately once a month. In addition, the type of latrine is influenced by the location of groundwater: if it is close, then you should not dig a cesspool.
Having decided on the design of the toilet, you can begin drawing up a drawing that will simplify the assembly of the frame, or use ready-made plans.
The drawing shows detailed dimensions
In any case, it is recommended to manufacture structural parts strictly according to the drawing in order to avoid inaccuracies and distortions. The simplest model of a restroom, which does not require special skill, is considered to be the “Birdhouse”. Typically its height is two to three meters, width - one meter, and length - one or one and a half meters. If desired, all these dimensions can be increased or a double restroom can be made.
The Teremok toilet looks original, especially with its arrow-shaped shape, which does not retain snow. And also the “fairytale” design is well protected from the wind. Its main element, unlike the Birdhouse, is not the frame and walls, but the roof, fixed to a truncated base.
The structure, lined with a slab, is well protected from snow
Another common type of latrine is the “Shalash”, where the side walls simultaneously serve as roof slopes. This model can be built in just a few hours. Finishing materials in such a design are needed only at the back and front; roofing materials are laid on the sides.
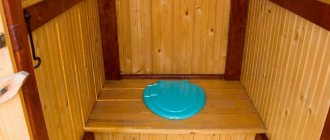
Comfortable sitting is an important detail of any restroom.
We are building a drawing
The development of a drawing of a country toilet should begin with the frame, noting the dimensions of the structure (length, width, height) and indicating the cross-section of the timber or boards. The design of a wooden building should show a cutting diagram for the facing material, the amount of which is calculated for one side (due to symmetry), front and rear walls. When creating a drawing of a “Birdhouse”, the front wall must be built higher than the back wall for slope if the roof is pitched. In a toilet with a gable roof, the front and back walls are the same height. Those who are planning to make a ceiling in the restroom should also display it in the illustration.
We calculate the amount of materials
Standard set of products for a small country toilet two meters high:
- Two pieces of edged boards from four to six meters.
- Four floorboards of six meters.
- Three-meter lining - two or four packs (depending on the type of internal lining).
- Edged timber with a thickness of at least 50×50 mm or a board - from 20 mm for the frame.
- Glassine - four meters.
- Ruberoid - one and a half meters.
- Twenty special galvanized nails for eight-wave slate or corrugated sheeting.
- Galvanized steel for the ridge.
- Door with fittings.
- Two buckets of sand.
- Antifungal drug packaging.
- Roofing material (120×140 mm).
The list may vary and be supplemented depending on the selected toilet model. The final estimate is drawn up according to a pre-created drawing. To build a toilet roof 1.5 m long and 1.2 m wide, you will need 1.8 m2 of edged boards (calculated by multiplying the length by the width) plus three meters (0.75 boards) for the side rafters.
As a result, 1.75 boards 4 m long and 0.25 m wide are enough to cover the roof. The number of floorboards is determined according to the same scheme: 0.6 m2 (1 m x 0.6 m) is needed for the floor covering and ( 0.6 m x 0.4 m x 2 + 1 m x 0.4 m + 1 m x 0.6 m = 1.48 m2) - for a toilet seat, and the area of four boards is six meters long and 100 mm thick is 2.4 m2.
To cover the back and two side walls of the restroom you will need 7.28 m2 of boards. The area is also calculated by multiplying the length by the width. As a result, 2 m2 of lining will go to the back wall and 2.64 m2 to one side wall (2.64 m2 x 2 + 2 m2 = 7.28 m2).
For a parallelepiped-shaped restroom model, the length of the lining must be at least 1.24 m (if the products are stuffed crosswise), and the width and thickness can be taken arbitrarily. Calculations are made in a similar way: the area of the walls of the structure is determined and divided by the area of one board of the lining, the number of necessary elements is obtained.
We are building a restroom according to the traditions of Russian architecture
We purchase quality material
If you decide to build a restroom from boards, then it is better to use widespread products made of larch, which does not darken, retains its original appearance for a long time and is durable. Edged boards can be planed or untreated. The first ones are more expensive, but they are already dried, polished and do not injure your hands during operation.
The toilet can also be covered with clapboard - thin boards that are fastened together with grooves. It is usually made from coniferous wood, resists moisture and temperature changes well, and does not deform when exposed to sunlight.
The lining withstands weather conditions well
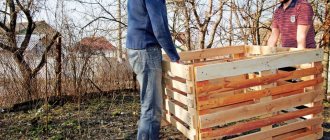
A budget-friendly and convenient option for building a closet can be used pallets - packaging products that are convenient to fasten, break, process and combine with other materials. They can be easily obtained for free by contacting transport companies that do not need “garbage”, or purchased at a bargain price through thematic portals.
Pallets are connected to each other with bolts
You can also cover the restroom with moisture-resistant plywood, fiberboard, chipboard or sealed OSB boards. All of the materials listed are easy to install and resistant to adverse biological influences. However, it should be taken into account that fiberboard and chipboard made from glued sawdust can be damaged by impact loads, especially for thin materials. A toilet with a 0.5 mm fiberboard coating is unlikely to last long.
Modern OSB-3 boards, made from wood chips with synthetic resins in the form of three layers, can withstand significant mechanical stress and are easy to construct. Therefore, they are suitable for structures designed for long-term operation. A restroom made from logs or timber will be reliable, durable and pleasing to the eye with an antique style. This design has only one drawback - the high price.
Preparing the necessary tools
In the process of building a toilet you will need:
- building level;
- hacksaw or portable circular saw;
- plane;
- Screwdriver Set;
- self-tapping screws;
- hammer.
What to consider at the design stage?
It is better to take your favorite wooden birdhouse as a sample. If you are not satisfied with the standard layouts and dimensions of a country toilet, then the development of your own project begins with a frame layout. This sheet immediately indicates the dimensions, quantity of building materials, cross-section of boards and timber.
When calculating the amount of facing material, the areas of the facade, rear wall and one side wall are summed up. The last digit is doubled. Do not forget about the difference in heights of the front and rear walls; it provides a slope. If the plans include the installation of a wooden floor, the necessary materials are added to the consumables; the dimensions of the roofing sheet are also noted on the drawing.
What can be sheathed with
By and large, the walls of an OSB toilet built for a summer house or village house with your own hands can be left as is - simply by covering the sheets with wood varnish or painting them if desired.
However, if you have leftover siding from your home, you can use it to cover the exterior of the outhouse. This way you can improve your country toilet completely free of charge.
You can also use corrugated roofing sheets as the outer cladding of a rural wooden toilet (made of OSB and boards).
In this case, you don’t have to spend money on impregnation, varnish or paint. Roofing metal will reliably protect the tree from precipitation.
Once again, we draw your attention: if you do not know how to make a toilet in the country with your own hands, the drawings will help you. You can use ours or pick up others from the Internet.
How to calculate the volume of a cesspool?
Before starting work on the construction of a much-needed structure, the optimal dimensions of the tank are determined. For an outdoor toilet you need a pit with a depth of 1500 to 2000 mm. The side walls are arbitrary - 1000x1000 mm, 1000x1500 or 1500x1500 mm, but a very wide pit will be more difficult to cover. It is not advisable to dig a pit more than 3000 mm deep.
It’s a completely different matter if a pit is being dug for a sewer system coming from the house. To avoid emergencies, it is necessary to take into account the number of residents. The average daily water consumption by a person is about 150 liters, so the minimum pit volume for a family of 3 residents will be 12 m3. If the family does not live at the dacha permanently, but only visits there on weekends, the pit can be reduced.
The properties of the soil are taken into account. For example, clay does not absorb water well, so a larger tank volume is needed. Sandy and loose soils can absorb up to 40% of runoff per month, in which case the hole can be made smaller.
Designing a brick toilet with drawings
The foundation for a brick toilet can be a reinforced concrete curb buried in the ground, or concrete blocks located at the corners of the structure.
A standard small cabin with a wall area of 8 square meters will require about 300 bricks to build. The calculation is approximate and very exaggerated, but for a general understanding of the process this information is enough.
Sequence of actions when laying bonded and treaded rows of brickwork. The walls of the toilet must be strong, because the building will be used for many years
For such a volume of masonry, you need to design about 60 kg of cement to prepare the mortar. The dimensions of a brick country toilet can be taken from the drawing of a birdhouse toilet.
If the wooden walls are made separately, then the brick outhouse is laid out in rows along the entire perimeter.
Cement mortar takes time to gain strength. If you lay out all the rows of masonry at once, the lower ones will bear a large load, under the influence of which the unset mortar will simply be squeezed out of all the seams.
To prevent this from happening, the laying is carried out in several stages. Optimally – 4-5 rows per day. Construction will be delayed, but the result will be much better.
Openings must be shown on the drawing in advance so that during the laying process you are not distracted by unnecessary calculations and adjustments
The roof can be pitched, as in the case of a wooden country birdhouse-latrine, or gable. Depending on this, the layout of the rafter mesh changes. The toilet is covered with the same slate, corrugated sheeting or other covering materials.
In addition to the listed types of closets, our website has an article on how to design and build a toilet with a shower. This is especially true if the territory of the summer cottage is not too large.
Arranging a pit for a toilet stall
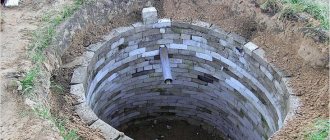
If you have a drawing, the optimal dimensions of the country toilet have been calculated, the appropriate volume for the pit has been determined, you can proceed to the most labor-intensive stage - the construction of the pit. Regardless of which option is chosen (sealed or absorbent), the pit needs reliable walls that can prevent waste from seeping into the soil. There are the most common and effective ways to ensure environmental safety.
Concrete rings
The advantages of this option are the high speed of construction along with the durability of such a cesspool. The joints of the rings are secured with mortar, sealed and waterproofed. It only takes a day to work. The downside is the need to “engage” special equipment, which promises additional costs.
Monolith
A concrete monolithic well requires much more time for arrangement. In addition to the mortar, you need formwork made from available materials - sheets of metal, boards, plywood, etc. A reinforcing frame is required. It is recommended to fill in layers of 500-700 mm, so the work cannot be completed quickly, but the bonus for this method is the saving of material for formwork and greater strength.
Plastic containers
Tightness and immunity to moisture are the undeniable advantages of such containers. However, there is also a drawback - the flexibility of the material. This disadvantage is eliminated by strengthening the walls of the pit with reinforcement and mortar, but the best option is Eurocubes with a metal sheathing. In addition to these containers, plastic barrels are readily used.
Brick
This is the best option if the material remains after construction. This method allows you to give the hole any shape - square, round, rectangular, as well as maintain dimensions down to the millimeter. Even half-brick masonry will ensure the strength of the walls. Tightness requires the absence of voids in it. At the final stage, the brick wall is plastered and waterproofed.
Selecting the appropriate project type
To design a drawing, you need to decide on the type of toilet. This may be a toilet with or without a cesspool. In addition, the cesspool can be used for the benefit of the household and compost can be produced in it.
A building with a sealed container instead of a cesspool would be appropriate in an area where groundwater is located too close to the surface of the earth.
No. 1 - classic country toilet with cesspool
The most common and familiar design of a simple toilet for a summer house is a model with a cesspool. The principle of this design is simple: all waste falls into a deep hole, which is located directly under the toilet booth.
If the cesspool is full, they call a sewer man who pumps out all the sewage, and the toilet can continue to be used.
This scheme for a country toilet is time-tested. Its main advantage is that the pit does not need to be maintained for quite a long time. If the toilet is used only during the summer season, you may not have to call a sewer at all.
Since a shower in a country house is just as necessary as a toilet, some try to combine these two projects into one.
If you build a summer shower in one part of the site, and a toilet house in another, you will have to do a lot of shoveling work, because a drainage pit is needed in both cases.
By combining amenities, you can significantly reduce labor costs for excavation work and the amount of materials required.
No. 2 - powder closet or toilet without a pit
A simple way to make a drawing of a toilet for a summer cottage is to design it according to the powder-closet principle.
This type of toilet does not require a cesspool; all waste goes into a tank directly under the toilet seat. This can be a plastic or metal tank or bucket.
Since the main problem with such toilets is an unpleasant odor, the sewage is sprinkled (powdered) with adsorbent substances, which protect the restroom from the appearance of a specific “amber.”
In toilets of this type there are always two containers: for collecting waste and for storing powder. Containers need to be cleaned regularly
Wood ash, peat, sawdust, and sand are used as adsorbents. By and large, a powder closet with peat is a homemade variation of ready-made industrial dry closets that use the same peat as a filler.
No. 3 - toilet with compost pit
Another option, ideal for a summer cottage, is a compost-producing toilet. As you know, compost is an excellent organic fertilizer for plants.
Natural fertilizer will never be superfluous, and special technology allows it to be produced at an accelerated pace from almost nothing.
In order for the compost to be saturated with oxygen, it must be loosened regularly. For this purpose, a special lever is provided for manual mixing.
The toilet is equipped with a compost pit. It is better if there are two of them, so you can use each of them in turn while the compost matures.
The pits are designed in such a way that the finished fertilizer can be easily removed. This additional functionality will appeal to those who are concerned about the environment.
Construction of a “birdhouse”
It is better to get acquainted with the stages and their sequence using the example of this simplest design. Having delved into the details, you can “swing” at a more complex form of toilet.
Foundation arrangement
The best option is the columnar variety. Asbestos pipes covered with a layer of waterproofing are installed in the ground (depth - 500-700 mm). The solution is poured into them, then the wooden supports of the frame are fixed there, their level is controlled, preventing even minimal displacement as the concrete gains strength.
Frame
It is made from 100x100 mm timber. The material is treated with antiseptics and antipyrine or primed and then painted. Fasteners - wooden hardware. If you have a welding machine, it is better to build a metal “skeleton”. The front pair of pillars is made higher than the back one; it provides the roof with the necessary slope.
Make 2 auxiliary horizontal straps: at the level of the toilet seat and for mounting the roof. To add rigidity, diagonal beams are needed; they are placed on the sides of the building. To form a doorway, vertical supports and a horizontal lintel between them are used.
How to put a wooden toilet in place
In this chapter we will talk about how to build a toilet, the drawing of which is given below. We present complete instructions for its construction:
Assembly drawing
Frame drawing
Drawings of frame parts
- Set the foundation . For this purpose, it is not necessary to pour a concrete base; it is enough to dig concrete wall blocks or pillars around the perimeter of the building.
- Make a frame from a wooden beam 50x50 mm or 80x80 mm . In the same capacity, you can use profile metal pipes. The frame must have four vertical supports.
- Longitudinal elements are installed as roof lining , protruding at least 30 cm beyond the perimeter of the house.
Sanding the floor
We cut and knock down the beams
Securing the seam with a pin We advise Clogged toilet: tips and recommendations for elimination. How to unclog a toilet
Fastening the floor with a bracket
Nailing the block house
Fastening the door frame with a pin
- To strap the base, fasten four strips at the level of the toilet seat . At the same time, be sure to take into account your height for the convenience of using the toilet. Typically, the height of the toilet seat is set no more than 40 cm from the finished floor.
- Next, install the jibs diagonally along the rear and side walls.
Diagonal spacers
- To install the door, add two vertical supports no more than 190 cm high, connected at the top by a jumper.
- Cover the frame with wooden boards , corrugated sheets, slate, etc.
- Make a door on the back wall for easy emptying of the waste container. You can make a cutout along the entire width of the wall to the height of the toilet seat, securing it with loops.
- When covering the roof, seal it with roofing felt or other moisture barrier if using wooden boards. Still, it is better to use slate or sheet metal.
Stuffing the sheathing
Fixing ondulin
- If necessary , install a ventilation pipe by cutting a hole in the toilet seat and roof. Be sure to seal all cracks.
- Hang the door . Don't forget to equip it with a latch or hook. Make a window in the door for natural light.
Veil
Window
The restroom is ready
Handle and bolt
Lavatory side view
Rear view of restroom
Don't forget to paint the toilet to protect it from the elements. If you are installing a metal frame, then it is covered with a protective layer before sheathing it.