LEDs are considered one of the most efficient light sources; their luminous flux reaches fantastic values, about 100 Lm/W. Fluorescent lamps produce half as much, namely 50-70 Lm/W. However, for long-term operation of the LED, it is necessary to withstand their thermal conditions. For this, branded or homemade radiators for LEDs are used.
Why do diodes need cooling?
Despite their high luminous efficiency, LEDs emit light for about a third of the power consumed, and the rest is released as heat. If the diode overheats, the structure of its crystal is disrupted and begins to degrade, the luminous flux decreases, and the degree of heating increases like an avalanche.
Reasons for LED overheating:
- Too much current;
- poor supply voltage stabilization;
- poor cooling.
The first two reasons can be solved by using a high-quality power supply for LEDs. Such sources are often called an LED driver. Their peculiarity lies not in stabilizing the voltage, but in stabilizing the output current.
The fact is that when the LED overheats, the resistance of the LED decreases and the current flowing through it increases. If you use a voltage stabilizer as a power supply, the process will turn out to be an avalanche: more heating means more current, and more current means more heating and so on in a circle.
By stabilizing the current, you partially stabilize the temperature of the crystal. The third reason is poor cooling for LEDs. Let's consider this issue in more detail.
Solving the cooling problem
Low-power LEDs, for example: 3528, 5050 and the like, give off heat due to their contacts, and the power of such specimens is much less. When the power of the device increases, the question of removing excess heat arises. For this purpose, passive or active cooling systems are used.
Passive cooling is a regular radiator made of copper or aluminum. There is debate about the benefits of cooling materials. The advantage of this type of cooling is the absence of noise and the almost complete absence of the need for maintenance.
Installation of LED with passive cooling in a spotlight
Active cooling is a cooling method that uses external force to improve heat dissipation. As the simplest system, we can consider a radiator + cooler combination. The advantage is that such a system can be much more compact than a passive one, up to 10 times. The disadvantage is the noise from the cooler and the need to lubricate it.
How to choose a radiator?
Calculating a radiator for an LED is not an entirely simple process, especially for a beginner. To perform this, you need to know the thermal resistance of the crystal, as well as the crystal-substrate, substrate-radiator, and radiator-air transitions. To simplify the solution, many use a ratio of 20-30 cm2/W.
This means that for every watt of LED light you need to use a radiator with an area of about 30 cm2.
Naturally, this solution is not unique. If your lighting structure will be used in a cool basement room, you can take a smaller area, but make sure that the temperature of the LED is within normal limits.
Previous generations of LEDs felt comfortable at a crystal temperature of 50-70 degrees, new LEDs can tolerate temperatures up to 100 degrees. The easiest way to determine this is to touch it with your hand; if your hand can barely bear it, everything is fine, but if the crystal can burn you, make a decision to improve its working conditions.
We calculate the area
Let's say we have a 3W lamp. The radiator area for a 3W LED, according to the rule described above, will be 70-100cm2. At first glance it may seem big.
But let's consider calculating the radiator area for an LED. For a flat plate radiator, the area is calculated as follows:
a * b * 2 = S
Where a , b are the lengths of the sides of the plate, S is the total area of the radiator.
Where did the coefficient 2 come from? The fact is that such a radiator has two sides and they equally give off heat to the environment, so the total usable area of the radiator is equal to the area of each of its sides. Those. in our case, we need a plate with side dimensions of 5*10cm.
For a finned radiator, the total area is equal to the area of the base and the areas of each of the ribs.
Design features
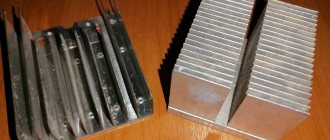
Structural radiators are divided into two groups:
- needle-shaped;
- ribbed.
The first type is mainly used for natural cooling of LEDs, the second - for forced cooling. With equal overall dimensions, a passive needle radiator is 70 percent more efficient than a finned one.
Needle-type radiators for high-power and SMD LEDs
But this does not mean that plate (finned) radiators are only suitable for working in tandem with a fan. Depending on their geometric dimensions, they can also be used for passive cooling.
LED lamp with ribbed radiator
Pay attention to the distance between the plates (or needles): if it is 4 mm, the product is designed for natural heat dissipation; if the gap between the radiator elements is only 2 mm, it must be equipped with a fan.
Both types of radiators can be square, rectangular or round in cross section.
We also recommend that you familiarize yourself with the electromagnetic device - a choke for lamps.
DIY cooling
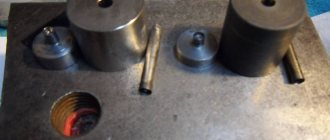
The simplest example of a radiator is a “sun” cut out of tin or aluminum sheet.
Such a radiator can cool 1-3W LEDs. By twisting two such sheets together through thermal paste, you can increase the heat transfer area. This is a banal radiator made from improvised means; it turns out to be quite thin and cannot be used for more serious lamps.
It will be impossible to make a radiator for a 10W LED with your own hands this way. Therefore, you can use a radiator from the computer’s central processor for such powerful light sources.
If you leave the cooler, active cooling of the LEDs will allow you to use more powerful LEDs. This solution will create additional noise from the fan and require additional power, plus periodic maintenance of the cooler.
The radiator area for a 10W LED will be quite large - about 300cm2. A good solution would be to use finished aluminum products. You can purchase an aluminum profile at a hardware or hardware store and use it to cool high-power LEDs.
By assembling the required area from such profiles, you can get good cooling; do not forget to coat all joints with at least a thin layer of thermal paste. It is worth saying that there is a special profile for cooling, which is commercially produced in a wide variety of types.
If you do not have the opportunity to make an LED cooling radiator with your own hands, you can look for suitable copies in old electronic equipment, even in a computer. There are several located on the motherboard. They are needed for cooling chipsets and power switches of power circuits. An excellent example of such a solution is shown in the photo below. Their area is usually from 20 to 60 cm2. Which allows you to cool a 1-3 W LED.
Another interesting option for making a radiator from aluminum sheets. This method will allow you to gain almost any required cooling area. Watch the video:
Material for the manufacture of heat sink
The service life of LEDs directly depends on what material is used in the semiconductor, as well as on the quality of the cooling system. When choosing a material for a heat sink, you must be guided by the following:
- the material must have a thermal conductivity of at least 5-10 W;
- The thermal conductivity level must be above 10 W.
In this regard, for the manufacture of a heat sink it is worth using the following materials:
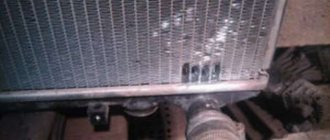
- aluminum. The aluminum version is currently used most often for cooling LEDs. But at the same time, the aluminum heat sink has a significant disadvantage - it consists of a number of layers. As a result of this structure, the aluminum apparatus provokes thermal resistance. They can only be overcome with the help of additional heat-conducting materials, which can be insulating plates;
Note! The aluminum radiator, despite its shortcomings, does an excellent job of dissipating heat. An aluminum plate is used here, which is blown by a fan.
Aluminum radiator
- ceramics. Ceramic heat sinks have special routes through which current is conducted. LEDs are soldered to the same traces. Such products are able to remove twice as much heat;
- copper. There is a copper plate here. It is distinguished by higher thermal conductivity than aluminum. But copper is inferior to aluminum in technical characteristics and weight. At the same time, copper is not a malleable metal, and after processing a lot of scraps remain;
Copper radiator
- plastic. The advantages include affordable cost, as well as a high level of technology. At the same time, the disadvantages here are lower thermal conductivity.
As you can see, the best option in terms of price and quality would be to make your own radiator for LEDs from aluminum. Let's look at several ways to make a heat sink for LEDs.
How to fix the LED
There are two main methods of fastening, let's consider both of them.
The first method is mechanical. It consists of screwing the LED with self-tapping screws or other fasteners to the radiator; for this you need a special “star” type substrate (see star). A diode, pre-lubricated with thermal paste, is soldered to it.
On the “belly” of the LED there is a special contact patch with the diameter of a slim cigarette. After that, power wires are soldered to this substrate, and it is screwed to the radiator. Some LEDs go on sale already mounted on an adapter plate, as in the photo.
The second method is glue. It is suitable for mounting through a plate or without it. But it’s not always possible to attach metal to metal; how to glue an LED to a radiator? To do this, you need to purchase a special thermal conductive glue. It can be found both in hardware stores and in radio parts stores.
The result of such fastening looks like this:
The first method of self-assembly
The simplest design for a homemade radiator, of course, will be a circle. It can be cut like this:
- We cut out a circle from a sheet of aluminum and make the required number of cuts on it;
Cut aluminum circle
- Next we bend the sector a little. The result is something like a fan;
- along the axes it is necessary to bend 4 antennae. With their help, the device will be attached to the lamp body;
- LEDs on such a radiator can be fixed using thermal paste.
Ready-made radiator for round diodes
As you can see, this is a fairly simple manufacturing method.
conclusions
As you can see, a radiator for an LED can be found both in the store, and by rummaging through your old devices, or simply in the deposits of all sorts of small things. It is not necessary to use special cooling.
The radiator area depends on a number of conditions, such as humidity, ambient temperature and radiator material, but they are neglected in domestic solutions.
Always pay special attention to checking the thermal conditions of your devices. This way you will ensure their reliability and durability. You can determine the temperature by hand, but it is better to purchase a multimeter with the ability to measure it.
Please rate the article. We tried our best:)
Did you like the article? Tell us about her! You will help us a lot :)
Temperature
And for my 10 W, according to the known dependence (see figure), a delta of 30º is obtained.
The maximum permissible LED temperature is +80º, so this radiator can be operated without forced cooling at ambient temperatures up to +50º. It is not surprising that in fact the radiator practically does not heat up, because creates natural air circulation and you can safely take a narrower plate or install a more powerful LED, up to 50 W. I have already bought myself several 1000x15x2 mm. If they sold them in 10 mm widths, I could also try them. By the way, it is better to fasten with two bolts or rivets, which can easily be made from the same piece of aluminum strip.