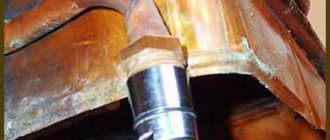
Despite the fact that today's variety of methods for repairing heating radiators (heat exchangers) is quite wide, soldering remains the most reliable way to eliminate a malfunction. The most common failure of radiators is antifreeze leaking from the system. It is worth noting that soldering a radiator to a gas water heater or repairing it is quite possible with your own hands. The use of geysers and heat exchangers must be completely safe.
Approaching the issue in a purely professional manner, you need to know that special equipment for argon welding and gas-dynamic spraying are used to repair heat exchangers. However, what should you do if you only have a soldering iron and the necessary knowledge on soldering metals? First, you should find out exactly whether you have an aluminum or copper heat exchanger in your home? Soldering copper and aluminum radiators is slightly different.
Soldering a copper radiator
- First, you drain the antifreeze with your own hands, after which the heat exchangers intended for geysers are dismantled;
- Next, you need to clean the soldering area from scale and oxidation. For these purposes, you can use a metal brush with soft hair and do it yourself. It is necessary to carry out the procedure for cleaning radiators until the metal is shiny;
- The next step after cleaning is to degrease the surface using a solvent (contact of the solvent with your hands is extremely undesirable);
- Take a soldering iron with your own hands, the power of which is at least 100 W, or a hair dryer, and then remove the scale from the tip (tip of the soldering iron);
- You should heat the repair area using a soldering iron or a hair dryer for this purpose;
- We take a brush with our own hands and etch the damaged area of the radiator using soldering acid applied to the brush (the radius of applying the acid is 5 millimeters from the center of the damage);
- We heat up the soldering iron and apply rosin to the tip, after which we proceed to tinning with solder;
- The leak area of the heat exchangers must be sealed.
Small radiator leaks can be removed using solder. However, if the damage to the heat exchangers is extensive, use a brass or copper patch. Longitudinal cracks in the radiator tube can also be repaired with your own hands, but it would be better to replace them with new ones: dismantle the old tube (equipment), and then install a new one.
Soldering an aluminum radiator
Soldering aluminum heating heat exchangers for geysers is a rather problematic and labor-intensive process. The essence of the problem is that when aluminum interacts with air, an oxide film is formed on the metal. The oxide film is removed by exposure to active fluxes, as well as aluminum-based solders. The following fluxes can be used: 34-A, NITI-18 (F-380).
The film is also removed mechanically:
- We heat the repaired surface of the radiator intended for geysers using a soldering iron, after which we cover the fault area with a thin layer of rosin;
- A small amount of solder is applied to the tip of the soldering iron (it is advisable to mix the solder with metal filings);
- Next, we tin the damaged area of the heat exchanger using circular movements;
- Rosin will prevent aluminum from coming into contact with air, and iron filings will help effectively remove the oxide film.
In general, soldering an aluminum radiator does not differ from a similar procedure used for copper heat exchangers.
Using Cold Welding
This method of soldering an engine cooling radiator does not involve heating. The hole is sealed with a special substance that covers the damage. Repairs are performed as follows:
- Prepare the part. To do this, the surface is cleaned of dust and degreased. A rag is moistened with alcohol and the radiator is gently wiped with it. You can’t apply any force; the metal will be damaged even more.
- Prepare the adhesive composition. It is selected according to the type of metal. Cold welding is a thick mixture that must be evenly distributed over the defect. Careful application improves the quality of the seam. Wait for the composition to dry and inspect the soldered radiator.
We recommend reading: How to solder copper pipes yourself
Soldering a car radiator
To repair automobile radiators by welding, special equipment designed for argon welding or gas-dynamic spraying is used. But what to do if you need to repair radiators yourself, without special equipment.
So, it is necessary to have skills, filler material, and soldering equipment. If there is some doubt that soldering car radiators is not your strong point, then it is better not to start work. However, if you are determined to repair an element of the car, then know the procedure.
This is what they teach in school
According to plumbing textbooks, soldering is the process of creating a permanent connection of parts using a special alloy (solder). Unlike another popular method - welding, when soldering the metals being joined do not melt, only the solder melts, which wets both parts and fills the gap between them. After cooling and crystallization, the solder, adhering to both surfaces, like glue, securely binds them. Strength depends on the cleanliness of the surfaces and heating (it is important to melt the solder, heat the parts and maintain the required temperature for a certain time). The characteristics of the selected solder and flux, as well as the properties of the materials of the parts being repaired, are important.
How to solder a car radiator
Today in this article you can learn how to solder a car radiator with your own hands or with the help of specialists. A car radiator is one of the most important elements of the cooling system.
It is through it that hot liquid (antifreeze or antifreeze) passes and releases heat to the environment. It is the radiator that allows it to cool due to the counter-movement of air flows when the car moves.
As a result of the fact that the car radiator is located in the risk zone (the front part of the car), it is prone to damage. In the event of an accident or any head-on collision, the radiator is sure to suffer. Its integrity is compromised or the body is deformed.
Damage to the car radiator leads to disruption of coolant circulation in the system. The driver begins to notice a leak of antifreeze or antifreeze. The quality of engine cooling is noticeably reduced. This is especially visible in the summer, when the high temperature outside breaks one record after another.
In addition to mechanical damage, a car radiator can be subject to corrosive influences. The appearance of the first rust on its surface indicates that the radiator has damage to its protective layer.
Preparing gumboil
Soldering a cooling radiator with your own hands is only possible if you have high-quality flux. You will have to prepare it yourself. And it’s better to do this just before you start soldering. So, pour 2 parts of ordinary rosin and 1 part of iron filings into a fireproof container. Sawdust can be made using a file with fine notches, processing any iron workpiece that comes to hand. Heat the resulting mixture over a fire, stir and let cool. That's basically it. Flux for aluminum is ready.
The main causes of radiator damage
Being in a risk zone, a car radiator takes on more than just a headwind. Often, stones, branches, rubble and even birds can damage the radiator. The driver should occasionally inspect its surface for damage. This will make it possible to identify problems at an early stage and take measures to eliminate them.
The following are the causes of damage to a car radiator:
1.Mechanical
Any damage associated with a violation of the integrity and tightness of the radiator. Even a stone flying from under the wheels of oncoming traffic is enough to damage the radiator. As a rule, head-on collisions with other cars or real objects come first.
2. Repair
They can also be classified as mechanical damage, but in this case the reason for the violation of the integrity of the radiator is inept handling of the tool when repairing the car.
Often car repairs require dismantling the radiator. Many mechanics, carelessly handling this important element of the cooling system, damage it with tools.
3.Corrosion
Damage to the radiator that seems insignificant at first glance in the form of scratches and chips can develop into active foci of corrosion. After some time, if the process is started, damage may form through which antifreeze or antifreeze begins to slowly leak out. It is difficult to notice them, but nevertheless, a meticulous examination of the radiator will help to detect them.
In principle, these are the main reasons that can cause damage to the surface of the radiator and compromise its integrity. There are still some operational problems regarding its use that disrupt the normal circulation of coolant.
Among them, two internal causes of malfunctions in the operation of the cooling system element can be identified:
1.Scaling
During the circulation of antifreeze or antifreeze, scale begins to form on the inner surface of the radiator. As an example, consider scale in a kettle.
A similar nuisance plagues drivers who love to use distilled water instead of antifreeze or antifreeze in the summer. It is this that is capable of producing such a sediment, which is tightly attached to the inner surface of the radiator.
2.A mixture of oil and antifreeze
Careless drivers who rarely maintain their car and do not keep the engine compartment clean are faced with a similar phenomenon. If even a small amount of engine oil has entered the engine cooling system, immediate measures must be taken to remove it and clean the system.
Otherwise, after mixing it with hot antifreeze, they form a substance similar to jelly. It accumulates in the radiator and disrupts the circulation of antifreeze, clogging the internal cavities of the heat exchanger.
How to solder a car radiator?
The question is interesting and requires detailed consideration. All minor damage and cracks on the surface of the radiator can be repaired by soldering. People who have not even held a soldering iron in their hand will be able to do this after reading the article.
If the element is deformed or the damage area is large, it is easier to replace the radiator altogether than to go through the hassle of repairing it and wasting time on it. The game in this case is not worth the candle. Today, if you wish, you can buy a second-hand radiator. The most important thing is to make sure there is no damage before purchasing.
There are 2 main types of radiators. They differ from each other by the type of material used for their manufacture. These are copper and aluminum radiators. The second has become much more common in recent years. It is lightweight, comfortable and corrosion resistant. That is why it is preferred over a copper radiator.
Before soldering a car radiator, it must be properly prepared. If you do everything quickly and without proper preparation, the quality of the soldering will be very low, and it will fall off in a few months.
Copper or aluminum
In order to properly solder a cooling radiator, it is necessary to determine exactly what material it is made of. Most often, cooling devices are made from copper and aluminum. It is not difficult to determine the type of material. Copper honeycombs have a characteristic reddish-brown color, aluminum ones – gray.
If you have determined that you have a copper radiator, you can consider yourself lucky. This metal is easy to solder at home. If you get an aluminum device, then you will have to tinker with it, because this material is difficult to solder.
How to solder a copper car radiator?
Work on sealing a copper radiator should be carried out in a well-lit room. To do this, it is placed on a flat, hard surface. The soldering zone is preheated with a hair dryer to soften the metal. It becomes flexible and convenient to work with.
Soldering a copper radiator is not difficult and it won’t take much free time. The following solders can be used: POS-60, PSr-72, PSr-12, Psr-45, L-CuP6, POS-40 . It is best to choose refractory solders, since the car radiator heats up during operation.
A layer of rosin is applied to the damaged area. It must be in liquid form. Without giving it a chance to cool, you need to lay the required amount of solder on top.
Using a heated soldering iron, the solder is spread in an even layer over the entire damaged area. Due to the rosin between the surface of the copper radiator and the solder, better adhesion will be achieved. At this point, the process of sealing a copper radiator with your own hands can be completed.
How to solder an aluminum car radiator?
Soldering an aluminum car radiator is complicated by the oxide film that forms on the material. POS-50 and POS-61 are used as solder The main task when soldering an aluminum radiator is to minimize the negative impact of the oxide film.
Otherwise, the quality of adhesion between the solder and the material will be low. The completed car radiator repair will not last long.
You can use the following effective method for soldering an aluminum radiator:
- Metal filings are added to rosin (can be obtained by rubbing a file against a metal element);
- Apply rosin together with metal filings to the damaged area of the radiator;
- A heated soldering iron evenly distributes the solder over the damaged area.
Metal filings are added to rosin for a reason. They act as an aluminum oxide neutralizer. A high level of adhesion between the solder and the surface of the aluminum material is ensured.
How to solder brass: methods, review of materials, instructions
An alloy of copper and zinc, known since ancient times, is widely used in our time. Brass has high strength, is resistant to corrosion, and is ductile. Thanks to these properties, it is used to make parts of mechanisms and structural elements that are forced to constantly come into contact with aggressive environments.
Despite the reliability of the material, brass products sometimes develop various defects that require repair - breaks, holes, cracks. One way to restore elements is soldering. This process is not very complicated, but it has its own characteristics, so it is extremely important to know how to solder brass.
Familiarity with soldering technology will allow you to successfully carry out such work even at home.
What are the features of the technology?
This method of producing permanent joints is not as popular as welding. The reason is lower solder strength.
Seams are formed by melting a filler material called solder. The most important difference between soldering is the melting temperature, which should be lower than that of the elements being connected.
They do not change the state of aggregation, which makes it possible to reliably fasten dissimilar materials.
The low-temperature effect on the surface to be soldered has made soldering indispensable, and in some cases the only possible: for example, when it is necessary to obtain a permanent connection of dissimilar metals.
The integrity of the processed parts is the main advantage of such a technological operation, since it allows you to work with the smallest elements without fear of their deformation or change in structure.
Soldering is especially relevant in electronics, where you have to work with miniature, very fragile microcircuits, and in electrical engineering, when there is a need to connect or extend conductors.
Classification of brass alloys
Brass can be double or multi-component. In the first case, the composition includes only copper and zinc, which increases the hardness of the alloy.
Other components that improve its physical and chemical characteristics include aluminum, iron, silicon, manganese, nickel, tin, lead and other elements.
For this reason, it is necessary to know exactly the composition of brass in advance; this will help determine the method, as well as the specifics of soldering.
Brass is classified according to its chemical composition:
- Two-component (double, simple). It consists only of copper and zinc. The percentage of these components may vary. These compositions are marked with the letter “L” and a number, which always indicates the amount of copper. For example, L90 contains from 88 to 91% copper, zinc accounts for 8.8-12%. There are impurities, but their amount is minimal - about 0.2%.
- Multicomponent (special). This brass has a large number of ingredients that increase the corrosion resistance of the alloy, its strength, and hardness. It is marked differently: another one is added to the letter “L”, meaning the alloying element, and another number appears - the percentage of alloying metal. For example, LA77-2 is aluminum brass, it contains 77% copper, about 2% aluminum, and the rest is zinc. All such alloys are named after the alloying element: ferrous, silicon, nickel, manganese, lead, etc.
Brass is used to make various products. According to the degree of processing, these alloys are divided into:
- deformable, they are used to produce bolts, nuts, car parts, brass strips, sheets, wire, pipes, pipes;
- foundry (fittings, bushings, instrument parts, bearings, car hydraulic system fittings).
Based on the percentage of zinc, brass is divided into:
- Red (tompak), containing 5-10% of this component. Such alloys are ideal for jewelry, figurines and similar artistic products.
- Yellow, here the percentage of zinc is 21-36%.
The reason for the popularity of brass is its durability, reliability, resistance to temperature changes and mechanical stress.
Therefore, parts made from this alloy are widely used in water supply systems, sewerage systems, and in mechanical and instrument making.
Brass products have a long service life, but this is only true if their operating rules are not violated.
Efficiency and obstacles
There are several technologies that allow you to easily weld parts or products made of brass, but they are not simple, promise significant costs, and require certain work skills from the master. Soldering is an alternative that is technologically simpler, which means this option is also suitable for a home craftsman, since there is no need for a highly qualified performer.
If the zinc content in the alloy is not too high, then there are no insurmountable obstacles on the way to the goal: simple soldering using ordinary rosin can cope with the task. When the percentage of this metal in brass exceeds 15, special fluxes are required.
The reason is strong evaporation during soldering of copper and zinc; it leads to the formation of a strong oxide film on the material, and it is quite difficult to remove it. Therefore, without special solders and neutralizing fluxes, an ideal result cannot be achieved.
Selection of optimal materials
Before looking for the best option for soldering brass, you need to determine its brand. Only in this case can an acceptable result of the operation be guaranteed.
Choosing the right solder
This is the material, usually an alloy, that is used to solder the elements. its peculiarity is its melting point, which must be lower than that of the metals being joined. Typical examples of alloys are tin and lead, pure tin.
However, the quality, mechanical strength of such a clutch and appearance are very far from ideal. The reasons for poor quality are pores that appear as a result of zinc evaporation.
To ensure reliable contact, the melting temperature of the material must be significantly lower than brass, and the solder must have excellent adhesion to this alloy.
- For soldering brass containing a large amount of copper, it is better to take compositions related to copper-zinc solders, since as a result of the addition of zinc, the melting point of these alloys is reduced. For example, PMC54 and PMC-48 solders melt at a temperature of 880°, PMC-36 - at 800-825°.
- For the same alloys, you can use silver solders - grades from PSr12 to PSr72. If brass has a higher zinc content, then similar solders are recommended, but not lower than PSr40.
- Relatively inexpensive copper-phosphorus solders are MF-1, MF-2, MF-3. They are plastic, but have good electrical conductivity. If the mechanical and vibration loads are high, then it is better to purchase solders with silver.
- If it is necessary to guarantee special strength, then hard copper alloys are chosen: for example, the universal L-CuP6.
The latest brand of solder has a temperature range of 710-880. It is designed to work with bronze, red bronze, brass, as well as copper, when installing pipes, radiators, and heating systems. When using silver or phosphorus solders, it must be taken into account that brass dissolves rapidly, so the processing time (heating and soldering) must be reduced.
Fluxes: homemade or ready-made
Fluxes clean the surface of metals from grease and also prevent the formation of an oxide film. They are also selected depending on the composition of the alloys.
For copper compounds, rosin alone is sufficient, but for brass a more aggressive agent is already needed. The simplest flux option for soldering brass is a mixture of borax and boric acid (1:1).
It is poured with water (5 mm per 1 g), boiled, stirring, then cooled. However, the best characteristics are possessed by “professionals” - purchased compounds.
- Borax flux. He has been known for a very long time, but since then he has not lost his fans. The reason for its popularity is its high-quality work.
- Other brands are no less effective: PV-209 (from 700 to 900°), PV-209X (from 650 to 850°).
Popular imported brands are German powders FELDER Cu-Rosil, Chemet FLISIL-NS-Pulver, flux paste Chemet FLISIL-NS-Paste. There are many fluxes on the market designed for soldering brass - both imported and domestic, so there will be no problems with the choice.
Two methods for soldering brass
As already noted, the biggest difficulty in working with brass is the formation of an oxide film when heating the alloy, which rosin (even in combination with alcohol) cannot cope with.
Using a soldering iron
To solder this alloy, you need a powerful device - at least 500 W, maximum - 1000 W. This requirement is associated with the high melting point of both the alloy and the solders.
However, there are exceptions: these are brass alloys that have a lower melting point (a large percentage of copper). The best option is a soldering station, which makes it possible to regulate the heating of the soldering iron tip. The optimal setting is 350°.
This equipment will avoid overheating of the soldering area.
If copper predominates in the alloy, then in this case you can use a tool of modest power - 100 W. Phosphoric or soldering acid is used as a flux: before soldering, the surfaces of brass products are carefully treated. POS-60 (tin-lead) is used as solder.
Soldering with a torch
The same problem can be solved using a not too large burner. But in this case there is a main requirement for the working surface: the brass part must be placed on a heat-resistant material.
For example, on a small asbestos plate, in an iron bucket with small pebbles. The parts to be joined are combined with each other, the surfaces are wiped with flux and a brown base.
A small amount of silver solder shavings are sprinkled on top, then a gas burner flame is introduced into the soldering zone.
Warming up is carried out in stages. First, the area is heated slightly so that the solder can adhere to the surfaces of the alloys. The second stage is heating the area until redness appears, during which the solder spreads evenly over the surface, filling the gaps. At this moment, a temperature of 700-750° is reached.
The burner is turned off. After the soldering area has cooled, it is washed, removing flux residues - sagging, glassy drops: first, the product is immersed in a hot solution of sulfuric acid (3%) for several minutes, then placed under running water.
These methods differ from the traditional joining of other elements with tin, since brass is not as easy to solder. The best results are guaranteed by using a gas burner. If you perform all stages of the operation correctly, you can obtain high-quality and reliable products.
The following video addresses this burning issue:
Automatic kettle repair
Kettle - this is what car enthusiasts call a radiator due to the fact that the liquid in it is beyond the boiling point of water - up to 130 degrees. Therefore, instructions on how to solder a radiator will come in handy. Repair of the internal combustion engine cooling system is the most common thing in auto repair shops during any holiday season.
Practice shows that on the road you can fix a leak yourself only temporarily - to the nearest service station. The following can be done as a temporary measure. Grouting powder or corresponding liquids are poured or poured into the radiator.
How to solder a radiator, read below. If, of course, you purchased everything you need in advance and put it in the trunk. These are the two main emergency equipment for long journeys.
Radiator repair is the elimination of leaks in the tubes. If this happens at home, you won’t have to turn to professional aluminum shareholders and coppersmiths. If you have everything you need, you can handle such a problem as repairing radiators on the highway.
To do this, you will need to perform several technical procedures:
- Draining the water/antifreeze, removing the radiator and preparing it for soldering.
- Availability of tools and SOS tools.
- Soldering of the emergency area.
Do not try to make the job easier by soldering without removing the heatsink. The fact is that the leak can be obvious - a stream, but there is a leak that you won’t notice. But after a while, an emergency situation with a coolant leak will occur again.
Removal is necessary, first of all, to diagnose possible water/antifreeze leaks. To do this, close the empty “kettle” with stoppers, except for one, connect an auto-compressor to it and place it completely in a container with water. Where even small bubbles appear, a new breakthrough is possible.
Looking for a leak
A clear sign that the radiator is leaking is the presence of traces of coolant on the ground under the car, on the engine guard, or on the engine itself. Finding the location of the leak without dismantling the device is almost impossible. But before you remove it, you should make sure that the problem is in it, and not in the pipes or, for example, in the leaky plug of the upper tank. When this is done, you can safely drain the coolant and remove the radiator for diagnostics.
If a visual inspection of the device does not yield any results, check it by immersing it in water. To do this, take a container of a suitable size and fill it with water. Close all pipes with plugs and immerse the radiator in water. Now all that remains is to create air pressure in the device. This can be achieved by simply blowing into the filler neck of the upper tank or by coming up with another option with a compressor (pump). The escaping air bubbles will show you exactly where the damage is.
Repairing a copper radiator
Clean the engine cooler from adhering dirt and leaves with a vacuum cleaner and water. Remove defective areas from the grilles on the tubes by carefully cutting them off, clean them thoroughly with a metal brush, sandpaper and a small file, and then degrease them with acetone or any alcohol.
Remember that the cleanliness of the leak site must be perfect so that the solder adheres to the metal everywhere - both on aluminum and copper radiators. Otherwise, the quality of the connection will leave much to be desired.
Now you can solder the radiator with your own hands by performing copper plugging. You need to prepare:
- electric soldering iron with a thick tip for 100 - 150 W;
- any burner;
- solder made from a mixture of lead and tin;
- oxide remover (flux);
- rosin, dry or in alcohol.
POS-60 with low melt temperature will patch a copper radiator. For a brass engine cooler, use index 40, only heating the defective area with a gas burner for a longer time.
After performing high-quality tinning, place the solder heated with a soldering iron over this area evenly over the soldering area. It is better to use any flux instead of rosin.
Restoring duralumin damage
Any welding of aluminum, as well as its soldering, is impossible without cutting off air, otherwise instant oxidation cannot be avoided. Since it is impossible to solder an aluminum radiator like a copper one, it is possible to take solder from bismuth with indexes 33 or 50.
But for it you first need to prepare a powder from four chemical elements that are difficult to find. They are used only at car service stations.
Another method can be used. To do this, have a carbon dioxide cylinder. Direct its jet to the place where the solder is applied. Apply solder and use a soldering iron to place it evenly over the area.
Checking the quality of work is not difficult. After the radiator has cooled down from soldering, pour antifreeze into it. If there is no leakage, place the unit on the car, drive several kilometers, subjecting the radiator to water pressure and heat load.
Remember that DIY repairs are not always the best solution. The problem can be fixed temporarily. Therefore, do not delay and at the first opportunity, seek advice and diagnostics from the service center specialists. Repairing a radiator is a task whose solution should still be trusted to experienced craftsmen.
Safety precautions
| The electric soldering iron must have intact cord insulation and a working plug. During operation, make sure that the cord does not touch the tool or heated parts. |
| Hold the soldering iron by the handle only. You cannot determine its heating by touch - just hold your hand at some distance from the sting. |
| Vapors from heated solder and fluxes are harmful to health. Work should be carried out in a ventilated area or in the fresh air. |
| Please note that the solder takes a long time to cool down on a heated part, so after removing the soldering iron, do not rush to immediately touch the seam with your hands. |
