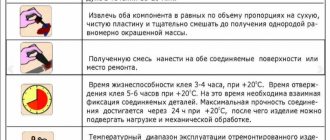
Mastix cold welding can be used to join various parts and structural elements without melting. The joining process will be represented in the form of gluing. New interatomic bonds are not formed, plastic deformation does not occur, which happens during traditional welding, so we need to talk about glue, and not welding in its usual sense.
Technical characteristics of the glue
Mastix cold welding composition is multi-component. It includes the following components:
- Epoxy polymer (adhesive base).
- Plasticizers (used to increase the resistance of the epoxy polymer to mechanical loads, shocks, and vibrations).
- Fillers (mineral, metal). Thanks to them, the thermal conductivity of the glue increases and the strength characteristics are improved, which makes the connection resistant to temperature changes.
- Polyamine or amine hardener (necessary to stimulate the hardening of the mixture - hardening of a thin layer of Mastix cold weld occurs within a few minutes).
The percentage of components will depend on the type of Mastix cold weld. The manufacturer offers a wide selection of products designed to solve various technical problems.
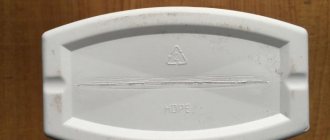
The adhesive mass is presented in the form of a material resembling plasticine. It has a rod shape and consists of 2 layers separated by packaging (mix the layers before use). Products are produced in soft packaging. It is recommended to store at a temperature of no more than +30o C. Important characteristics include:
- Minimum operating temperature: -60° C.
- Maximum operating temperature: +200° C (or more depending on the type of glue).
- Beginning of the hardening process: 7 minutes after application.
- Weight: 55 g.
- Recommended storage temperature: no more than +30° C.
How to solder an aluminum radiator at home
Before proceeding directly to soldering, you first need to remove the battery, drain all the liquid from it, then dry it well. After preparation, you can proceed to one of the soldering methods. These differ depending on whether you choose flux, flux or copper.
Method 1
For this method you will need the following materials and tools:
Materials and tools required for soldering the battery using the first method.
- fine iron filings;
- solder (it is better to use P300A or P250A);
- rosin;
- soldering iron with a power of 100 W or more;
- sandpaper;
- file;
- ceramic crucible.
You need to start work by preparing flux and solder. For this you will need;
- bismuth;
- tin;
- sodium sulfate;
- salt;
- lithium chloride;
- cryolite;
- potassium chloride.
First you need to make solder - mix bismuth with tin. They need to be melted in a crucible in a ratio of 95 (tin) to 5 (bismuth). Then you need to make flux: add table salt (6.5%), potassium chloride (56%), lithium chloride (23%), sodium sulfate (4%) and cryolite (10%). The container with the solution must be tightly sealed, because the mixture quickly absorbs moisture. Warm up the surface with a soldering iron, then apply the resulting melt to the work area. Next, you can apply solder to close the crack.
Soldering instructions:
- First of all, the area around the crack needs to be cleaned with sandpaper. But under no circumstances scratch the surface of the battery.
- Prepare a mixture of melted rosin and sawdust in a 2 to 1 ratio.
- Clean the soldering iron from deposits and plug it into the electrical network to heat it up.
- Treat the prepared surface of the radiator with a mixture of rosin. In this case, rosin must be applied to a heated surface, and not to a soldering iron, otherwise it may char and lose its properties. Only small cracks can be repaired with a mixture of rosin and sawdust, otherwise you will need flux.
- After treating with flux/flux, tin the surface, making circular movements, as if wiping it.
- Over time, the rosin will begin to spread, but you must continue to tin, and at the same time, start adding solder with sawdust, catching it with a soldering iron.
- Solder the crack completely with solder.
The meaning of each component is as follows: sawdust cleans the surface, thereby removing oxide deposits from it, and rosin protects the work area from air and prevents it from quickly oxidizing.
After completing all work, do not forget to check the quality of soldering. Fill the battery with water (it is advisable to tint it with potassium permanganate). Leave the radiator for a couple of hours. If no leak is found, then the work was done correctly.
Method 2
In order not to prepare the flux, the damaged area can be covered with a small layer of copper. To work you will need:
Materials and tools required for soldering an aluminum radiator using the second method.
- sandpaper;
- battery;
- soldering iron;
- solder;
- flux;
- copper wire with a diameter of about 1 mm;
- copper sulfate solution.
When all the materials and tools have been found, the preparatory activities have been completed, you can proceed directly to work. Soldering the radiator is carried out as follows:
- Sand the surface around the damaged area with sandpaper.
- Place a large drop of copper sulfate on the damaged area.
- Connect the negative from the battery to the radiator, and the positive to the copper wire.
- Connect the other end of the copper wire to the “drop” of vitriol so that the wire does not touch the battery.
- Wait a while until a thin layer of copper appears on the surface of the battery (the layer under the drop of copper sulfate).
- Now the surface needs to be washed and then dried. Only after this can you proceed to tinning with a soldering iron and soldering.
- Solder the crack with solder.
Product area of use
The scope of application of Mastix cold welding will directly depend on the type of adhesive chosen. Therefore, the products are ideal for use in the following areas:
- Bonding of metal products, structural elements, parts.
- Durable connection of metal and non-metal products.
- Bonding of metals that during operation heat up to extreme temperatures (more than 200° C).
- Repair of plumbing products, gluing tiles, porcelain, marble, etc.
- Bonding of steel products.
- Bonding of aluminum products.
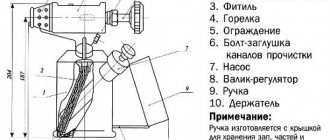
Materials and consumables
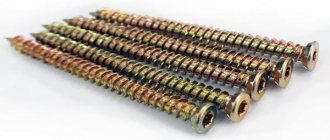
The most important consumable is the electrode. In general, welding copper with a tungsten electrode is not in short supply now, so the question is the diameter; the required welding current depends on the diameter. I had 1 and 2 mm electrodes and tried to light a spark. Welding machine - Resanta inverter, current 10 Amperes, radiator wall thickness about 1 mm, plus on the radiator, minus on the electrode. I burned two holes each with an electrode rod of 1 mm and 2 mm:
Here's the view from the inside:
As you can see, the hole caused by the ignition of the spark does not depend in any way on the diameter of the electrode. However, with a 1mm electrode you can weld with a current of 10 Amps, while for a 2mm electrode a current of 10 Amps is not enough, the spark goes out, you have to increase the current to 15-20 Amps, and this both increases the likelihood of burning a hole and will cause unnecessary heating radiator, which will cause the solder to begin to melt near the welding site, that is, both tubes and fittings may become unsoldered. I definitely recommend using 1 mm electrodes.
The diameter of the hole when igniting was 3 mm, which was not at all pleasing, so I tried to “accidentally” strike on the honeycomb:
And he also “accidentally” struck the phone:
As you can see, you need to cook very carefully, one awkward movement - and either the radiator is scrapped, or a lot of exciting and unnecessary fuss.
Next about the flux. I used borax, I think I read that it is water soluble, but for some reason it did not want to dissolve in water