Hardness measurement using the Shore method
Albert Shore lived in the twentieth century. He was an industrialist, his company produced low-modulus materials. These are substances with low longitudinal elasticity. With such characteristics, they are elastic without a significant increase in temperature; even room temperatures are sufficient. Such properties are possessed by polymers, rubbers and products of its vulcanization, some varieties of plastic. Thus, Albert Shore developed the hardness scale out of industrial necessity. She helped make his work easier and, with the help of professional salespeople, make his enterprise more successful. And this method is ideal for determining the hardness of polyurethane.
Shor's method is empirical. This means that it is associated with observations, conducting experiments, and drawing conclusions based on the perception of the results. The indicators identified by this method cannot be accurately translated into other known hardness values, because of this the Shore scale is not related to the fundamental characteristics of the material being tested.
But at the same time, the indicators obtained using Shor’s device have high practical significance. Their use is widespread in various industries. For example, motorists are interested in the Shore hardness of the rubber used to make tires. Optimal values range from 50 to 75. The softer the rubber, the better it grips the road. However, overly soft samples have a short service life, as they quickly wear out. Also, tires that are too soft make more noise. Taking into account operating conditions, you can select tires that are suitable for hardness using the Shore number.
Unfortunately, not every tire manufacturer indicates hardness, although it is not at all difficult to determine. The presence of this mark indicates a responsible approach to production and excellent quality indicators.
The method is most suitable for fairly soft materials. Measuring the Shore hardness of polyurethane is convenient and quick.
Devices
Equipment for determining Shore hardness was created by the inventor of the method itself. Depending on the method, a durometer or scleroscope is used.
Shore Durometer
A device called a durometer is used to determine the Shore hardness by indentation. These devices come in several types. Class D and A appliances include the following parts:
- Support surface. Its area is from 100 mm2. Has a hole 2.5 - 3.5 mm in diameter 6 mm or more from the edge.
- Indenter. Represented by a rod of 1.1 - 1.4 mm in diameter made of hardened steel.
- Indicator device. Demonstrates the extension of the indenter tip beyond the supporting surface, expressing its value in conventional units.
- Calibrated spring. Serves to apply force to the indenter.
As additional equipment, durometers are equipped with a device for securing the load. It is centered along the axis of the indenter and allows you to create a certain clamping force.
As for the types of durometers, they are differentiated based on the scales used for different materials. There are 12 scales in total. The most common options among them are types D and A. Type A is characterized by its focus on softer materials. Devices of this type are therefore characterized by less pressing force and greater measurement accuracy. It should be noted that the force created by the durometer is calculated using special formulas.
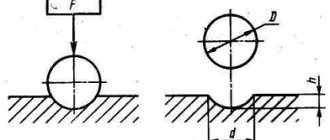
Schematic diagram of Shore's scleroscope
Scleroscopes are represented by devices equipped with a spherical striker. They are also differentiated into several types based on scales. The most common are C and D. Thus, type C device has a hollow tube with a window mounted on a tripod with a sample stage. The latter has a scale on it. Inside the tube there is a striker with a mass of 2.5 g and a radius of 1.25 mm, held by a locking-release device mounted on top of the tube. The rebound height is recorded visually. Type D devices have a heavier firing pin (36 g) and an electronic or mechanical device for recording the magnitude of the rebound. The striker is usually equipped with a diamond tip, although options with a blunt steel tip are used for testing soft materials.
Separately, it should be noted that due to the presence of several scales for each of the devices for determining Shore hardness, a conversion table from one to another has been created.
How is the Shore hardness of polyurethane measured?
Determination of hardness with a durometer
The device for measuring indicators was created by Shore himself back in 1920.
Its name is durometer. It consists of a support platform with a hole in the middle, an indenter rod and an elastic spring that applies some force to the rod. The durometer is also equipped with an indicator showing how much the indenter nose extends beyond the boundaries of the supporting surface. There are several hardness scales. A and D are most often used. Different scales are necessary for greater accuracy, because measurements are carried out for different materials. Scale A is optimal for soft ones, and D is suitable for more elastic ones.
Also, the use of this method requires taking into account environmental conditions. Before determining the hardness of polyurethane products, it is important to note the environmental humidity, temperature, and the presence of direct solar radiation. For true indicators, factors that distort the results should be excluded. ISO standards can help with this.
There are also special requirements for the type of test sample. Its thickness should exceed 6 mm. The width should be such that there is at least 12 mm left to each edge when measured. The sample must be smooth, as a rough texture will produce skewed results.
Hardness determination method
To determine the hardness of the material, the durometer is installed vertically, with at least 1.2 cm remaining from the tip of the indenter to any of the edges. The support panel is quickly, but without pushing, pressed against the surface of the sample. In this case, it is necessary to maintain parallelism between the planes. Pressure can be applied using a special weight or by hand pressing.
With instant measurements, readings are taken after 1 second. But more often they maintain an interval of 15 seconds. For greater accuracy, measurements are carried out five times in different areas of the sample. The arithmetic mean is calculated from the obtained values. The result can be from zero to one hundred. This is the hardness indicator of polyurethane according to the Shore table.
Taking measurements
Hardness measurement using the indentation method is performed on a horizontal hard surface. The durometer is placed vertically. The supporting surface of the device is quickly pressed against the object being examined and pressure is applied to it. After 15 seconds, readings are taken. Next, the average is calculated for five measurements at different points on the surface at a mutual distance of 6 mm. In the case of instantaneous measurement, readings are taken a second after pressure is applied. In this case, the maximum result is taken into account.
Carrying out measurements using the Shore method
If results of less than 20 are obtained on a type D durometer, a type A device should be used, and vice versa, if a class A durometer gives values of more than 90, switch to a type D device.
To increase accuracy, the supporting surface is pressed against the object using a tripod and a weight.
To perform correct measurements, the following requirements must be met:
- It is necessary that the thickness of the object being examined is at least 6 mm. To achieve this value, it is permissible to combine several layers, however, due to their insufficiently tight fit, the results may deviate in comparison with similar solid objects.
- The objects being measured must have dimensions sufficient to allow measurements to be taken at a distance of 12 mm from the edges of the surface.
- The surface under study within a radius of at least 6 mm from the tip of the indenter must be flat. In the presence of differences, roughness, and irregularities, a significant deviation of the results occurs.
- The materials are conditioned.
- It is necessary to take into account environmental conditions and exclude those that affect the parameters of the material.
When examining the rebound method, the scleroscope is installed vertically along a plumb line or level. The object being measured is fixed on its table and clamped. Cylindrical parts are placed in a special stand, and large objects are examined with the removable part of the device. In this case, five hardness measurements are also carried out and their average value is considered the result. In this case, impacts are performed with a frequency of up to 5 in 10 seconds, and the points are located 2 mm or more from each other and from the edges.
Thus, Shore hardness testing technology includes simple but imprecise methods that are most suitable for quick measurements.
Source
Where are Shore hardness values used?
The areas of application of indicators obtained by the Albert Shore method are varied. Thus, artists, when choosing erasers, will give preference to products marked 20 rather than 50. Soft erasers are more suitable for creativity, allowing you to delicately correct a drawing or shade a pencil. But at school and in the office, more elastic elastic bands are more important. The goal there is to erase the shortcomings without a trace.
The elasticity indicators of the sealant are important. So, if it has to be opened, for example, because it has darkened or cracked, lower hardness values will be more profitable. Soft sealant is more convenient to dismantle. Optimal indicators are 10-25. Large values indicate low quality sealant.
The hardness of bicycle tires, of course, should be lower than for car wheels. But still, the minimum indicators are about 30. But for skateboards, hard wheels are needed. The minimum threshold is 75, and if hard wheels are needed, then the mark should be around 95, which is similar to the hardness requirements for forklift tires.
Even when choosing helmets for construction site workers, it is important to consider hardness ratings. The minimum indicators are 75 units. Using protective headgear made of softer plastic, with indicators of 40-60, is dangerous to life and health.
What materials' hardness is measured using the Shore scale?
Hardness indicators using this method are state standards for materials such as rubber, caoutchouc, ebonite, silicone, plastic, polyurethane. For the first time, such standards were approved for rubber. The standard appeared back in 1975, after which it was adjusted several times.
The Shore method can also measure the hardness of metal products. But the technology is a little different. When measuring the hardness of obviously hard materials, it is not the depth of immersion of the indenter that is monitored, but the height of the rebound of the nose. There is also a separate scale for indicators obtained by the rebound method. But in industry, other more accurate determination methods are more often used.
Despite this, the places and situations where the Shor method is used are very diverse and sometimes unexpected. Thus, doctors pay attention to hardness indicators when they select special rubber bandages for fixing tires. The latter are necessary when providing assistance after a bone injury. Bandages that are too soft cannot fix the splint well enough, and bandages that are too hard can compress blood vessels and disrupt blood flow.
Thus, the method, invented by an American industrialist back in the last century, is still relevant in many areas due to its objectivity and ease of use.
