Today, the bidet is coming into use among an increasing number of our compatriots.
If you decide to become the proud owner of this extremely useful device, it will not be superfluous to learn how to install it - this will allow you to save a little.
Let's see how to install different types of bidets with your own hands.
Installation and connection of a floor bidet
The technology for carrying out installation work directly depends on the method of attaching the bidet. Before you begin installing the structure, you need to prepare the following equipment: hammer, chisel, adjustable wrenches, drill, building level. After this, the product should first be placed in the place where it will be located. Completing this procedure will help determine the length of the hoses required to connect it to the communications.
Remember, the bidet and toilet are usually located next to each other, with a minimum distance of 70cm between them.
Let's look at the installation sequence of a floor-standing bidet.
- Determine the location of the structure.
- Attach the mixer to the bidet bowl. To do this, it is necessary to fix flexible hoses in the threaded sockets of the element, which are threaded through the provided holes in the structure. Next, the mixer is secured with a nut.
Remember, work should be done as carefully as possible to eliminate the possibility of damage to the earthenware or porcelain bidet body.
Assemble the siphon. This element is usually not included in the bidet package. That is why it should be purchased separately.
Often, siphons are made of brass, stainless steel, and plastic.
The siphon assembly process consists of the following operations: first of all, you need to screw in the drain grate, then connect the end of the siphon to the neck, then insert the corrugation into the socket of the sewer pipe.
Secure the bidet. To do this, fastening holes are drilled in the floor covering using a drill, into which dowels and bolts are inserted, and rubber gaskets are pre-installed. “Coat” the fastening mechanism with sealant or a special adhesive composition. Connect the structure to the sewer. Carry out a test run of the system to check the functionality of the bidet
To do this, open the valves all the way, paying special attention to the pipe connections. If there are no leaks, the device is ready for use.
Remember, installing a bidet with an upward flow of water is much more difficult than with a simple one, since in this case, initially, it is necessary to assemble the adjustment mechanism and connect the device. After this, tighten the bidet, connecting the water supply pipes.
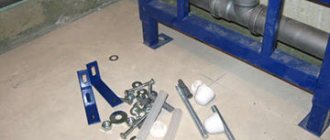
Advantages of installations
Using a bidet installation provides many advantages:
- Space optimization. The installation allows you to make the most efficient use of the square meters of the bathroom - you get the opportunity to hide water and sewer pipes, fittings and other engineering elements in the structure, which often not only take up a lot of usable space, but also make the bathroom extremely inergonomic and uncomfortable.
- Non-standard arrangement of plumbing fixtures. The installation makes it possible to install a bidet in any area of the bathroom, which allows you to re-arrange the layout of the room and decorate the interior according to your design idea.
Advice. It is recommended to install the bidet at the same level as the toilet. But the distance between plumbing fixtures can be any.
- Reliable bidet mount. The body of the installation is made of steel, and the fasteners secure the plumbing fixtures in a given position as firmly as possible, which in total allows the structure to easily withstand loads of 300-400 kg.
- Ease of cleaning the bathroom. The hanging position of the bidet greatly simplifies the cleaning procedure.
Installation is a reliable and convenient way to attach plumbing fixtures.
And another fundamentally important advantage is that the installation for a bidet can be installed without the help of professionals. The installation of the structure is carried out in three stages.
Bidet connection design features
Let's start with the fact that the bidet is a large oblong bowl installed at a height of 40 cm from the floor. Outwardly, it resembles a toilet, but the installation of a bidet differs in the water connection. Since the device does not have a drain tank, a small mixer is installed instead. This allows you to regulate the temperature and pressure of the supplied water.
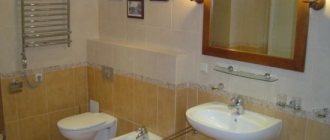
Photo 1. Despite their external similarity, the toilet and bidet differ in how they connect to the plumbing system.
Similar to the toilet, bidets come in two types: floor-mounted and wall-hung. They differ from each other in the installation method. Thus, the installation of the floor structure is carried out directly to the floor using special screws. This type of bidet is connected to an installation supplied with the bidet kit and concealed in the wall.
In addition, bidets differ in the way they supply water. The simplest one involves the flow of water through a standard mixer tap. And the installation and connection of a bidet of a more complex design is distinguished by the presence of an “upstream” mechanism. At the bottom of the bowl of such models there is a hole through which a fountain of heated water “gushes” under a slight pressure.
Types of modern models ↑
A classic bidet is a plumbing fixture with a large oval-shaped bowl, the bottom of which rises from the floor at a height of about 40 cm.
Externally, the bidet resembles a toilet
The main difference between the device is the water supply. Instead of a drain tank, the device is equipped with a tap through which warm or cold water is supplied.
Depending on the installation method, manufacturers distinguish two types of bidets:
- floor-standing models – installed and fixed directly to the floor;
- hanging models - mounted through an installation that is hidden in the wall.
Hanging models are an excellent solution for arranging small bathrooms
The back of the device acts as a support for the bowl, supporting it in a horizontal position.
The mixer supplying water to the device is available in two types:
- external - located at the upper end of the side of the bowl, forming a downward flow. It is equipped with an aerator with a ball joint, with which it is convenient to adjust the direction of the water stream.
- internal - only the valves are located on the shelf, and the nozzles are placed under the inner edges of the bowl. It creates an upward flow.
Mixers for models with external bowl filling can be either lever or valve. There are also models on sale equipped with a hygienic shower.
In models with an upward flow, a stream of water for ablution is supplied in the form of a fountain
In models with a “fountain”, in addition to the automatic drain valve, there is also a mixer valve. The technology for connecting devices of this type is more complex, since it involves assembling a water supply mechanism.
Particularly convenient are models in which the mixer is equipped with a thermostat. With this device it is easy to set a fixed water temperature. Among the latest developments, it is also worth noting sensory faucet models. Their design includes only one faucet, in which a photo sensor is installed that instantly responds to ultraviolet radiation. The sensitivity zone of such devices varies between 30-40 cm: when a person approaches, the sensor is triggered and water begins to flow.
What is needed to install a bidet
The installation process of this equipment depends on its type: floor-standing or hanging bidet. In the latter case, you should seek help from professionals or, at a minimum, advice if you have at least some experience working with such equipment - installation of a hanging bidet includes not only the correct connection to the pipes and the organization of the drainage system, but also the installation of a tank and other pieces of equipment into the wall.
Bidet installation
In any case, if you decide to install the purchased bidet in the bathroom yourself, then read the instructions for installing this equipment, and also look for similar information on Internet pages - this will make it easier for you to understand and imagine the entire algorithm of the upcoming work. In addition, you will need special tools, including:
- perforator;
- wrenches: wrenches and gas;
- special tape;
- silicone sealant.
General recommendations for connecting equipment ↑
Regardless of the configuration of the bidet, wall-mounted or floor-standing, a number of rules must be followed when installing the device:
- The fasteners must be tightened tightly, but without using excessive force, as this may compromise the integrity and tightness of the structure.
- When installing the mixer, it is necessary to place it strictly in the center of the intended location.
- When fixing the mixer in the sanitary ware surface, it is important not to forget about the use of rubber washers, which will protect the fragile material from cracking in the tightening area.
- To increase the tightness of the structure, it is better to “fill” all mating elements with moisture-repellent, self-hardening compounds.
Need for additional plumbing
Previously, plumbing was the same for everyone, it had its own clear place in the room and could not leave it. However, now even in apartments, not to mention large private houses, they make a couple of bathrooms, expand these rooms, and install a bidet in addition to the toilet. This is hygiene, health, plus an attractive interior element for the bathroom.
Actually, not only personal hygiene, the desire of a person to maintain cleanliness has led to a real boom in the bidet market. Also, installing a bidet is due to the fact that with its help, water is used rationally, time is saved, and the need to take a shower is eliminated. That is, the bidet significantly helps in life, in maintaining the modern fast pace.
Caring parents, through the use of additional plumbing fixtures, help their children from an early age develop an understanding of what personal hygiene means, how important it is to observe it, and what role it plays in life.
Features of the design of the bidet
A bidet is needed if the bathroom and toilet are separated into separate rooms, which makes personal hygiene more difficult after visiting the toilet. Even if both rooms are combined into one bathroom, installing a bidet is quite justified, especially when bathroom space allows.
The design of a bidet is very similar to the design of a toilet. Even externally, such equipment looks like an oblong bowl of the same size as a toilet bowl, located at a distance of about 40 cm from the floor (toilet bowls have almost the same height). A distinctive feature of the product is the method of water supply, since the flush tank familiar to the toilet is replaced by a tap of an original design, connected to hot and cold water supply pipes. A divider is installed at the end of the mixer spout to change the direction of water flow in the desired direction.
The bowl of the product is also structurally different, namely its rear part. Siphons for bidets are required to be installed, while toilets are equipped with direct outlets that allow drainage into the sewer system
The outlet of the device can have any direction, so when choosing, it is important to focus on the features of the existing sewer socket
Self-installation and connection of a bidet
To connect a hygienic device, you do not have to be a professional plumber. Classic models with a floor structure and a mixer tap can be installed independently. The main thing is to follow our recommendations and carry out all the work step by step.
Photo 2. You can invite a master plumber to install the bidet, or you can do it yourself.
Step 1. Preparing the device for installation
First, carefully read the instructions and accessories of the bidet. By default, you should have a bowl with three holes. One of them is intended for installing a mixer, the second is for installing a siphon, and the third is necessary in case of overflow.
As a rule, the equipment is not equipped with a siphon and mixer. So you will have to buy them separately
Pay attention to the styling of the device in order to buy the appropriate faucet design. Bidet faucets are offered in traditional designs - external - and internal
In the first case, the faucet structure is completely located on the shelf from above, and in the second, only the valves and the outlet are visible on the shelf.
Photo 3. The bidet is half-prepared for installation.
A bidet differs from a toilet not only in the installation of a mixer, but also in the need to install a siphon. If the toilet has a direct outlet for draining into the sewer, then the bidet has a connection to the sewer through a siphon.
Step 2. Installation of siphon and mixer
To connect a faucet with valves for hot and cold water, you will need two connections with reinforcement in the form of a metal outer braid, a set of studs, rubber gaskets, washers and nuts. Installation is carried out in the following order:
- we extend the ends of the flexible hoses to the mixer sockets and fix them by twisting them;
- insert the other ends of the flexible hoses into the hole on the shelf of the sanitary device;
- install the mixer on the shelf and secure it with a nut.
And to avoid the risk of damage to earthenware or porcelain, do not forget to insert rubber gaskets between the body of the product and the fixing elements. It is best to tighten the nut using pliers and a socket, holding them not perpendicular to the bolt, but parallel.
After installing the tap and drain grid, we proceed to installing a siphon with a corrugated drain pipe. To do this, connect one end of the device to the neck from the inside and manually tighten the connection. We pull the corrugated tube outward from the end side of the shelf. Have you finished the interior work? We proceed to fixing the product to the floor.
Photo 4. Installation of the bidet siphon.
Step 3. Attaching equipment to the floor
To make it easier to attach and fix the bidet, we first install it in the right place to mark and check the length of the eyeliners. We make holes in the floor with a hammer drill or impact drill, using special drills for concrete or tiles. We clean out the resulting debris and secure the bidet to the floor using self-tapping screws with rubber seals or bolts.
Step 4. How to connect the bidet to the water supply and sewerage system
The layout of sewer and water pipes must be done in advance. The closer the bidet connection is to the sewer, the better the entire system will work. Connecting a bidet to a water supply involves connecting flexible hoses to the supplied pipes using fittings and fastening tools. To fix and prevent leaks, you can use various types of sealants.
Connecting a bidet to the sewer system involves leading the end of the siphon tube into the sewer pipe connection. The corrugation should be positioned freely and not have sharp bends. To check the functionality of the system, open the taps and do a test run of water.
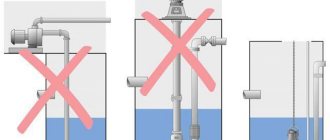
Photo 5. Diagram of a bidet fully connected to the water supply.
Whatever type of bidet you choose, the main thing is to strictly follow the instructions when installing it. Only in this case will you be able to enjoy the results of your work.
How to choose a bidet
There are a variety of bidet models available in stores; they differ in installation method and material of manufacture. Here are some tips for choosing:
- It is advisable to purchase a toilet and a bidet at the same time. In this case, you can select models from the same series. They will have the same design, and the interior will look harmonious.
- If you plan to purchase a bidet later, then it is worth remembering the manufacturer of the toilet, its model and article number. Then, based on these indicators, you can easily select the appropriate bidet model.
- Based on the type of installation, plumbing fixtures are divided into floor-mounted, wall-mounted and wall-mounted. In the first option, the pipes supplied to the bidet are located openly; in the case of a wall-mounted installation, the pipes are hidden in the wall, and in the third installation option, the pipes are built into the body.
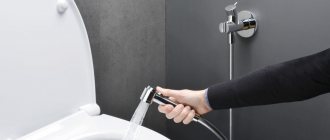
Benefits of a shower for a toilet
We list the advantages of a hygienic shower for a toilet with a mixer:
- Significant money savings, as there is no need to purchase 2 separate devices. In addition, installing a separate bidet entails remodeling the room, supplying pipelines and installing a drain pipe;
Not everyone’s bathroom space allows them to place a bidet in addition to the toilet. - The combined device takes up little space, which allows it to be placed even in a very small toilet;
- Often it is not necessary to purchase a toilet with a built-in shower. It is quite possible to adapt a shower to an existing toilet by placing it, for example, on the wall or on the sink. If a sink is already installed in the bathroom, then simply install a suitable faucet on it;
- Saving time on hygiene procedures;
- Convenience is achieved for older people when using the toilet;
- A hygienic shower in the toilet is also convenient to use for washing the toilet, drawing water or performing other tasks.
Read about how you can make a shower cabin with a tray with your own hands in a separate material on the site.
And the answer to the question of how to clean a toilet from urinary stones inside is in another article. It discusses the most effective cleaning methods.
Installation of a floor bidet
To install a floor bidet with your own hands, you will need the following set of tools:
- drill with hammer function;
- a set of drills for concrete and ceramics;
- adjustable wrench or set of wrenches;
- sealing material (optional: FUM tape, linen thread, etc.);
- silicone sealant for wet areas.
Installation of a floor bidet is carried out in several stages:
- marking in the area where the device is installed. It is necessary to mark the locations of the mounting bolts on the floor;
- hole preparation. If the bathroom floor has tiles, it is recommended to use a feather drill when drilling. Plastic dowels are inserted into the drilled holes;
- the plumbing fixture is installed and secured with the fixing bolts included in the kit;
To avoid damaging the surface of the bidet between the bolts and the bowl of the device, it is recommended to install rubber gaskets.
- the joint between the bidet and the floor is treated with silicone sealant.
Connecting the bidet to the water supply
The bidet is connected to the water supply using a mixer. The mixer can be:
- ordinary hinged. Such a device is installed on the bidet, like a faucet on a sink;
- built-in To install a built-in device, you will need to groove the wall.
The mixer connection diagram is usually supplied complete with the device. If there is no such scheme, then you must proceed as follows:
- The mixer is fixed to the surface of the bidet or the wall. Bidet mount included;
- flexible hoses are connected and attached to the mixer;
- the second end of the hoses is connected to a tee installed on the water pipe. All connections must be additionally sealed.
Before connecting the bidet to the water pipes, it is recommended to install separate taps, which allows you to independently shut off the water supply to the device for inspection or repair.
Connecting the bidet to the sewer
How to connect a bidet to? To set up the connection you will need:
- siphon for bidet;
- corrugation;
- rubber cuff for the transition from the siphon to the sewer.
The connection is made in the following way:
- A siphon is attached to the bidet. Rubber gaskets are installed between the surface of the plumbing fixtures and the device;
- a corrugated hose is connected to the siphon;
- the second end of the corrugation is inserted into the sewer inlet. A rubber cuff is used for sealing.
The installation process of a floor-standing bidet is presented in detail in the video.
Connection to water supply
You can connect the device to the water supply using flexible hoses. To do this, nuts are screwed onto adapters or pipes leading into the frame. It is recommended to install separate valves into the system. In this case, the device can be disconnected from the water supply without shutting off the water in the entire house.
Connection diagram for bidet to water supply
Floor bidet connection technology
Connecting a bidet to the sewer is a task of average complexity. But, strictly adhering to the installation technology, even a novice master with only basic repair skills can perform it.
When choosing a place to place the bidet, take into account the availability of free access to the pipes
A floor-standing bidet is installed in close proximity to the toilet. The distance between devices must be at least 70 cm.
Equipment preparation
The first thing you need to do before connecting the bidet to the sewer is to read the instructions supplied with it and check the presence of all components of the structure.
The bowl of the standard model is equipped with three holes: the top one for installing a mixer, on the side inner side for overflow, and at the bottom for direct drainage into the sewer pipe. The drain valve is independent of the device configuration. It is fully automatic.
To connect the bidet to the sewer you will need:
- hammer drill with a set of drills;
- adjustable wrench and wrench;
- Screwdriver Set;
- mounting tape;
- waterproofing tow;
- silicone sealant;
- marker or pencil.
The diagram for connecting the bidet to the sewer, included in the instructions for the device, should be kept at hand at all stages of installation.
Mixer installation
Most models do not include a mixer with the bidet. It should be purchased in advance at points of sale of plumbing equipment.
Installation of an externally mounted faucet involves fixing the device to the outside of the bidet through a special hole
The installation technology is in many ways similar to the procedure for installing a sink faucet.
The procedure is performed in several stages:
- Flexible hoses are fixed in the threaded sockets of the mixer.
- The mixer is installed on the outside of the bowl, tightening it with a nut from below.
- A drain valve is attached in place of the siphon.
- Connect cold and hot water pipes.
- All mating elements are compressed.
When connecting models with internal filling bowls to the sewer system, it should be taken into account that cold water should be supplied to the spout directly from the storage tank located on the rear side. The hot water supply pipe must also be connected independently.
Connection to sewerage
To connect the bidet to the sewer, experts recommend using rigid hoses. But to simplify the task, you can also connect a corrugated pipe to the sewer. It is better to lay out the sewer pipes in such a way that the hose attachment points are located directly behind the plumbing fixtures.
Connection to the system cannot be made without installing a siphon
Bidet siphons differ from their counterparts, designed for connecting sinks and showers, by an elongated drain pipe and a smoother bend of the elbow. This solution allows you to create a larger volume water seal, ensuring uninterrupted operation of the system.
There are also models on sale equipped with several water seals. They are more often used for hidden installation. If open installation is necessary, you can use both tubular and bottle-type siphons.
The technology for installing an open siphon includes the following steps:
- A drain grate is inserted into the drain hole, secured with a nut.
- The receiving part of the siphon is installed on the back side of the neck, securing the structure with mounting nuts.
- A siphon outlet is mounted to the overflow hole.
- The outlet end of the siphon, a corrugated pipe, is inserted deeper into the socket of the sewer system.
The diameter of the sewer outlet must be at least 100 mm
To connect equipment with rising water supply, it is better to invite specialists. Sanitaryware with an internal bowl filling has a more complex configuration. Without knowing the intricacies of installation, it will be difficult for you to connect the bidet to the sewer without making mistakes.
Installation of the structure
Having completed all the steps of connecting the bidet to the sewer, all that remains is to secure the plumbing.
The floor bidet is mounted to the floor, secured with special fasteners for the toilet
Sequencing:
- Place the device in the intended place, outlining the contour of the sole with a pencil.
- Holes are drilled using a puncher according to the marks made.
- Plugs are inserted into the holes, then the bidet is inserted at the specified mark and the fastening screws are tightened, not forgetting to place rubber gaskets under them.
The installation and connection process is described in detail in the video:
Having installed the structure, check the correct connections and start the system. To carry out a test run, open the valves and observe: if the water pressure is good and there are no leaks, the work has been done correctly.
How to assemble and install a siphon
Today there is a large selection of siphons for bidets, so it is important to navigate correctly
So, you need to pay attention to the amount of free space, the method of fixation and other important parameters
Siphons may differ in the type of material used for their manufacture. It can be plastic or metal. Also, differences may lie in the shape; on sale you can most often find a tubular or bottle shape. Of course, if necessary, you can look for non-standard products.
The bidet siphon is assembled in almost the same way as the sink siphon:
first you need to install a grate equipped with a rubber gasket on the drain hole; then screw on the locking nut, which has a wedge-shaped ring; a rubber ring is inserted all the way into the sewer socket, which is pre-treated with silicone-based sealant; the end of the outlet pipe is inserted into the ring, after which it is connected to the siphon using a clamping nut
It is important to note that the inner diameter of the ring must match the diameter of the siphon.
Bidet installation
The bidet must be placed in a pre-selected location and the length of the supply hoses must be checked. If this length is sufficient, you can begin marking the fastening, which, depending on the type of installation, can be done on the floor or wall.
Using a drill or hammer drill, holes of the required sizes are made. The resulting construction dust must be removed and plastic dowels installed. Now you can place the bidet in the holes you made and secure it with bolts. Since there is a risk of cracks forming when clamping the bolts, it is advisable to place rubber gaskets under their heads. After fixing the attachment point, it is necessary to treat it with sealant.
Installation of a bidet combined with a toilet
Often a bidet is combined with a toilet, since this solution is ergonomic and convenient. This device looks like a simple toilet, which is equipped with a mixer and taps. If necessary or desired, you can connect a shower hose.
Some people want to turn their toilet into a bidet, in which case you can simply install a bidet cover, which can be simple, electric, heats the water, or with a remote control. Installing the device is not difficult, just follow the instructions provided by the manufacturer.
Regardless of which bidet will be installed, separate, combined with a toilet, wall-mounted or floor-mounted, it is important to remember that there is an installation diagram for this plumbing fixture. Following a clear sequence of actions, you can carry out installation work yourself
Floor/wall mounting
The place for the bidet should be chosen so that it is located closer to the toilet, but at the same time it is convenient to use. There should be at least 0.7 m of free space in front of the device. Having decided on the location, proceed to attaching the bidet.
Here's how to install the floor model:
- The sole of the device standing on the floor is outlined with a marker and the position of the mounting holes is also marked with it.
- Next, the bidet is placed on its side and its sole is again outlined on a piece of linoleum or rubber pressed against it. Again, you need to note the position of the mounting holes.
- A gasket is cut out from linoleum/rubber along the applied contour.
- In the floor, according to the applied markings, holes are drilled with a diameter corresponding to the diameter of the dowel sleeves or special fasteners for toilet bowls - depending on which of them will be used. Ceramic tiles should be drilled through as carefully as possible, using a special spear-shaped drill bit and setting the rotation speed of the drill chuck to low. Impact, of course, is unacceptable.
- After removing the debris remaining after drilling, sleeves for fasteners are installed in the holes.
- Next, the gasket is put in place (as the reader remembers, the outline of the sole was drawn on the floor). Silicone sealant can be applied to both surfaces.
- All that remains is to install the bidet on the gasket and screw it to the floor with the selected fasteners.
How to properly install a bidet with your own hands. Video
https://youtube.com/watch?v=Cq1O0cmIZNk
Rice. 8.128. Square bidet and toilet
A simple bidet model is something between a low sink and a toilet (Fig. 8.128). It is connected to the sewer in the same way as a regular toilet. But instead of a cistern, taps with mixers are attached to its edge. The disadvantage of such a bidet is that it is quite cool to sit on it.
A simple bidet is mounted in much the same way as a sink. First, install a mixer with taps on the bidet and screw them on. Then a drain is inserted into the bidet, to which a siphon is connected, as when installing a sink. Now you can put the bidet in the planned place, but you should not rush and tilt it towards the floor (Fig. 10.143-10.145).
Rice. 10.143. Installing the mixer
Rice. 10.144. We screw flexible hot and cold water hoses
Rice. 10.145. Install the bidet in the chosen place
Connect the mixer pipes to the water supply pipes. In this case, it is most convenient to use flexible eyeliner. A drain pipe is connected to the siphon pipe using a compression connection - insert it into the sewer socket (for a bidet, you can also make a drain from the sewer, which immediately provides a threaded connection). The bidet is attached to the floor in the same way as the toilet (Fig. 10.146-10.151). There are wall-mounted bidets that are attached not to the floor, but to a mounting frame.
A bidet with an upward flow of water is more complicated. The water flow passes inside the seat rim, heating it, then gushes upward under the action of a special regulator. The opening of the fountain is located at the bottom and dirty water flows directly onto it, so a special water supply is provided: waste water is not sucked back in and does not pollute the water in the water supply. Before installing such a bidet, you need to assemble and connect the adjustment mechanism, and only then connect the bidet drain grate to the water supply and sewerage system.
Similar materials
Do-it-yourself installation of plastic pipes. Video
Pipe cutting and threading. Tools and Tips
How and with what to unclog a sink, toilet or bathtub
Do-it-yourself electric heated floor. Video, editing, device
Laying out water pipes. Video. Scheme
Do-it-yourself warm water walls. Video, instructions, photos
How to repair a damaged sink (chip, scratch). Video
Installing a heated towel rail with your own hands. Videos, photos, tips
Laying sewer pipes inside a house (apartment), how to do it correctly. In and
Purification (filtration) of water at home. Video
How to make and install a box under a washbasin
How to properly install a bathtub with your own hands. Video instruction
Installing a radiator heating system with your own hands. Videos, diagrams, photos
How to install plumbing in a house with your own hands. Video
How to install a pool filter with your own hands. Video
How to install and connect a dishwasher (dishwasher) yourself
How to repair a mixer and tap with your own hands. Video
How to properly install a faucet in the kitchen and bathroom. Video, photo, instructions
How to make a podium for a shower stall with your own hands. Video. Photo
How to restore a bathtub with your own hands
Load More…
Bidet installation specifics
This task, like connecting a bidet to a sewer, can be accomplished without outside help, without resorting to the help of a plumber. To do this, you need to have a specific amount of patience and follow any step of the instructions.
First of all, you need to choose a place to install the bidet, taking into account the size of the structure and the placement of the sewer pipes and water supply system.
To install the bidet you will need these tools:
- screwdriver;
- spanners;
- rags or tow for waterproofing;
- tape for installation work;
- adjustable wrench for pipes made of metal;
- elastic wire;
- perforator;
- pobedit drills;
- silicone based sealant.
The connection of the bidet to the sewer must be carried out strictly in accordance with the diagram provided by the manufacturer. This diagram must be constantly visible during work.
The bidet is equipped with a fully automated drain valve. Regardless of the model and combination of the device. There is no connection to the water seal. The process of installing a floor bidet to the floor surface is carried out using a special mount for the toilet; connection to the sewerage system is realized using a flexible tube.
Assembly and installation of a water tap
When the model takes into account a water tap, the work of installing it is done last, and then the bidet is attached to the sewer pipes. A bidet faucet has a different design than a sink faucet.
The component head has a 360° swivel angle, and the lever for adjusting the water supply is on the other side. Like others, the water faucet for the bidet can be double-lever, single-valve and touchless (with a photocell). All today's designs are easy to use and allow you to customize the temperature, flow rate and purpose of the water.
If the water tap must be placed on the rim of the bidet, then when purchasing it you need to pay special attention to the correspondence of the holes for fasteners. If you plan to install a water tap into the wall, this must be taken into account in advance.
A little about the device
If there is enough space in an apartment or house, they buy a toilet, and next to it - a bidet, from the same series. It is more convenient than a toilet in that you can regulate the water pressure and its direction yourself. There is a toilet with a bidet, but for convenience it is better to take both products separately from each other.
Manufacturers today offer two types of bidets - one that is installed on the floor, and a more modern one - a hanging one, which is attached to the wall. Both are equally convenient to use. Bidets are made from a variety of materials - from steel to gold. But the most popular are the classic options made from sanitary ware and porcelain. The same goes for color. Manufacturers create bidets in a variety of colors. But consumers prefer white.
Bidet installation system design
There are currently two types of installations available for fixing a plumbing fixture such as a bidet. The design differences between frame and block systems must be taken into account when choosing.
Installation diagram
Block design
Block-type installations are based on a body structure with areas for fixing the main reinforcement. Such models are intended for installation exclusively on solid brick or block walls, due to the lack of floor support.
Block installation
Installation of the block structure is carried out using standard anchor bolts, which take on a significant part of the total load.
Frame design
A more common option, characterized by structural complexity and based on a metal frame with places for reinforcement fixation. The frame structure is attached at two points on the wall and at a couple of points on the floor.
The advantages of frame installation include the ability to adjust the installation depth, as well as accessibility for installation without expanding the size of the niche.
Installations of this type are presented:
- frame structures fixed to monolithic walls;
- frame structures fixed to lightweight partitions;
- universal frame structures.
Frame design of the installation
The first option has a standard device, and the second type of design is based on a supporting frame that takes on a significant part of the total load.
Modern universal frame installations are characterized by a unified design that allows any of the traditional installation options.
Bidet installation - features
A task such as connecting a bidet to a sewer can be accomplished independently, without the help of a plumber. To do this, you need to have a certain amount of patience and follow each step of the instructions.
The first step is to choose a place to install the bidet, taking into account the size of the structure and the location of the sewer and water supply system pipes.
To install a bidet you will need the following tools:
- screwdriver;
- spanners;
- rags or tow for waterproofing;
- mounting tape;
- adjustable wrench for metal pipes;
- flexible wire;
- perforator;
- pobedit drills;
- silicone sealant.
The bidet is equipped with a fully automatic drain valve. This does not depend on the model and configuration of the device. There is no connection to the siphon. The floor bidet is installed to the floor using special fasteners for the toilet; connection to the sewer system is realized using a flexible tube.
Assembly and installation of the mixer
When the model includes a mixer, its installation occurs last, and then the bidet is connected to the sewer pipes. A bidet faucet has a different design than a basin faucet.
The element head has a 360° rotation angle, and the lever for adjusting the water supply is located on the reverse side. Like others, the bidet mixer comes in two-valve, single-lever and contactless (with a photocell). All modern designs are easy to use and allow you to adjust the temperature, flow rate and direction of water.
If the mixer is to be installed on the bidet rim, then when purchasing it you need to pay attention to the correspondence of the mounting holes. If you plan to mount the mixer into the wall, this must be taken into account in advance.