Plastic injection molding at home
This video lesson from the OchumeletsTV channel is about how to cast plastic at home.
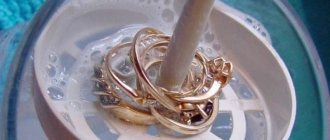
Molten plastic is not completely liquid. This is a thick mass, so it is poured under pressure. To create it, the master made a metal syringe. I used a plumbing squeegee. Piston. Guide. Solid mold. Made from epoxy resin. Make a screw lamb. Polypropylene was used as a raw material. From an old box. At home, it is better to cast polypropylene and polyethylene, since these plastics are non-toxic.
When heated, they do not emit harmful products. Fill small pieces into a syringe. We put it in the oven at 220-240 degrees. The part is simple, so the plastic should not be overheated. While the plastic is heating up we will assemble the mold.
First, secure the bolt to the required distance. Just pull by hand, no wrench needed. The pressure is not so high. To prevent the bolts from moving back and forth, we use a cap. Chipboard material. Install the cover and tighten it with nuts. We will pour plastic into the hole.
30 minutes have passed. We put on special gloves and take out the syringe. Let's quickly wind it up. Apply pressure to squeeze out the plastic. Installed on top of the mold. Let's press. We wait a certain time. It must be kept under pressure to minimize shrinkage. Let's analyze the form and see what the product turned out to be.
It's obvious that everything has spilled. Let's extract it. The detail worked. The bolt is well filled and sits firmly. The protrusions can be trimmed. This way you can do polypropylene casting, etc. at home. This is the most primitive artisanal method. So that the product can be cast quickly and easily.
Plastic molding at home
Small parts of models are usually made of plastic or metal by mechanical processing. However, when a lot of them are required, it is better to cast parts from plastic into plaster molds.
Plastic can be prepared from acrylate powder AKR-7, mixed with a solvent until it forms a dough. Both necessary components are available in denture kits.
If the part is symmetrical and has a simple configuration, for example an anchor, a wheel or a lifebuoy, then it is more convenient to make a collapsible mold, of two halves that can be used repeatedly.
When molding, metal or plastic casting models are pressed into the not yet hardened plaster to the plane of symmetry (connector) and allowed to harden. The second half of the mold is poured, after wetting the lower part with a weak soap solution to facilitate the separation of the halves. The upper part of the mold must have a through hole: 3-4 mm in diameter for filling with plastic and releasing excess plastic during polymerization. Having taken out the casting model and folded both halves, they are tied together with twine or rubber - and the mold is ready.
Rice. 1. Collapsible mold for casting: 1 - base of the mold; 2 - upper half; 3 — installation rod (wood); 4 — plastic model; 5 - cardboard box. To produce a part with a complex configuration, a mold consisting of three or more parts is required. Here it is better to use the method used in precision casting - lost wax.
Rice. 2. Non-separable mold for casting: 1 - plaster casting; 2 — paraffin model; 3 — installation rod (wood); 4 - cardboard box.
The form will be one-piece, that is, disposable. The model for its production is made of paraffin, filled with gypsum solution, providing in the very top part a cylindrical or conical hole with a diameter of 3-5 mm, expanding upward - a sprue. After 30-40 minutes, the frozen plaster mold is immersed in a vessel with cold water with the sprue facing up and boiled until the casting model is completely melted. Paraffin, being lighter, is displaced from the mold by water and floats to the surface. Then, without removing the mold, the water is cooled and a layer of frozen paraffin is removed from its surface. To remove its residues from the mold, heating should be repeated.
Thanks to this method, we obtain a cavity in the plaster that accurately reproduces the shape of the part. If fasteners are desired inside the future part, then they should be inserted into the paraffin casting model so that they do not move during melting. For example, if it is required to have a metal nut in a part, then it is placed with a protruding bolt and the whole thing is filled with plaster. Then the free end of the bolt will be in the thickness of the plaster and, after melting the paraffin, will hold the nut in the right place. In a non-separable form, the plastic is prepared in a glass container, bringing it to the consistency of liquid sour cream. After mixing the mass with a glass rod, pour it through the sprue hole into the mold. The polymer is prepared and the mold is filled without delay, since the mass quickly thickens. At the time of pouring, the inside of the mold must be moistened, otherwise the surface of the finished part will turn out rough and porous.
The filled form is kept at room temperature for 15-30 minutes until the mass thickens rubbery. After which it is compacted through the sprue hole with a glass or wooden stick. The compacted surface of the mass should not reach the upper edge of the mold by 3-5 mm, since acrylate expands during polymerization.
The sprue hole is covered with moistened cellophane and a piece of plywood and tightened with a clamp. Then the mold along with the clamp is immersed in a pan with water at room temperature and gradually heated for 30-40 minutes and brought to a boil. It should not be violent and lasts at least 45 minutes. After this, the heating stops and the mold is kept in the pan for another 15-20 minutes. To obtain a better quality casting, it is necessary to slowly cool the mold completely to room temperature.
A. Partin
Mold making
Next, watch a video on how to make a mold for pouring plastic.
Polypropylene casting machine
The author of the OumeletsTV channel showed a self-made machine for home plastic molding. It's electric. The piston is manual. Thermostat for precise temperature control. The video shows his tests. For these purposes he will cast nylon or polyamide. There is another name - nylon. Chair crosspieces are usually made from nylon. The master found just such a thing, he crushed it. Before use, the mug must be dried at a temperature of up to 100 degrees. This must be done within 2-4 hours.
Load the granules into the machine. Let's set it to 250 degrees. This is the optimal temperature for polyamide casting. Let's wait until the required degrees are reached. Then we will install the piston. The machine has reached optimal mode, the indicator light is on. Now you need to wait 5 minutes for the plastic to completely warm up from the inside.
The polyamide has warmed up. We put it on the mold. We press in. We do pressure aging. It's obvious that he's flooded. Let's let it cool a little. Now let's disassemble the mold. Studied plastic product. As you can see, there is no shrinkage.
Selecting materials
For casting, you can use liquid plastic, polyester resin, gypsum mixed with PVA glue, etc. When choosing one or another option, you should consider the following characteristics:
- viscosity;
- working period.
The second parameter indicates the time during which material that has not yet hardened can be manipulated. This is at least 5 minutes. If a suitable material cannot be found, then use regular epoxy resin, which is sold in all automotive stores.
Plastic injection machine at home
Below is a video explaining how to make a plastic injection molding machine. What do you need for this in a DIY home environment? Rod with piston. Three-quarter pipe as a cylinder. Half inch adapter to 3/4 pipe. Fitting cut off for convenience. Metal gasket with mica for insulation. Thermostat. It regulates temperature up to 350 degrees. 600 watt ten. Two nuts and a box for attaching the thermostat. We put on the adapter. We tighten the washer. To prevent the nichrome from sliding down.
We begin to assemble the control unit. Then we attach the thermocouple from the thermostat to the cylinder body. The author did not show how he would assemble all this, but presented a diagram. The photo shows the device assembled.
We attach the control unit to the syringe. Tighten with nuts. The thermocouple is long enough. Now you need to secure it. Mica to prevent thermocouple from slipping through ceramic insulators. For rewinding, not just a thread is used, but a silica one. It is heat-resistant, that is, it does not burn or melt. You can use asbestos cord. But since the master did not have it in stock, he had to buy silica.
We wrap it with heating element. Next, you can use mineral wool or asbestos fabric. Necessary to avoid heat loss. The master used mineral wool from an old oven. Fixed it with aluminum wire. Assembly is complete. Pressure tests can be carried out.
Set the thermostat to 100 degrees. Let's see how the machine will work in this mode at home.
How to make a mold
Mini-TPA does not require a full-fledged mold for casting plastic parts.
It is enough to make a form-building part that is part of any mold.
The form may consist of one, two, three, and so on parts. The main thing is that they must be tightly connected and kept assembled at the moment of plastic injection. Then, after injection, the mold should be easily disassembled into its components, and the part itself should be easily removed after casting.
Making a mold will be shown using the example of the task of casting a cord clip . This example is for a machine with an automatic clamping unit; modifications for a manual machine are also described below.
1. Draw the product.
2. Since the part is small, several such parts can be cast at a time. It was decided to cast 2 pieces at a time, since a small number of products are required.
A computer model of half the mold containing 2 parts is drawn. The injection is planned in the middle between the products. Since the requirements for the product are not high, it is customary to make the casting channels wide for easier casting.
There are threaded holes in the corners.
You can download a zip archive with files of this plate in stp and iges format from this link.
3. The front plate (the second half of the mold) is a smooth surface with a hole in the middle for the MiniTPA nozzle and also four threaded holes for fastening.
4. For ourselves, we have developed a set of frames for attaching various-sized forms with many through holes and with large holes in the corners for mounting on guides.
Subsequently, we abandoned the frames in their original form, leaving only vertical parts with bronze bushings.
Forms are attached to the holes; the hole dimensions for our case are indicated on the “Drawings” page. You have the right to choose them and arrange them as your detail requires.
5. We assemble the entire structure on the machine and make a test casting. All is ready.
6. In our case, we modified the mold, equipping it with pushers for automatic operation.
An example of work is shown in the video below:
Manual casting mold on the desktop
A mold for manual casting will have a minimum of differences: there is no need to make a hole in a flat plate - injection will occur along the line of closure of two plates (half-molds).
The form will need to be pinned to your desktop. The top lever will keep the mold from opening, the second will move the entire work table towards the injection nozzle.
We hope this information will be useful to you when designing and making your mold.
Making double dowels for installing heated floors
According to the above algorithm, a casting mold was designed and tested
double dowel for installing heated floors.
Form
The mold was made of aluminum for two reasons. The first is to test one hypothesis (technical solution), the second is to minimize risks in case of failure and at the same time save money in case of success. Everything worked out.
Making plastic products and molds with your own hands
A business idea for organizing small-scale production of products from various injection molding materials at home. Thanks to innovative technologies, today in the production of plastic products it is possible to do without expensive automatic thermoplastic machines. Moreover, you can set up small-scale mini-production right on your desktop. This business idea can be considered in two directions:
- As the main business of manufacturing finished products and molds by casting from: liquid:
- plastic;
- silicone;
- polyurethane;
- transparent resins and other materials.
- Mold making as an effective addition to other types of business in the area:
- construction;
- Food Industry;
- soap making
In the first and second cases, casting at home does not require large financial investments. You can start an injection molding business simply now.
How is the plastic made?
In this section of the article, we will give a step-by-step process that is used to make plastic at an industrial level.
Raw material extraction
To make plastic, the first requirement is the procurement of raw materials. These raw materials include coal, crude oil and natural gas. Provision is only the first step.
Cleaning to get rid of unwanted particles
Once raw materials have been purchased, they cannot be used immediately. It is mixed with a lot of impurities that need to be filtered out. This filtration and purification process occurs in oil refineries. Simply put, the extracted crude oil goes to the refinery where it is broken down into various petroleum products. From this refining process we can obtain monomers which help us in the production of plastics.
These monomers are also the building blocks of plastic polymers. You might be wondering how the refining process works - all the crude oil is placed in a furnace and heated. After this, it is sent to the distillation plant. This distillation unit breaks down all the crude oil into smaller, lighter compounds called fractions. Of all the resulting fractions, the most important for the plastic manufacturing process is naphtha.
Polymerization
This is probably the most difficult part of the production process. In this part of the process, compounds such as ethylene, propylene, butylene, etc. are converted into higher molecular weight polymers. This also means that initially monomers were converted into polymers. This is why this step is called polymerization. In the production of plastics, two types of polymerization occur:
1. Complementary polymerization - In this type of polymerization, a monomer combines with the next one (dimer) and the chain continues. Basically you keep adding more monomers to the original one. A catalyst is used to facilitate this type of polymerization. The most commonly used catalyst is a type of peroxide. Examples of plastics that use addition polymerization are polyethylene, polystyrene, and polyvinyl chloride. 2. Condensation polymerization - This type of polymerization involves the joining of 2 or more different monomers. The condensation process occurs due to the removal of smaller molecules such as water. This process is also facilitated by catalysts. Examples of plastics produced by condensation polymerization are polyester and nylon.
Compilation and processing
The formulation process involves melting and mixing different materials to form a single material, in this case plastic. The mixture is then turned into granules, which can be molded into various items according to the manufacturer's needs. These granules can come in a variety of colors, opacity, and shapes. All this is done by machine.
Manufacturing using liquid plastics
The manufacturing process is carried out using liquid plastics and silicone molds. Now it is possible to produce plastic products in small batches at home:
- souvenirs;
- toys;
- costume jewelry;
- spare parts for auto tuning;
- spare parts for various mechanical devices;
- shoes;
- dishes
There are components for the manufacture of parts from thin-walled plastic, which can significantly expand the range of products and produce parts of any complexity. For example, mixing two components of the Axson FASTCAST F32 brand from a French manufacturer makes it possible to obtain a super-liquid plastic that flows into the smallest folds of the relief of the model’s shape. In addition, it is harmless to children and has no odor.
Pre-production
To organize production, you will first need a sample model. Using it, you first need to make a mold from special silicone or polyurethane components. With experience and the quality of materials, you can learn to remove molds from models at such a high level that fingerprints will even be visible on the products (if necessary). That is, the copy will be at the level of identity, which cannot be distinguished with the naked eye. Plastic products can be given complex compounds with any relief. If there is no ready-made model for a sample, but you need to make unique products, you can order it from the owners of a 3D printer. By the way, casting significantly exceeds the productivity of 3D printing from plastic.
When your product is ready, you can design it using related products that come with liquid plastics:
- paints for artistic effects;
- primers;
- glue.
Naturally, in some cases you cannot do without creativity, and you will have to manually paint the products, which may affect productivity. But creating every business is undoubtedly a creative process. After all, financial management is an art.
Let's start the casting process
Stage one. First of all, take the cut mold and clean it thoroughly so that you end up with dry and clean surfaces. And we remove all the residues that remain after completion of the procedure.
Stage two. If necessary, we will be able to slightly change the shade of our working composition. To do this, it is enough to add one drop of paint of the desired color (but not water-based, since plastic is particularly “allergic” to it).
Stage three. As for degassing the working mixture, there is no need for this at all. The explanation is quite simple: the production of plastic at home a priori provides for a short service life of the finished product. But in order to remove air bubbles from small parts, we can use any suitable object and do everything manually.
Stage four. Next, you need to thoroughly mix all the components, after which we pour the finished mixture into the cut form (but always in a thin stream). Fill until the entire internal volume of the mold is filled, and with it a small part of the casting channel. After this, when the degassing process is completed, the material will decrease somewhat in volume and will turn out just the way we need!
Note! In conclusion, one last piece of advice. In order to achieve maximum quality of parts, the matrix should be cooled gradually, slowly. If you follow all the instructions, you will definitely succeed! Good luck with your work.
We make a product from liquid plastic
The technology for creating an ideal small relief when making it in a silicone mold with your own hands. First you need to prepare all the components and materials. We will need:
- Silicone Platinum.
- Liquid plastic Axson FASTCAST F18 (white color, has the consistency of water, odorless!).
- Scarlet dye for silicone.
- Polyurethane varnish.
- Scales.
- Syringe.
- File-buff.
We securely fix the sample model to the bottom of the formwork to form the mold, using neutral wax plasticine (to avoid leakage of silicone). We paint the silicone from which the finished mold will be made scarlet, so that the quality of mixing the components of the liquid, white to the color of the plastic can be clearly seen on the mold. Helpful advice: in order for the shape to be perfect, you should first coat the sample model with silicone using a wide brush. Thus, carefully fill all the depressions of the relief with compound. Only after this, fill the form completely. We fill the entire formwork with silicone. Leave it for 7-8 hours to fix the mold structure. The hardest part is over.
Congratulations. Now you have a ready-made mold for repeated production of copies of the sample model. Before starting casting, make sure the mold is completely dry to avoid bubbles. Then we very carefully mix the plastic components 1:1 by weight (for this it is better to use a pharmacy or laboratory electronic scale). Setting time is 7 minutes, but it will take another 20 minutes to fully set. This plastic is neutral to silicone and does not stick to it. But after repeated use of the compounds over time, you may need a release lubricant with the protective properties of EaseRelease. After the required time has elapsed, we take out the finished product, which is copied exactly according to the sample.
Making a form
To cast several plastic parts at home, you will need a master model.
It can be made from anything. Suitable for you: - plasticine; - plaster; - tree; - paper and many other materials. Make a model of the part you will cast. Coat it with lithol or other lubricant. After that, make the shape. Silicone molds are becoming increasingly popular. This is understandable; working with this material is easy and convenient, but several circumstances must be taken into account. Firstly, there are two types of silicone, pouring and coating. Secondly, each type has its own elongation coefficient and its own viscosity. As for the first parameter, silicone with a coefficient of 200% is suitable for plastic molding.
Pay attention to the viscosity coefficient. The smaller it is, the more accurate the shape will be. This is especially important if you are going to be working with potting silicone. Also take into account the polymerization time. If you have pouring silicone, place the master model in a flask (it can be made of steel or, for example, bronze) and fill it with silicone. Apply the coating material carefully with a brush, taking into account all the unevenness. Let the silicone harden, then remove the master model.
A flask is a metal container. It should be slightly larger than the master model.
Polyurethane forms for construction
Along with plastic products, injection molds can be produced. The use of injection molds in construction is now very popular. It is possible to produce compounds for the production of building materials. They are durable and do not require treatment with special release lubricants during manufacturing. After all, concrete is absolutely neutral to polyurethane. For example, liquid polyurethane compounds make it possible to produce molds for filling:
- concrete decorative products (tiles, fences, etc.);
- plaster elements of interior decoration (balusters, stucco, etc.);
- liquid plastic when creating a wide variety of products (souvenirs, toys, figurines, etc.).
Silicone molds for confectionery and soap making
The application of mold casting technology in the food industry is quite obvious.
New innovative solutions in the field of chemistry today offer liquid: plastics, silicones, silicone masses that meet all health standards and have the appropriate certificates. Such safe components can be used to make molds for the food industry. For example, for the production of: Compounds are also in great demand among soap makers. They always need new, original molds to create sellable souvenirs made from soap. It is not at all difficult to find a customer who wants to make their products with a unique shape.
Opportunities for a small business idea
This business idea makes it easy to create popular products with your own hands. Finished works can be sold through an online store. It is also possible to provide services or sell finished compounds to other manufacturers in other industries. The most important thing is that with all these wide possibilities of home business, the cost of components is more than affordable. The range of components is wide and allows you to select the necessary materials for creating forms or filling them. All that is required is a sample model from which the mold will be removed. This business idea is very attractive for a home business. It does not require a lot of costs, allows you to produce useful goods and captivates you with the creative production process.
All about molds for injection molding of plastic products
We know everything about injection molds and their modifications, since the main direction of the MetroPlast Engineering company is injection molding, as well as the production of plastic products (Moscow and the Moscow region). In this article, we have collected data that will give you an idea of all the available technological options for creating molds.
This information will help you navigate the types of molds, as well as what influences their differences in the production of plastic products (except for the price of molds for casting).
How do injection molds work?
To understand the differences in the variations of casting molds, we suggest that you familiarize yourself with their purpose and standard structure.
Using injection molds, large-scale production of custom-made plastic products is carried out. Using the capabilities of injection molding allows us to obtain products with tolerances of up to 0.01 mm (on engineering plastics), which indicates their high level of performance and detail.
The technological process for developing molds for casting is based on milling and/or electrical erosion of metal blanks. The main structural components of casting molds are the punch and the matrix (their surface follows the shape of the part being manufactured). After closing both parts of the mold, a polymer (plastic) heated to a certain temperature is injected between them.
Home manual casting machines
For small-scale casting of plastic parts, tabletop machines can be used. This is compact equipment that will fit in any private workshop or garage. Plastic can be poured onto them in single or multiple forms, depending on the size and serial production. The units differ from industrial equipment only in their small size. The tabletop press is suitable for all polymers and is easy to operate.
Stages of casting at home on a machine:
- Installation of the apparatus and injection nozzle.
- Installing the mold and lubricating it with silicone;
- Loading polymer into the hopper;
- Heating and stirring the material using a screw;
- Pouring raw materials into molds;
- Waiting for cooling;
- Removing the plastic part.
Welding extruders can also be used in everyday life to fasten plastic parts to produce more complex products.
It is possible to make plastic products with your own hands individually, as entertainment, or for a one-time need. And also in bulk, for sale or for subsequent production. Homemade forms and improvised means or specialized home equipment are suitable for this. It is more profitable to entrust mass casting to specialists, since this requires expensive, large equipment and the work of experienced personnel.