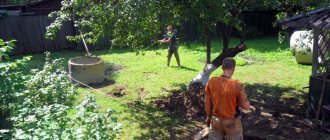
What is groundwater
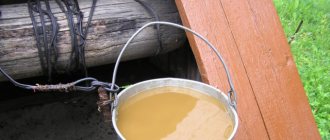
Wells provide access to clean water. Groundwater is found in the first aquifer from the surface of the earth. They are formed by precipitation. Therefore, the water level in a well always corresponds to the upper level of the aquifer. There is also perched water (groundwater located near the surface of the earth). Such waters disappear during drought and are not suitable for drinking, since such water does not have time to filter through the ground. The well shaft must be isolated from the high water.
When to dig a well
It is best to choose the end of summer and the beginning of autumn, that is, August - September, at this time the groundwater level is lowest, and you will not miscalculate the depth of the well.
Next, to decide the question of who will dig the well, if hiring a team of workers is expensive for you, then invite more assistants, because digging the well must be at least three people, who will ensure a continuous digging process, replacing each other.
One person digs the soil, putting it in a bucket, another lifts it at the top using a lifting device, and a third waits to replace the person who is tired.
The rope with the bucket also serves as a level to maintain the strict verticality of the shaft.
Here it is necessary to say separately about safety precautions.
A person who is digging earth in a well shaft must wear a helmet; even a small lump of earth falling from a bucket from a height of three meters can cause serious injury.
Choosing a place to build a well
Before choosing a location and building a well, you need to determine the presence and depth of the ground aquifer.
If wells have already been built on neighboring properties, then you will probably have the same thing. Just talk to your neighbors and get the information you need.
If there are no wells nearby, then you will need to contact the services of a hydrologist. A definite answer can be obtained by drilling an exploration well. But this work is quite expensive, and not everyone will agree to it.
SanPiN requirements:
In accordance with SanPiN 2.1.4.1175-02 “Hygienic requirements for the quality of water from non-centralized water supply. Sanitary protection of sources” - the well site must be located at least 50 m (upstream of the groundwater flow) from existing or possible sources of pollution, which include cesspools, toilets, fertilizer warehouses, sewerage facilities, etc.
Also, you should not install wells in areas flooded with flood waters and closer than 30 m from roads with heavy traffic.
Experts do not recommend building wells on the slopes of ravines and on the banks of reservoirs.
Choosing a place
The first thing you need to do before you start digging is to determine the most optimal place for the well. Ideally, it is advisable to involve a specialist to resolve this issue.
You can try to choose a place yourself, in this case we recommend asking your nearest neighbors (if they already have a dug well) how deep they dug, the composition of the soil, and also find out about other nuances associated with this process.
Many people dig a well right in the garden; this makes sense, since there is no need to carry water from afar for irrigation.
When choosing a location, it is also necessary to take into account sanitary standards governing the location of wells and boreholes relative to sources of pollution. According to these rules, water intake must be organized at a distance of no closer than 30 meters to the toilet, cesspool and other places that pollute groundwater (including elements of autonomous sewage systems such as drainage fields and septic tanks).
Note that you can dig a well next to the well, this will not contradict sanitary standards.
If in the future it is planned to erect buildings on the site, then this must also be taken into account, since moving the well (digging a new hole and burying the old one) will be problematic.
It is not recommended to place the well on quicksand (water-bearing sand) - this will significantly complicate the task.
Construction of a shaft well
The village or country wells that are familiar to us are called mine wells. They are relatively shallow and are designed to receive water from the first aquifer.
Main parts of a shaft well:
- The head is the part of the well that rises above the ground by at least 0.7-0.8 m;
- Shaft (trunk) of a well - serves for the passage or placement of water-lifting devices and mechanisms;
- The water intake part is the part of the well filled with water.
There are 3 main types of well designs: full, full with sump and incomplete:
a - incomplete structure, b - complete structure, c - complete with a sump; 1 - aquifer, 2 - aquifer.
With a full structure, the well rests its bottom on a water-resistant layer, and water will enter the well through the side walls.
The full design with a sump involves extending and deepening the well shaft into the waterproof layer, thereby creating additional volume for water, which, as in the previous version, will flow in through the side walls.
With an incomplete design, the bottom of the well is located above the waterproof layer, so water flows through the bottom, and additional water inflow can be made through the side walls by installing holes.
Most often, summer residents choose an incomplete structure, since it is the easiest to construct and can provide enough water per day. Filtration materials are placed at the bottom of such wells, but more on that later.
Materials for well construction
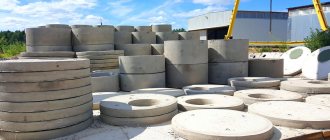
To line the walls of the well, it is primarily recommended to use concrete or reinforced concrete rings; in their absence, brick, stone and wood can be used.
Brick and stone must be strong, without cracks, and not stain the water. Brick (stone) and reinforced concrete rings are laid only on cement mortar, and the cement must be of high grade and without impurities.
The disadvantage of wells made of concrete rings may be a violation of the tightness at the joints between the rings; the solution does not always solve this problem. Also, reinforced concrete rings have a significant mass and therefore it will be necessary to use special equipment when laying the rings on top of each other.
When constructing log houses, certain types of wood should be used in the form of beams or logs: for the crowns of the above-water part of the log house, which are not exposed to strong influences, spruce or pine is well suited, for the water intake part of the log house - larch, oak, alder. The lumber must be of good quality, cleared of bark, straight, healthy, without deep cracks and wormholes, not infected with fungus, prepared 5 to 6 months in advance.
A wooden frame will last for several decades. Such a log house gives the site a good antique look. The disadvantages of a wooden well are the complexity of installation and high cost.
Do-it-yourself well in the country: choosing the optimal location
If you have chosen a well rather than a tube well to supply water to your private home or suburban area, then the first thing you need to do is choose a suitable place for it. Let's consider the rules that should be followed when selecting a location for a well.
Note! Before final installation, it is recommended to perform a well water analysis. There is a possibility that the liquid will be of poor quality or may not be suitable for drinking at all. Laboratory analyzes are also carried out during the operation of the water intake structure, since over time the water at the source becomes polluted.
Before installing a well, you need to do a water analysis
The well must be located at a point remote from probable sources of pollution. The minimum permitted distance from the water intake structure to the nearest landfill or cesspool is 25 m. However, experts recommend increasing it by 2 times in order to maximally protect the water source in the well from clogging.
If necessary, you can always use the services of specialists. A professional team will not only carry out a qualified installation of the water intake structure, but will also determine the most suitable location for it. The price of a turnkey well depends on the company whose services you want to use. Today, the cost of installing 1 ring is on average 4,000 rubles. The cost may also include the organization of a bottom filter (about 2000 rubles) and installation of an above-ground house (6-6.5 thousand rubles).
The recommended distance from the foundation of a residential or any other building to the well is 8 m. Failure to comply with this rule can lead to serious consequences. Water located underground can erode the soil layer under the foundation, which will lead to its weakening.
It is recommended to place the well away from the landfill and cesspool
Experts advise installing a well at the highest point (in the direction of water flow in the soil) on a suburban area. However, this rule is not decisive. This is due to the fact that no matter what place you choose to build a well, in any case you will reach an underground source. It is important to remember: in order to buy reinforced concrete rings for a well, you need to accurately calculate their number and dimensions. The depth of the structure may vary.
Construction tools
Despite the fact that technology is now developing very quickly, there are few tools and devices that make the construction of wells easier. Most of the work will have to be done using old-fashioned methods. The following tools will definitely come in handy:
- Bayonet shovel;
- Staircase for going down into the mine;
- Bucket to remove soil;
- Bucket lifting device;
- Extension cord with a lamp to illuminate the shaft;
- To pump out water you will need a pump. The best solution would be a drainage pump, as it is capable of pumping out a mixture of soil and water.
In addition to these basic tools, others may be needed, for example, a wooden frame cannot be made without a hacksaw, hammer, ax and drill. For concrete wells, you need to make a solution, so a spatula and special containers will come in handy.
How to build a wooden well
First we decide on the type of wood. The best materials, as mentioned above, are oak and larch, which have the required durability and strength. In the absence of oak and larch, you can use aspen, hornbeam and alder, but the service life of wells made of such wood will be shorter.
The beams or logs that will be used to build the well must be carefully prepared. All logs should be checked for fungus or mold contamination. Rotten wood cannot be used. Before assembling the well, the wood must be dried and not left outside for a long time, as the wood may crack in the sun.
The standard section of a well shaft is a square with sides ranging from 700 to 1500 mm. The ideal size would be logs with a diameter of 150 to 200 mm, and timber 150 by 150 mm. The frame is assembled at the top, then the crowns are marked. Then, the log house is disassembled and after that it is mounted in place.
For good tightness, the crowns of the log house are carefully adjusted. The sides of the logs that will be inside are processed so that there are no burrs or cracks. To do this, you can use a plane. The crowns are connected with dowels.
Installation of a wooden frame
There are two ways to install a well frame in a shaft:
- They begin to build the structure from the bottom;
- They build up the frame from above and gradually lower it;
The first method is used when the depth of the mine does not exceed 7 meters. First, dig a hole to the depth of the well. A base is installed at the bottom on which the remaining crowns are mounted. At the same time, the walls of the shaft are temporarily strengthened from their spontaneous destruction.
The second method is used when you need to build a deep well. First, they dig a shaft about 4 meters deep. A frame is assembled at the bottom and extended until 3 crowns rise above the ground. While inside the well shaft, the soil is dug up in the middle of each side and support pads are installed. Next, they dig into the corners and knock out the gaskets. After several such operations, the log house gradually settles. The structure may get stuck in the shaft, then it is besieged by striking the upper crown.
Technologies for constructing drinking wells
Let's start with the fact that the well shaft must have strong walls. And if in the old days they were lined with logs, today the best option is reinforced concrete rings, which are installed on top of each other, sealing the joints.
There are two main ways to form a mine: manual and mechanized. Let's start with manual.
Manual method of digging a well in the country
The technology itself is simple - a well is dug with shovels, strictly following the markings. But here the type of soil at the dacha site can interfere with the technology. It can be clayey or sandy.
In the first case, the mine is simply dug to the depth where the aquifer passes. Then reinforced concrete rings are lowered into it using a crane.
The second method is very different from the first. The thing is that it is difficult to maintain vertical planes on sandy soil. Sand is a loose and soft rock, so the walls of the mine will simply crumble and the diameter of the structure will expand. Therefore, there is a certain algorithm for carrying out this type of work.
- Make markings at the site of the well construction.
- Dig a hole with a shovel to a depth of half a meter .
- The first reinforced concrete ring is installed into it using a crane .
- A digger climbs inside and begins to select the soil. To make digging easier, the bottom of the hole is often filled with water.
The well is dug from inside concrete rings Source landshaftblog.ru
The land can be selected according to two schemes. The first is to first remove the area in the middle of the pit, and then gradually under the walls of the ring, thereby sinking it into the ground. Or vice versa: first they remove the soil under the walls of the ring, and then choose in the middle.
As soon as the first reinforced concrete ring has lowered so that part of it protrudes from the ground to a height of 10-15 cm, a second concrete ring is installed on top. And the process repeats. In this way, a well is dug, forming a trunk.
Deepening is carried out to a depth when three springs begin to emerge from the ground. That is, the process reached the aquifer. You cannot dig deeper, because the soil below is weak, and this can lead to the lower concrete ring simply sinking. Often it was distorted, after which the well was simply covered with soil, and a new one had to be dug.
Well made of concrete rings
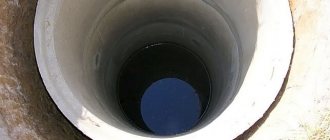
The most popular design today is a well made of concrete rings. To build such a well, you can use concrete rings made at the factory. Extending a well trunk is done in exactly the same way as when extending a wooden frame. The simplest method is to settle the rings and remove the soil from underneath them. The joints between the rings must be well sealed to prevent water from entering the well. First, the seams are laid with hemp, and then sealed with concrete mortar. For better strength, the rings are fastened together with staples.
Hemp is a material consisting of plant-based fibers that is used in sealing threaded connections of pipelines.
Also, to seal the joints between reinforced concrete rings of a drinking well, you can use special construction mixtures, for example, “Kalmatron-Shovny”. There are a large number of similar mixtures on the market, so the most important thing is that these materials meet sanitary standards and are suitable specifically for drinking wells, which you should ask the seller about or get information on the manufacturer’s website.
If digging a mine has to be done in an aquifer, then it will be necessary to use a pump-out pump. If you have to pump out a liquid mass, a drainage pump is used.
We build a well ourselves: stages of a long journey
If you have decided that it is necessary to build a well on your site, before you begin directly laying it, you need to do a number of fundamentally important actions, in military terms, to carry out reconnaissance on the ground.
Reconnaissance and survey of the local population
The art of finding a water vein using a grapevine slingshot has been well known since ancient times.
At this stage, you will have to become district inspector Aniskin for some time and carry out a number of urgent operational measures:
- Carefully survey local residents about the availability of water and its quality in the immediate vicinity of your site.
- Visit your local geological exploration office and review geological maps for the depth, abundance and quality of local waters, again as applied to your site.
- Independently inspect the area for the presence of plants on it that indicate the proximity of groundwater. These are Norway willow, black alder, large burdock, common plantain and others.
- You can also localize a good place to lay a well if you systematically place a cast-iron frying pan upside down overnight in the area during the summer. Abundant condensation inside early in the morning can serve as a positive signal.
- For additional research, you can contact dowsing specialists or frame framers, who certainly have a positive reputation.
Willow is a time-tested, reliable neighbor to an underground water source.
And a young guy went to the mine: shaft sinking
The work of a digger can be entirely manual
At this stage, you will have to experience all the delights of the hard work of a Stakhanovite shock worker in the domestic mine construction industry.
And almost completely mechanized
The process itself consists of several stages:
- Estuary marking. Do not forget that the mouth should have a diameter of +50% of the cross-section of the main body of the trunk. At the finishing stage, this volume will be filled with clay for waterproofing and covered with reinforced concrete screed.
- Preparing the site for transshipment of supplied soil. Take into account the required loosening coefficient; for clay it is 1.5. That is, when excavating a pillar with a volume of 20 cubic meters. at the transshipment site for loading and removal you will have 30 cubic meters. do not place the dumping area directly next to the trunk of the future well. In order to minimize the pressure of the excavated soil on the walls, place it at a distance of at least 5-7 meters from the work area.
- Take care to ensure ventilation and drainage as work deepens. This is especially true at depths below the horizon of the maximum occurrence of perched water, which is 12-15 meters. Local ventilation can be provided by an axial high-speed fan with an impeller diameter of about 400 mm, and drainage by a low-capacity drainage pump.
- The provision of tools is as follows. To loosen the soil, you need a bayonet shovel, a short hoe, and a cleaver, which is a wide ax mounted vertically on a long handle. To excavate a stone, you need a pair of crowbars of sufficient length to handle the work. For loading, a shovel with a straight and conical edge and a scoop are required. As a universal tool, an American-style shovel.
- Lifting and transferring soil. To facilitate lifting, it is necessary to arrange a simple or double block on a metal or wooden frame. The use of such a system simplifies and facilitates lifting compared to direct manual lifting. Constantly monitor the integrity of the rope and the reliability of fastening the lifting vessel in order to prevent its accidental fall into the face of the shaft.
- Carrying out surveying work related to constant quality control of the vertical axis and diameter. These requirements can be met by using a plumb line and a diameter template, which can be used to carry out constant measurements of the quality of the work performed.
We prepare rings, but not wedding rings
Since the casing of the body of the trunk of the future well in our case will be done using concrete rings, their selection should be taken care of in advance.
With a fairly wide range of concrete rings on the market, finding a quality product in all respects is not at all easy
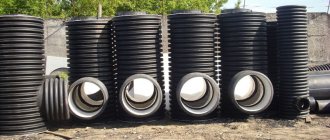
Important! Recently, plastic rings for lining the walls of wells have appeared on the market. Since there is no experience in the long-term operation of such products in the country, it seems premature to talk about such materials as a full-fledged alternative to traditional ones.
Making well rings from concrete is, if not complicated, then in any case a very responsible procedure. Therefore, take the choice of manufacturer and product quality very seriously.
- The basic, or rather generally accepted, diameter of a concrete ring of this type is 900 mm. It is this diameter that determines the normal operation and subsequent repair of a well made of concrete rings. In addition, the cost of such a product meets the optimal ratio for such an important criterion as price.
- It is worth paying attention to the quality of the ring body, the presence of locking elements, the tightness of the fit, the diameter of the mounting loops and other things.
- It would be useful to make sure of the positive reputation of the ring manufacturer, based on the systematic quality of products and a reasonable pricing policy.
Installation with a manipulator greatly simplifies work in all respects
- Calculate the possibilities of transporting and unloading products at the most reasonable price, and this can be provided by an on-board vehicle with sufficient carrying capacity, equipped with a crane-manipulator unit. Among other things, if such a CMU, in addition to a hydraulic boom drive, is equipped with a winch, then in addition to unloading, you can organize the installation of casing rings directly from the side.
Although manual labor flourishes wildly in the vastness of the country
Montage, how much is in this word
The actual installation of casing elements, when a do-it-yourself well made of concrete rings is at stake, can be done using two technologies. These are direct casing and blast casing. Let's look at them in more detail.
Direct casing is carried out along the finished trunk, starting from bottom to top. In this option, it is possible to greatly facilitate and reduce the cost of installing a well made of reinforced concrete rings by using a manipulative installation and combine delivery, unloading and installation into one complete operation.
However, this technology is possible if the well is driven through stable rocks that do not require fastening, or you can get by with a simple temporary structure supporting the support.
When mounting according to the bottom-up scheme, it is necessary to securely and without distortions place the main ring on the sole, since it ensures the reliability and alignment of the entire barrel set
If the excavation is carried out on unstable, sandy soils, prone to crumbling, quicksand, then casing the walls of the shaft is possible only by casing with blasting. What is it?
As the face advances, the rings are simultaneously lowered, or as experts say, rings move towards it. The rock removed from under the edge of the ring causes its independent movement from top to bottom following the face under its own weight at the initial stage, and under the weight of other rings at subsequent stages of work.
In this case, for the convenience and safety of work, a frame with a block is needed, which will ensure the forward and correct movement of the ring to fit onto the previous one.
The use of stationary block structures greatly simplifies installation and increases work safety
A word from Experienced. When installing rings with undermining, rings with a lock are required. Since the side rocks are unstable, closing the rings will prevent displacement and rotation of the rings, and will preserve the integrity and alignment of the structure, and a well made of reinforced concrete rings will serve faithfully for many years. If there is no locking element, the locking effect can be achieved by welding the mounting hinges and additional embedded plates using electric arc welding. It would be useful to recall the provision of local ventilation and other safety rules when carrying out hot work at depth.
When you are constructing a well from concrete rings, a kind of folk instruction written with sweat and blood categorically recommends cutting the seams where the rings meet each other.
There are several ways:
- This is a clay castle for a well made of concrete rings. It is ensured by laying a clay mortar of enriched fatty high-quality clay along the entire perimeter of the joint.
- Laying a polymer or rubber gasket along the diameter of the ring.
- Using a special waterproofing sealant.
Important! When using polymer, rubber tapes, or sealant for a well made of concrete rings, be sure to ensure that they are chemically inert and safe when in contact with water.
Construction of a well from stone or brick
When a well is built from brick or stone, the shaft of the shaft is most often made round. Before construction, stones of approximately the same size are selected. The entire structure is reinforced to protect it from rupture. Both sides of the well are plastered with cement mortar (1:2). Instead of mortar, you can use oily clay on the outside.
The brick well is made using the “butt” method, making sure to bandage all the seams. The wall thickness is made in sizes from 250 to 370 mm. The external seams will be larger than the internal ones, so you need to carefully monitor their filling. The verticality of the shaft is checked using a plumb line. The masonry is reinforced with wire to make it as strong as possible. The wire must be laid every 4 - 5 rows.
If the masonry is done from below, then the shaft will have to be plastered from the inside gradually, building up the walls. You can immediately install staples into the shaft structure, which form a ladder for subsequent cleaning of the well. The inside of the brickwork is plastered when it is completely ready.
Well protection from high water
Along the perimeter of the well head, a “castle” is made of carefully compacted clay or loam 2.0 m deep and 1.0 m wide, as well as a blind area of stone, brick or concrete at least two meters wide with a slope from the well of 10 cm per meter. The blind area protects the mine from water flowing into it from the ground surface during rain and melting snow.
A concrete blind area has several disadvantages:
- Concrete is susceptible to the formation of cracks and chips, through which dirty rainwater can enter the well shaft;
- A rigid fastening is formed between the concrete and the well shaft, which in winter can lead to rupture of the rings (if the well is made of concrete rings). As a result, a gap is formed between the rings, through which water from the surface can enter the well.
Another option would be a soft blind area. A recess up to 1.5 meters wide is made along the entire perimeter of the well. This depression is filled with sand and compacted. Waterproofing is laid on top of the sand, it is placed on the top ring and fixed. The waterproofing is secured with steel tape, which is nailed to the ring with dowels. This blind area is covered with gravel or tiles are laid on it.
Well creation process
Now that we have discussed how to assess conditions, select the optimal location and the specifics of different structures, it remains to tell you how to properly dig a well. Since the use of concrete rings is common in modern construction, the creation process will be considered with an eye to this particular form and material.
Digging using a tripod Source kolodeznyemastera.ru
See also: Catalog of companies that specialize in water supply, sewerage, swimming pools and equipment for them
Excavation
When all the required information is known, the question arises of how to dig a well. Manual labor and an ordinary shovel are used for this. If stones are encountered during advancement, they are turned out using a short crowbar, then tied with ropes and lifted from the trunk. At the same time, if the employee’s well-being worsens, he should get out of the hole. It is quite possible that this is a negative influence of the harmful gas collected in the mine.
The digging process requires that, as a rule, three people are involved, alternating. During the digging process itself, it is important to follow the following rules:
- It is not advisable to carry out work in the spring. You can make a mistake with the required depth of the well.
- The best time for digging is the end of summer or winter. In the second case, digging is much more difficult, but there are no options if digging a well is very problematic at other times of the year.
- To avoid sticking, the well is dug continuously.
- A winch and crane are used to facilitate excavation.
Digging process Source kopka-kolodec.ru
Construction of a shaft from concrete rings
Work technology directly affects the order of work. Namely, how to dig a well with your own hands with concrete rings and install them. The most popular is the lowering method of construction. However, they can first carry out full excavation work, and then install concrete elements. But provided that you have enough qualifications and skill level.
The lowering method is considered more convenient and safe. It involves strengthening the walls of the well at the same time as excavating the soil. This makes it possible to prevent soil rocks from collapsing into the trunk during digging. Concrete and reinforced concrete rings are used as walls. The second option is the most preferable due to its lower weight with the same strength characteristics.
The diameter of the well is selected with an eye to the comfortable position of the worker during digging. Usually it is from 1 to 1.5 meters. It should be noted that the width has practically no effect on the filling level, and if the well is imperfect, then there will be no difference at all.
Simultaneous excavation and laying of rings Source i.ytimg.com
Questions are often asked about how to dig a well and still be as efficient as possible. To facilitate the work, a number of technical devices were invented. For example, one of these is a shoe. This is a shortened ring with a cutter on the lower edge. Using a shoe allows you to speed up penetration and ensures smooth immersion of concrete elements into the shaft. To facilitate the lifting of excavated soil from a well, a tripod with a block is also used, on which a rope with a hook is installed.
Bottom filter device
In some cases, to obtain clean drinking water, it is necessary to install a bottom filter from bulk materials.
In this article we will look at the bottom filter, since such a filter is most relevant when using an incomplete shaft well design, when water enters through the bottom. If you plan for water to flow into your well through the side walls, then you need to build a wall filter, and it is not discussed in this article.
Cases when a bottom filter is needed:
- If the soil at the bottom of the well is loose and mobile or is generally quicksand. Quicksand is soil saturated to the limit with water, usually sand or sandy loam, which liquefies when mechanically applied to it.
- If the depth of the well is not great, but it is planned to use an electric pump, which can create water turbulence and raise turbidity from the bottom.
- If water flows into a drinking well from an aquifer in a powerful stream
Structure of bottom filters:
Typically, bottom filters are made from several fractions of stone materials and coarse sand.
You can use a three-layer structure, where the fraction of each layer differs from the previous one in size by about 5 times. Moreover, the sequence of laying layers can be direct (the largest fraction is at the bottom, and the higher the size, the smaller the size) or reverse (the smallest fraction is at the bottom).
A direct filter protects well the bottom of the well from erosion when constructing a well on a floating surface or in clayey soil.
A reverse filter is recommended for use in sandy soils.
The thickness of each layer of the bottom filter is approximately 150-200 mm, that is, the entire three-layer filter will be about half a meter thick. On quicksand, in addition to bulk materials, it is also necessary to use a wooden shield or metal mesh to prevent the filtration material from being sucked into the flowing soil.
Scheme of a direct bottom filter with a wooden shield
The wooden shield must match the shape and size of the well shaft. It is made of durable and moisture-resistant wood: oak, larch, aspen. To allow water to enter, holes with a diameter of about 10 mm are drilled in it or gaps are left between the boards. The number of holes is determined experimentally depending on the filling of the well, the diameter of the shaft and the water flow.
Materials for bottom filter
It is important to know that not all stone materials can be used to construct a bottom filter; some may simply be ineffective, while others may even be harmful to health.
It is strictly forbidden to use crushed granite stone, as it has an increased background radiation
The best materials for installing a bottom filter in a drinking well are: coarse-grained quartz sand, river pebbles, shungite, jadeite.
The best materials for a filter in a drinking well
River pebbles are the most affordable material from the above list, which you can acquire yourself; the remaining materials will most likely have to be purchased. On one of the sites, the cost of a 200 mm jadeite filter for a well with a diameter of 1.0 m is about 20 thousand rubles. Shungite is also very popular on sale; some suppliers even sell it in three different fractions at once.
Caring for the bottom filter
It is recommended to clean the stone materials of the bottom filter every 5 years. The material is removed, washed and re-laid, with new material being partially added if necessary. The wooden shield must be replaced with a new one.
The final stage of well construction
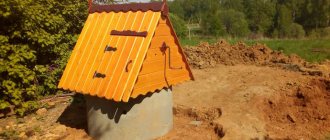
The final stage of construction is the design of the head, as well as the installation of a roof or canopy to protect the well from precipitation. Many summer residents put a wooden roof on top of the well, which will protect the well from various contaminants, and the well itself is covered with a tight-fitting wooden lid. To manually lift the water, a swing arm with a chain and a bucket is installed. You can, of course, additionally install a pump so that water flows directly into the house. If the pump malfunctions, you can always use a bucket.
Before drinking, you must send a sample of water from your well for examination. The cost of such a service ranges from 5 to 25 thousand rubles, depending on the number of indicators determined by the laboratory, but, as they say, health is more expensive.
Construction of a well: which one to choose - shaft or tube
The choice of water supply option for a suburban area depends on many factors. First of all, it is necessary to determine the water flow that meets the needs in a particular case. There are two common options for water supply at home, which cannot be connected to a centralized communication.
The most common water supply options in a private home are a well and a well.
The first of them is a well, that is, a tube well. However, this option is not suitable for self-installation, as it requires the use of special drilling equipment. In turn, it is quite possible to organize a mine well yourself. Moreover, this does not require professional skills. To make a well of this type, simply follow the instructions.
To organize a well of a suitable design, you must first become familiar with the factors influencing the choice of water supply. The key one is the depth of the aquifer. It can be different and depends on the individual characteristics of the area in which the summer cottage is located.
Also an important factor determining the type of future water supply is the type of soil. For example, if the soil is very rocky, then drilling a well (tube well) will cause certain difficulties. In such cases, it is recommended to dig a mine variety.
Before starting installation work and purchasing the necessary material and equipment, it is recommended to determine the daily water intake in advance. This figure must meet your needs, so it is determined depending on the region, the number of people living and other minor factors. After calculating liquid consumption, the most suitable water pump option for the well is selected.
In most cases, a classic shaft well is the best option
It is important to know that there are three aquifers, but the middle one is most often used. This fact is explained by the fact that the top layer contains water, which has extremely low quality characteristics and is therefore unsuitable for drinking. This is due to the fact that precipitation in the form of rain and melted snow falls into it.
In turn, the deepest layer, called artesian, contains clean, high-quality water. However, the cost of drilling a well capable of drawing fluid from it is too high. Maintenance of such a well is expensive. Thus, the most suitable option is the middle aquifer.
The standard well depth ranges from 10 to 20 m. In some situations (due to the terrain) installing a conventional well is simply impossible. This forces owners of summer cottages to seek help from specialists using drilling equipment.
In other cases, it is recommended to install the mine variety, which is the most acceptable. If necessary, you can use the services of professionals. The price of digging wells with rings (total amount) may vary. It depends on the number of elements, their dimensions, as well as on the prices of the company that does this kind of work.
To install a tube well, special equipment is required
Note! A tubular well differs from a well in its small diameter, corresponding to the cross-section of the drill. This characteristic affects the complexity of independently organizing such an option on the site.
Using a tube well has one more disadvantage, which in some cases is quite significant. The operation of a well depends on the quality of the electricity supply. Therefore, if your home constantly experiences power outages, it is better to give preference to a regular well.
