Why do you need to degrease the body?
The degreasing process is most often mentioned in connection with the need to repaint the body. Yes, to carry out such work, the process of removing grease from the body is a mandatory procedure. If you suddenly ignore this point or do it poorly, all the painting work will need to be done again. Paint does not stick to a greasy surface, and after drying, we will notice swollen bubbles or many wrinkles in these places.
After a long and active use of the car, especially in urban conditions, you can notice that the dirt from the body is somehow not completely washed off, stains are visible in places, and if you run your hand over the surface, you can feel some slight roughness. And the car itself no longer shines the way it did immediately after purchase. This means that the body simply needs to be degreased and remove traces of burning and soot from the city, traces of hands, remnants of silicone and polishing agents, as well as various stickers. Polish the body and the result will be visible to the naked eye.
Degreaser - which one is best to choose?
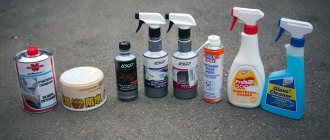
If you ask motorists what product they usually use to remove residual grease stains, each will name their own option. This can be either a store-bought car degreaser or one you make yourself. Some motorists try to degrease the body using gasoline, acetone, and a mixture of detergent and vinegar. But all of them poorly cope with the task or, in the worst case, can cause irreparable damage to the car’s paintwork.
People who paint cars strongly advise purchasing special industrial liquids for degreasing themselves. Today on the automotive chemicals market you can find a wide selection of different degreasers. All major manufacturers of paints and varnishes have developed proprietary degreaser compositions, and it’s up to you to decide which degreaser is best. They can be produced in various forms:
- organic solvents;
- emulsion-type compositions based on water and alkali;
- synthetics;
- lint-free wipes impregnated with solvent.
The most common means for removing grease stains is “White alcohol”. This substance is the result of oil distillation and has a specific smell of kerosene. White Spirit perfectly removes any grease stains of organic origin, bitumen and rubber stains. The disadvantages of this product include a very persistent odor and its inability to remove inorganic oil-containing deposits. Some motorists prefer to use time-tested solvents, such as acetone, kerosene, gasoline, etc. But when using these substances, it is important to remember that they all have a high degree of fire hazard and require strict adherence to certain safety measures.
If there are inorganic contaminants on the body, it is necessary to give preference to chemical compounds. Most often, motorists choose Solvent or Nefras S 2-80/120. It is better to use them when treating the car before painting.
Also, very good results will be obtained after treating the car with universal “anti-silicones”. Antisilicone perfectly removes all types of greasy contaminants and does not have an aggressive effect on the paintwork of the car itself. This fact is especially important if we decide not to paint the body, but simply wash it well, for example, after winter, and polish it.
Purpose and use of degreaser
Many beginners and amateurs often have the question of what degreasing is and which is better.
Professionals and experienced builders and motorists know that a dirty, greasy and dusty surface greatly reduces adhesion, so painting or gluing will not be done in the best possible way. In this case, durability and quality will be severely affected. A degreaser is a special chemical composition that acts on fats, dust and bitumen compounds, making the surface smooth and clean, suitable for painting or gluing. The product is used quite often and in many areas of life.
Mainly used:
- in construction;
- in the automotive industry.
Degreasers are often used at home, since the product is unpretentious and easy to use. Can also be used before painting. However, you should adhere to safety precautions when using this product, since the composition is highly concentrated and chemically unsafe.
Functions:
- Removing preserved coating;
- Preparing the coating for gluing and painting;
- Removing dirt and dust;
- Fighting corrosion.
When using fat-free products, precautions must be taken. They are written mainly on the packaging of each manufacturer, since the product is a source of increased danger. When using the product, you must wear protective gloves, as otherwise the horse's coat may be damaged.
Storage
The degreaser must also be stored according to established rules.
Main rules:
- The vial containing the substance must be closed;
- It is necessary to protect the container from sunlight;
- You must follow the instructions on the packaging. The temperature should not exceed 30 degrees Celsius.
If you do not adhere to storage rules, negative consequences may occur. For example, when temperatures rise, fires can occur.
Degreasing process
Washing
The first thing you need to do before starting the degreasing process is to thoroughly wash the car from dirt, dust and especially sand. Otherwise, rubbing the car body with a rag before polishing can seriously damage the paintwork. Experts recommend cleaning first and then moving on to manual washing using simple detergents.
To work with degreasers you need to prepare:
- respirator;
- protective glasses;
- latex gloves;
- two lint-free napkins.
Degreasing
Now you can proceed directly to degreasing.
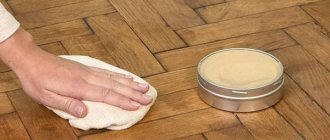
We apply the product we have chosen to the car body. This can be done using a spray bottle or a rag, rubbing the product over the entire surface. The rags must be dense, without fibers, and they must be changed as they become dirty, otherwise the fat will not be removed, but will simply be smeared over the entire surface. Here it is important not to forget the glass and roof. From below, approximately 40 cm, twice as much degreaser is required. Leave for five minutes and wash off as quickly as possible, possibly with shampoo. It is very easy to check the quality of work. You need to rub a dry paper napkin over the cleaned surface, and if there are no dirty spots on it, the job is done well.
After the degreasing process, it is important not to touch the car with your hands or clothes and immediately proceed to the next stage of processing - puttying, painting or simply polishing the vehicle. If the cleaning process was carried out in compliance with all the rules, then further processing of the body should be successful.
Degreasing car surfaces before painting
Preparing metal products for the application of paints and varnishes ensures better adhesion of the substrate to the paint film and corrosion resistance of the metal, which increases the service life of the painted product. According to many, rust removal is a more important issue in the preparation process than the need to degrease the metal before painting, which is often either forgotten or simply neglected.
The degreasing process involves removing fatty substances from the surface of the substrate, which may be contained in polishing compounds, preservative lubricants, mineral oils, and cooling emulsions.
In addition, fingerprints and sweat, residues from washing and etching also need to be degreased.
The presence of such contaminants significantly worsens the conditions for wetting the surface with paints and varnishes, and also adversely affects film formation and other properties of the coating.
According to the degree of surface contamination, depending on the amount of fatty impurities per square meter, they are distinguished:
- Weak – up to 1g;
- Medium – from 1 to 5g;
- Increased – more than 5g.
The chemical effect on fats consists of the following processes:
- Solvents;
- Emulsifying;
- Saponifying (destructive);
According to the ability of fats to be destroyed using degreasing agents:
- Saponifiable (fingerprints and skin marks, polishing materials, lubricant residues);
- Non-destructible (preservation lubricants, emulsions, etc.).
Solvent-soluble degreasers for metal
Organic solvents
Using organic solvents, you can clean oily and greasy areas of metal parts in a short period of time. They are more often used in individual production, less often in serial production (due to explosion and fire hazards). When exposed to organic solvents, oil and fat deposits dissolve.
The quality of work directly depends on the degree of contamination of the solvent, since the ability to dissolve sharply deteriorates with a fat content of 5 g per 1 liter. The most common are aliphatic (gasoline, white spirit) and chlorinated (non-flammable, but more toxic) solvents.
Among the shortcomings, one can note the lack of cleaning of surfaces from abrasive materials and other mineral contaminants.
It is no secret that water has low cleaning properties, the reason for which is high surface tension and incompatibility with fats, as a result of which it poorly wets greasy surfaces and does not form stable emulsions. An increase in pH, a temperature range of 50-65C, and the addition of surfactants significantly increases the washing ability of an aqueous solution.
Alkaline degreaser
These compositions are distinguished by high cleaning properties, fire safety, environmental friendliness, and a variety of application methods.
The effect of aqueous solutions on saponifiable fats and oils is destructive, and unsaponifiable contaminants are emulsified.
The emulsification process can be described as the peeling of fat layers from the surface into a working fluid and subsequent removal along with the solution. Among the disadvantages, we can note the need for mandatory anti-corrosion treatment of the cleaned surface.
One of the most effective components of alkaline cleaning solutions are surfactants. Surfactants form foam on the surface being cleaned, reduce surface and interfacial tension, increase wettability and have a dispersing effect on solid contaminants and an emulsifying effect on liquid ones. The surfactant content in grease cleaners is no more than 10%.
If, along with degreasing, it is necessary to remove thin oxide or hydroxide films, use acidic solutions containing 1-3% phosphoric acid.
After the cleaning agents have been used, the surface must be thoroughly rinsed with water. Salt residues negatively affect the properties of the paint film, increasing moisture permeability and promoting under-film corrosion.
To remove stubborn contaminants, grease, oil deposits, and old paint and varnish coatings, emulsion degreasing is used. This is a mixed version that takes advantage of organic solvents and aqueous alkaline solutions. Such compositions contain emulsions of solvents in water with surfactant additives. Solvents can be aliphatic or chlorinated hydrocarbons.
To improve the cleaning properties of detergent compositions, special baths with an ultrasonic field are used.
This method is used for small-volume products that have a surface of increased complexity and require ideal surface cleaning quality (parts of watches, devices, tools).
Electrochemical degreasing also occurs in specially equipped baths, where gas bubbles formed on the electrodes play an active role. This reduces the consumption of chemical components and improves the quality of cleaning.
Car degreasers
In everyday life, the choice of degreasing agent most often falls on the old “old-fashioned products” - gasoline, kerosene, acetone, alcohol. Nefras (White Spirit) and Solvent 646 are considered more modern and technologically advanced.
They are distinguished by their low price, better environmental friendliness and form films that are neutral to the paintwork, which prevents corrosion.
In order for the substrate to match the selected paint after degreasing, it is advisable to buy the solvent that is suitable for the coating (the manufacturer writes the numbers of suitable solvents on the label). At the same time, according to consumer reviews, No. 646 remains the most universal.
Special Anti-Silicone solvents are used by craftsmen to degrease the car body before subsequent painting. Of course, we should not forget about safety - work with organic solvents should be carried out in a room with good ventilation, away from sources of ignition, using personal protective equipment.
Before degreasing any object or just a surface before painting or gluing, you need to understand in what way and what material this should be done. Moreover, it is important to try to select the technology as correctly as possible in order to implement such work with really high quality.
In this article we will look at how the surface is actually degreased before painting and what nuances and secrets there are in this matter.
Let's start with the most important thing.
This is actually a very simple question.
If the plane of the part or the surface is not treated, then the adhesion to the paint layer will be weak, and possibly none at all. Because essentially normal adhesion will not work in this case.
That is, the glue or paint will stick not to the plane, but to a layer of dust or dirt. The consequences are not difficult to imagine, you will agree.
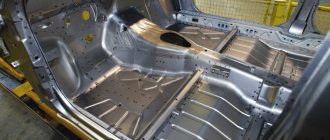
Please note that it is especially important not to be lazy in degreasing the metal before painting, since on the surface of this material, as a rule, there are always oil stains that cannot be adhered to by other materials.
So, it turns out that degreasing is essentially cleaning the surface of something from layers of old paint, dirt, oil, grease, etc. This is a very important stage of work, without which you may simply not achieve the desired goal.
Let's begin with a review of surface cleaning methods.
It is worth noting that we will talk about the simplest and most accessible methods of degreasing. That is, those that you can easily do with your own hands at home and without the presence of super-expensive equipment.
It should also be emphasized that, regardless of the type of surface, it is very important to follow safety rules during work. Because in most cases there is direct contact with various chemicals and acids.
But even if you try to limit yourself to mechanical cleaning, still try to follow the recommendations and work in safety glasses, gloves, and a respirator.
Please note that a respirator is by no means a “formality”. It is needed not only in situations where you are working with toxic paints, for example.
Even sanding even ordinary wood glue can cause a severe allergic reaction. Therefore, we advise you not to test the harmfulness of materials in practice - it is better to play it safe and still wear a respirator or mask.
Let's get back to the review.
Metal
- So, metal – what and how to degrease the surface before painting.
- On the surface of this material there may be rust, soot, oil, just dirt, or old paint, for example.
- As a rule, in most cases, acetone, white spirit, or even regular gasoline are suitable for cleaning a metal surface.
- And the step-by-step instructions will be approximately the same in almost all cases.
- The surface is cleaned mechanically.
This is done either with ordinary sandpaper or with an angle grinder (as the grinder is correctly called). It turns out that at this stage rust is removed, or simply dry large debris or dust.
- Next, the plane is treated with chemicals to remove more complex and durable layers (for example, machine oil or soot from it). To do this, a cloth is soaked in a solvent and the desired area is thoroughly wiped.
- After washing, the metal dries, if necessary, primed, and then painted.
Advice: if you can’t clean the surface of the product with a cloth, then try placing it in a container with solvent for a while - it should help. If you need to clean the surface of a fence, for example, then, of course, you cannot immerse it in a bath.
In this case, it is easier to apply a paste-like chemical solution to the metal, and then cover the entire structure with film for several hours.
If you are faced with a special task and need, for example, to find out how and with what to degrease the bathtub before painting, then there is nothing complicated here.
Before covering the bathtub with new enamel, you need to treat the surface of the product with ordinary soda and a hard sponge. The soda will wash away everything unnecessary, and after the surface is completely dry, you can safely begin painting.
In general, we have covered everything about metal - how to process it and how to degrease the surface before painting, now you can familiarize yourself with the features of preparing wooden surfaces.
Tree
To avoid problems
It would seem that the degreasing process is a very simple process, but even here you need to be very careful; if you select the wrong grease removal solution, you can, completely unwittingly, damage the paintwork of your car. Therefore, the choice of liquid should be made as responsibly as possible and carefully read the instructions and recommendations of the manufacturers.
If the goal is to simply polish the car, then poorly done grease removal will not have fatal consequences. But if you make “mistakes” when preparing to paint the body, problems cannot be avoided. Almost 100% of the time you will have to redo everything from the very beginning, and this takes time and money.
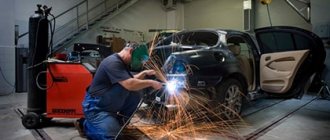
When starting to degrease the surface before painting or polishing, it is important not to ignore safety precautions. This type of work in a garage environment can be unsafe. Most of what can be used to degrease a car body is highly flammable, and the vapors from these products are harmful to human health. Taking this into account, when degreasing a machine, it is necessary to provide good ventilation in the room and protect the respiratory system, eyesight and skin.
Source
Degreasing technology
Once you have figured out how to determine how to degrease the car body or its other parts, let's talk a little about the process itself. This information will be no less useful than knowledge of how best to degrease a particular machine part.
Carry out this type of work in a well-ventilated area with ventilation and high-quality lighting. Wear protective clothing, goggles, a respirator and rubber gloves. Remember that the products used in the work may be a fire hazard, so make sure that there are no open flame sources nearby.
- The surface is degreased before filling, priming and painting.
- Car degreaser is applied with special lint-free materials - to do this, you need to run a cloth soaked in a solvent over the surface.
- Immediately after this, blot the treated area with the same cloth, but dry, to remove any remaining solvent.
- The treated surface should not be touched with hands.
- Check the quality of work using a clean sheet of paper - there should be no greasy stains on it.
Why keep degreasing in every car?
1. Quickly and efficiently wipe off stains from bitumen, tree resin, and insects.
Difficult to remove stains from the above factors cannot be dealt with with car shampoo. The only thing left to do is either wait until they disappear on their own (over time) or remove them immediately after they appear. The degreaser will cope with this successfully: it will dissolve harmful stains and all that remains is to wipe the surface of the paintwork dry with a rag.
2. After washing, make it look “chic and shine”, drive a perfectly clean and beautiful car
The body of a new car loses its original luster quite quickly during operation. After this, no matter how hard it is, no matter how you rub it with polishes, the car still remains dull, and even on a perfectly clean paintwork, barely noticeable stains and deposits soon appear.
You should not transfer the product by trying to wash your car several times with an increased portion of car shampoo. This will still not achieve the same effect as a degreaser. Even if you use diligent rubbing of the body with a sponge and shampoo instead of contactless washing.
But after degreasing the body, the car will become “glossy” (which only happens when new) and will have excellent contact with wax, other polishes and protective coatings for paintwork.
Peugeot 308 e-HDi EGS6 micro-HYbrid › Logbook › Degreasing a car: how and why?
The post will not only be about degreasing, but it, as the main theme, will run like a thread through the entire story. And the reason is simple - there is not much information on this topic, and what is available is, for the most part, completely obscure and requires careful filtering. Less words - more photos, you will see everything for yourself!
On the Internet, degreasing is mostly mentioned before painting/touching/sticking anything, and my previous car lived happily without this operation for more than 3 years. As it turned out, there was only one reason - dark color.
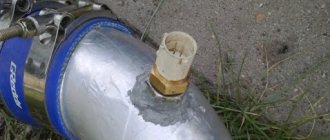
When I tried to wash my car after winter, I encountered some difficulties, see for yourself:
Contactless washing, even with the original brand Karcher shampoo, was more like a cruel joke - the foam did not remove almost anything. Having stopped transferring the product, I regretfully picked up the sponge; it washed everything off much better, but there was a residue everywhere on the car, and even very strong pressure was not enough to wash it off.
What to do? Degrease!
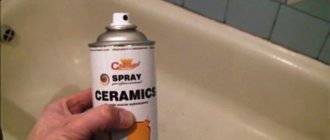
Internet searches led me mainly to forums, where there was a heated discussion about whether this procedure was a “conspiracy of car washes to scam the population” or not. Another thing is that I came there not to read conspiracy theories, but for a very specific thing - WHAT to degrease. There were 3 options: auto chemicals for bitumen stains and other things, white spirit and, in fact, just a “degreaser”. The first is expensive and incomprehensible, the second is scary (on a new car, yes, although I cleaned the 307 with it), then the third.
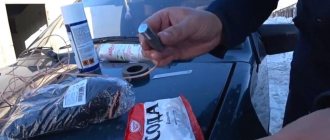
Finding it turned out to be not very difficult; in the end, I bought this liter bottle at OBI for 125 rubles:
And now specific examples of what and how he launders:
I washed it with a cotton rag, giving the degreaser about 5 seconds to dissolve the dirt before rinsing it off. Don’t get into very small cracks and marks, I’ll wash it there later, spraying more and immediately washing it off with Karcher instead of a rag.
I don’t know whether they are right or wrong, but they recommend applying something protective to the body after this operation. I applied Runway wax (300 rubles in a jar, enough for 2 full body treatments), left over from the 307. I have not had any complaints about it yet, it is easy to apply, after 15-20 minutes we polish the matte coating by hand with a microfiber cloth.
The car finally started to shine:
Thank you for your attention! I hope the post will be clear and useful for you, which is why it was written. Comments and objections are welcome.
PS In the meantime, the car has undergone the first improvements - but more on that next time