Very often, varnishing is used to protect and visually appeal wooden surfaces. Although the applied varnish is shiny, however, the wood fibers, smoothed during sanding, often rise during varnishing, this negatively affects the appearance of the wood. And although the surface is shiny, it looks uneven. What can be done to make a varnished product look like a mirror surface? There is one effective way - polishing the varnish; this procedure can be easily performed at home.
There are several methods on how you can make a wooden surface perfectly shiny and mirror-like with your own hands:
- cover it with wax;
- apply varnish solution;
- polish the varnish.
Each of these processes will be discussed in detail below.
Preparing the base
Before you start polishing, you first need to coat the wood with two or three layers of varnish, after which the composition must dry well. Typically, the drying process of modern varnishes takes several days. Often, polishing wood varnish is carried out with a polishing compound and some kind of abrasive material. The polishing composition is called varnish; there are several varieties of this solution. Depending on the type of varnish mixture, you can obtain the following types of polished coating:
- if you use shellac or nitro varnish, the wood surface will have a glossy shine;
- after treatment with polyurethane, pentaphthalic and water-based varnish, the coating usually has a semi-matte appearance;
- if the wood has been treated with an oil varnish solution, a matte sheen will be present.
Waxing
The procedure for coating wood products with wax material is quite easy and simple, at home. Thanks to the treatment with a wax composition, the texture and pattern of natural wood will be much clearer and more expressive, the surface will become velvety and soft. Waxing is often used for hard wood species, such as oak, walnut, ash. You can also wax soft wood, such as linden, alder or birch, but it is advisable to pre-tint these types.
The waxing procedure involves carefully filling all the spaces between the wood fibers, due to which the wax creates a very smooth base, which is subsequently treated with varnish. The wax coating process includes the following steps:
- The wood, previously cleared of lint (using sanding), is covered with a small layer of mastic. When this composition is dried, the wood is wiped with a soft cloth, against the grain. During the application of the first layer, all existing defects and irregularities, such as cracks and pores, are completely filled with the mixture. As a result, the wood has a perfectly smooth appearance.
- The treated product must be kept in a warm room for approximately 2 hours.
- The wax is applied a second time using a soft cloth. While applying the solution, you need to slowly increase the pressure on the wood. After the second treatment, the base should become matte and smooth.
- The applied small layer of shellac furniture varnish is polished.
Although this kind of polishing of varnish on wood at home looks very beautiful, it has one drawback - the protective wax coating after polishing is not sufficiently resistant to moisture and water. Drops may leave marks on the surface of the wood.
Instructions: how to polish headlights without a machine?
The procedure for polishing headlights with your own hands without using a grinding machine is somewhat different from mechanical polishing. It is best to carry out work using this method by removing the optical devices from the car.
In this case, the algorithm of actions is as follows:
- Wash the headlight with shampoo, then moisten its surface with clean water.
- Perform rough sanding using coarse sandpaper.
- Perform intermediate and final polishing, each time cleaning and wetting the surface of the optics before starting work.
- Perform final sanding with fine abrasive paste. There is nothing complicated about how this stage of headlight polishing is done. To do this, take a cotton or microfiber rag and rub the surface on which the appropriate product has previously been applied.
- Cover the headlight with varnish, and after it dries, polish the surface with the same rag. In the case of glass optics, no varnish is used.
How to save the number when selling a car?
Varnishing
Varnishing provides effective protection to wood, fills all pores and micropores, and thanks to varnishing, new pile does not form. After drying, the film becomes resistant to water, moisture, chemicals and dust, the wood pattern becomes expressive and rich. The varnish is applied to the product either with a brush or a roller, and swabs wrapped in a canvas rag are also used, so that no lint remains on the base. The varnish application process includes the following sequence of actions:
- The varnish is applied in two or three layers, between each coating you need to wait several hours for the layer to dry. The varnish fills all the unevenness and cracks;
- After the varnish coating has dried, it is almost completely removed from the surface with sanding material. The varnish should remain only in the pores and cracks;
- The next varnish coating is applied in one layer. This is a pre-priming treatment;
- after the second layer has dried, dust is removed from it;
- a third coating is applied in a thin layer, which must be allowed to dry completely for several days, indoors or in a box. During drying, dust should not fall on the varnished wood. After drying, the varnish is sanded or polished;
- If necessary, a final coating is applied, in one or two layers. A final finishing polish is then carried out.
If drips appear during the application of varnish, then after some time stains will form in these places. To avoid them, you need to cover the wood with a small amount of varnish solution, using smooth, uniform and slow movements. It is not allowed to pause, for example, after covering half the surface. You can use either shellac or another type of varnish material.
Wood finishing - varnishing and sanding the wood. how to apply varnish to wood
Added by: Andrey June 6
How to properly prepare wood for applying varnish to make it smooth?
Wood finishing is the stage that crowns the wood processing process and ensures its true beauty. If you learn the basic steps of sanding and finishing and the techniques involved, you will be able to guarantee excellent results every time. This article reflects the most useful tips.
Sanding wood
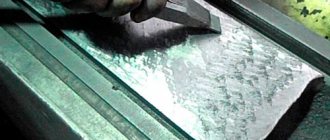
You can sand wood using either sandpaper or a sanding machine. Scratches are less noticeable when they run parallel to the grain of the wood. However, even the smallest scratches across the grain will become visible after applying varnish (or paint). Sanding the wood is done very carefully.
You should sand curved surfaces and other elements where it is inconvenient to use a sander by hand. It is important to use paper of the same grain size and try to apply the same force in all areas.
Any centrifugal grinding machine leaves practically no scratches, so it is advisable to use such a tool in places where the direction of grinding changes and where it intersects with fibers. In this case, the machine should be operated slowly (no more than 2-3 cm per second) and with little pressure, otherwise you risk causing spiral-shaped scratches (in the next photo).
Such scratches are left by a centrifugal grinding machine if used incorrectly.
When sanding wood, you should start with coarse sandpaper, gradually moving to finer and finer grit types. Whether you sand by hand or by machine, use 80-grit paper first, then 120-grit and then 180-grit.
Varnish selection
You should not rely on samples displayed in stores. The actual color depends greatly on the type of wood treated and how it was prepared for finishing. Therefore, collect scraps of wood, sand them and use them to test the varnish.
If this is not possible, then apply a test portion of varnish to an inconspicuous area (for example, to the bottom of the countertop). By leaving the varnish on the surface for more or less time, you can get different shades.
To obtain special colors, you can mix varnishes from the same manufacturer.
Water-based polyurethane varnish has very little effect on the natural color of the wood. At the same time, oil-based products have a rich tone that can radically change the color of the wood.
You will need a fairly bright light, and it should be directed at a fairly sharp angle to the surface. Inspect the wood for flaws and carefully mark them with masking tape. Then sand them down.
Some types of wood absorb varnish unevenly, resulting in dark spots on the surface. Birch, maple, pine and cherry can play such a cruel joke on you.
This effect is quite difficult to avoid, but it can be limited by treating the wood with a conditioner before applying varnish. The conditioner prevents the wood from absorbing uneven amounts of varnish into the fibers.
Such products are sold together with paints and varnishes.
In these photos you see how to choose a varnish. The choice of varnish should be made in accordance with the type of wood.
Wood varnishing
A brush is the best tool for applying polyurethane varnish. For water-based varnish, the best choice is a tool with synthetic bristles made of nylon or polyester.
For oil-based formulations, natural brushes should be used. In both cases, do not skimp on spending when purchasing these devices.
High-quality brushes pick up more polish, apply it more smoothly, and are much less likely to lose bristles on the final coat.
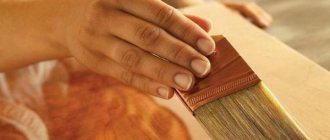
If you wash your brush immediately after use, it will last you a long time. Treating wood with varnish with a brush ensures efficiency and excellent results.
If, after applying the next layer, you suddenly notice a flaw in the coating, an uncovered spot or something similar, you will immediately rush to cover it up.
You shouldn't do that! Although the polish may still look wet, there's a good chance it's already set and you'll only end up ruining it with a brush.
There are exceptions to this rule: you can puncture small air bubbles with a needle, you can pull a hair out of a layer or pull out an unsuccessfully stuck fly with tweezers.
In places where applying varnish with a brush is difficult, rub it into the wood using a soft, non-fibrous cloth. When rubbed, the layer of varnish turns out to be much thinner than when applied with a brush, so it is worth repeating the procedure several times. Rubbing is only suitable for oil-based compositions, since water-based varnishes dry out too quickly.
Water-based polyurethane compounds can be conveniently applied to large surfaces with a paint roller. Because water-based varnishes dry quickly, brushing them over a large area can be difficult.
Before you begin varnishing wood, clean the piece and work area you are working on. Dust when applied to a fresh coat of varnish will ruin your entire work. So clean up your desk and let the dust settle.
How to apply varnish to wood step by step
Always lightly sand the surface between coats of varnish - this will help achieve evenness and perfect laying of the layers. Before reapplying varnish to the wood, wait until the previous layers have dried.
Wood finishing tools required: Wood finishing materials required:
| dust mask; | Several types of medium and fine-grained sandpaper; |
| centrifugal grinding machine; | For polishing between coats of varnish, use 180 grit/inch sandpaper and steel wool sponges; |
| paint roller; | Water-based or oil-based polyurethane varnish; |
| for water-based varnishes, use synthetic brushes and sponges; | Compatible paints (if required). If in doubt, use varnishes and paints from the same manufacturer. |
| For oil-based varnishes, use natural brushes. |
- Andrey
Application of oil varnish composition
The varnished oil coating takes a long time to dry, so thin layers of this composition should be applied. It is advisable to prime the base first; to do this, mix the varnish with water in a ratio of 1 to 5. After the varnish layer has completely dried, it must be sanded, then coated again with the varnish mixture. If the solution becomes thick, it can be diluted with turpentine. You need to work slowly with the brush, do not make sudden movements, so that air bubbles do not appear. After the topcoat has dried, the varnish is polished.
Defects that appeared on the body after painting:
- Various dirt (dust, sand) that stuck to the varnish during painting. Adhered dirt can be removed by sanding after the paint is perfectly dry. Grinding can be done both “dry” using a grinding machine, and “wet” manually, using sandpaper under constant wetting in water. We take a wheel for a grinding machine with a grain size from 1000 to 2000. For manual work we take sandpaper P2000. We polish the body with our own hands after finishing the polishing.
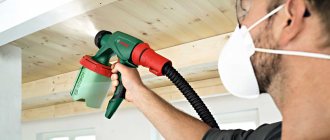
- Shagreen (orange peel is suitable for comparison). The reason for this shortcoming may be the use of thick paint or varnish when painting, or incorrect spraying due to an incorrect nozzle and low air pressure. To prevent this from happening again, before painting, carefully read the instructions for use. We eliminate this drawback by grinding and further polishing the car body.
- Instead of a glossy surface - matte. The reasons for this shortcoming: high humidity in the room where you painted; high pressure in the spray gun when painting; low-quality quick-drying thinner that forms condensation on the painted surface. Let's eliminate this drawback by deep polishing.
- The effect of the so-called “prick” (the bubbles burst). This defect appears after the paintwork has dried. It can occur when the thinner is chosen incorrectly (it should not be quick-drying) or when applying a couple of dense layers of paint without intermediate drying. We will eliminate this defect by polishing with abrasive materials.
We recommend: Protecting the car interior from UV rays
Polishing
Thanks to polishing, you can achieve a very beautiful wood texture, and at the same time the pattern of natural wood is preserved. The result is a mirror base that can be made easily and quickly at home. However, it is worth considering that not every type of wood can be polished. Wood with a large texture is poorly polished. Typically the polishing process includes the following work:
- The varnish mixture is applied three times as a primer. After the first priming, it is necessary to sand the base, then remove dust, and apply the next two primer coats;
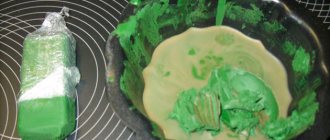
- polishing is carried out using a swab; the polish must be applied to the base in a thin layer. Then drying and sanding is carried out using an electric sander or sandpaper. This process is quite labor-intensive and time-consuming, so it is advisable to use a power tool. After sanding, the product is again treated with polish, dried, and sanded again. After several such treatments, an attractive, glossy, mirror-like surface appears. To prevent the tampon from sticking, you can add a few drops of oil to the mixture;
- Polishing a matte varnish or a glossy finish is done with any type of polish to which you need to add a little oil. Using a tampon, rub the product until a beautiful shine appears. To prevent the previous layers of polish from dissolving, you need to add 1-2 drops of oil for every 10 square centimeters. This treatment is repeated 2 to 5 times to achieve the desired effect. Before each treatment, the product must be wiped with a cloth moistened with a mixture of water and polish.
If polishing is performed using any other technology, and if the above sequence of work is not followed, the result will be unsatisfactory. For the first time, it is advisable to perform polishing with your own hands on a test area. If you follow these recommendations, polishing the varnish will be successful, resulting in a perfectly smooth, shiny surface.
Preparatory stage
Sanding and polishing is carried out no earlier than on the 20th day after painting. This is the optimal period when even a thick layer of paintwork dries out. In addition, in the third week all possible surface defects become noticeable.
We recommend: 10 best polishing machines
The preparatory stage before polishing after painting takes a short time. You need to wash your car using car shampoo. The surface of the body is treated with a degreaser, all rubber bushings and car parts are sealed with masking tape.