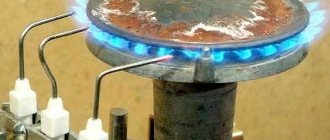
Ignition of the electric arc
Arc welding requires skill. And we are talking not only about the process of seam formation itself. Already at the initial preparatory stage, you need to have some experience in order to prepare the device for operation and, at a minimum, ignite the electric arc. It is generated as a result of the interaction of opposite poles of an electrical circuit. One of them is the electrode, and the other is the surface, or rather the junction of two workpieces.
Air is an excellent insulator. For example, in order for an electric discharge to be able to penetrate an air “cushion” 1 centimeter thick, a potential difference between the cathode and anode of 30 thousand volts will be required. Even the most advanced and sophisticated inverters cannot do this. Therefore, the only acceptable option for igniting an electric arc is tight contact followed by moderate removal of the electrode from the working surface.
It is impossible to perform such manipulations “on the fly”. It takes at least a little practice. Even experienced welders do not guarantee that the arc will be ignited the first time. There are many objective (and subjective too) factors that influence the result. It is very difficult to take them into account and anticipate everything.
Often the welder performs a series of taps with the electrode on the metal, trying to destroy the oxide layer formed during work. Most often, such difficulties arise when working with workpieces made of non-ferrous metals. Considering that low current is required to work with non-ferrous metal, it becomes obvious that generating a stable electric arc becomes more difficult.
A special device called an oscillator allows you to avoid problems with arc ignition. It is used as an additional power source device for argon arc welding. But only experienced specialists can use it. It is necessary to know the intricacies of connecting and operating equipment.
Manufacturing of key parts
Creating an oscillator for welding with your own hands begins with assembling the main elements:
- Step-up transformer. You can buy a ready-made part or make it yourself. The number of turns and the thickness of the core are selected depending on the operating parameters of the future device. When winding, take into account that the unit must increase the voltage to 6000 V.
- Oscillatory module. It is made of an inductor coil, which includes a ferrite core and a power cable wound around it. For the primary winding, 1 turn is enough, for the secondary - 5. The circuit is equipped with a spark gap and a protective capacitor. The first is used to develop and release a weakening impulse. The arrester is made of copper rods and tungsten rods that transmit current. Areas in contact with wires are coated with a hardening dielectric compound.
The oscillating module is connected in series with a capacitor. After this, a spark gap is installed, connected to the primary winding of the transformer. The capacitor can be purchased or taken from a non-working TV. To generate a more stable voltage, a dual inductor is used. In addition, this approach prevents device failure.
We recommend reading: How to choose a welding filter
Both parts of the circuit consist of the following components:
- capacitors with a capacity of at least 0.3 mF;
- varistor with a voltage corresponding to that on the secondary winding (90-150 V);
- a ferrite rod onto which a copper core with a cross section of 15-20 mm² is wound.
What is an oscillator
An oscillator is a generator that produces a high-frequency current that connects the anode and cathode during welding without contact between them. In the working circuit, this installation is connected between the holder and the voltage source of the welding machine. There are options that are integrated into the assembly of metal welding equipment. Oscillators operate according to the following schemes:
- generate a short pulse that is capable of exciting a welding arc without physical contact between the anode and cathode. From the outside it will look like a discharge of small lightning that moves in the direction from the electrode to the working surface. After reaching the surface of the workpieces (provided that the ground is connected), a stable contact is established in the form of an electric arc. The pulse is short-term in nature and fades out immediately after ignition of the arc;
- constantly maintain a high voltage, which is actually superimposed on the welding current. This ensures the stability of the welding arc and ensures continuous welding of parts.
DIY oscillator for inverter
There is a proven scheme , for the manufacture of which you do not have to look for scarce parts. Despite the simplicity of execution, the quality of arc formation is not much worse than factory analogues.
The oscillator is connected to the outputs of the power wires (electrode and ground). Since this continuous circuit is a parallel connection. You can install the board inside the welding machine, observing shielding from the switching power supply. If there is a suitable housing, installation is carried out in the form of a separate block.
Important! Connection to the network is carried out only through a transformer. Otherwise, when the main device is turned off, the oscillator will remain energized. Is it dangerous.
After assembling the circuit, it needs to be configured. Calibration is performed based on the condition and stability of the arc. The quality of arc formation is adjusted by selecting the thyristor rating.
Another example of a homemade oscillator for an inverter - video.
Choke Dr 1 is wound manually. A wire with a cross-section of 2.5 square is wound onto a ring R40 x 25 x 80 made of ferrite with magnetic permeability M2000NM. Transformer T 1 is better to use ready-made. A line transformer from old TVs with a kinescope is perfect. For example, TS180-2.
Switch S1 opens the high-voltage arc. To safely change the electrode, it must be open.
When connecting an oscillator, it is impossible to guess the “polarity” (zero-phase). To monitor the correct connection, the MTX-90 indicator is used. It should glow.
Device
By connecting the oscillator to the operating circuit of welding machines, remote ignition of the arc is ensured. Its stability is maintained throughout the entire welding process. It remains a static value even when the distance between the consumable and the working surface changes. Most oscillators have a similar structure and consist of the following components:
- rectifier;
- power supply;
- block of capacitors for charge storage;
- Control block;
- a unit with a spark gap and an oscillating circuit designed to generate a pulse;
- step-up transformer;
- voltage sensor;
- gas valve (in argon arc inverters).
DIY welding oscillator
Once you are convinced of the usefulness of this device, you will definitely want to purchase it. However, the cost of a good oscillator may exceed the price of your welding machine.
If you are constantly employed as a welder, the purchase is advisable, since the device optimizes work and speeds up the welding process. And if you uncover your transformer several times a year, it makes sense to make a homemade oscillator. Details on how to make a homemade welding oscillator - video It will not be as effective as a factory one, but the quality of the arc will increase significantly. Especially if you don’t have very high quality electrodes.
Principle of operation
The inclusion of an oscillator in the welder's equipment makes it possible to ignite the arc without contact. This not only makes the welder’s work much easier, but also saves his time and ensures stable operation of the equipment. In most cases, such installations are used as separate elements, but sometimes there are welding machines with integrated oscillators. That is, the current source and the device itself are contained in one housing.
The main task of the high-frequency pulse generating device is to change the characteristics of the incoming voltage. The frequency and voltage increase and the pulse duration decreases. Its duration does not exceed one second. The circuit works on this principle (using the example of an argon-arc inverter):
- After pressing the button located on the burner, the electrical circuit is closed.
- There is a rectifier at the input, which makes the current unidirectional.
- The capacitors accumulate voltage, which is necessary to generate a discharge.
- The released current flows into the circuit, which consists of a capacitor and an inductor. It is responsible for the formation of a certain number of oscillations.
- The current passes through the winding of the primary and then the secondary circuit of the step-up transformer. At this moment the voltage increases.
- Impulse is released.
- At the same time, the gas valve opens.
- As a result of the pulse, a discharge is formed that closes the circuit between the electrode and the surface of the parts being welded. It is important that the ground cable is connected before this.
- After welding current begins to flow through the bridge from the discharge, the pulse fades. The welding machine operates in normal mode according to the preset settings.
- When the electrode is removed from the metal surface and the welding arc goes out, the oscillator purges the torch with argon for 4 seconds.
According to the method of exciting the arc, there are two options for the operation of the oscillators
Continuous action
Integrated into the power supply of the welding machine. The arc is excited by applying high frequency current directly to the power cables of the device. After which it does not matter what current the main power supply will produce. The arc still remains stable.
Pulse action
Connected in series to power cables. The system is not so complicated; there is no need to install chokes that shunt high voltage and protect the welding machine. Works effectively with AC welders. The arc burns stably when the direction of the current changes in each half-cycle.
The common element is a blocking capacitor. It is selected in such a way that high-frequency current (generated by the oscillator) flows freely through it, and the standard current from the power supply is blocked. This circuit guarantees galvanic isolation between the oscillator and the power supply transformer.
What is it used for?
Oscillators are most often used when welding non-ferrous metals. When there is a need to connect copper, aluminum or stainless steel, the device allows you to quickly initiate an electric arc, avoiding the tedious scraping of the electrode on the surface of the workpiece.
The device is very convenient to use when you need to accurately place a seam. The specialist brings the tungsten tip to the edge of the joint, after which he needs to press the button to initiate the electric arc and lower the mask. Thanks to the oscillator, the seam will be the same both at the beginning and in the middle of the joint. In addition, there will be no need for post-processing from traces of electrode contact, which would necessarily form during the arc ignition process. The equipment is installed on plasma cutting machines and makes it possible to immediately begin cutting metal.
An oscillator is also used when working with thin sheet metal. To prevent workpieces from being burned, welders set the inverters to a low current value. In addition to the fact that it is difficult to ignite an arc with such parameters, it also goes out at the slightest deviation of the electrode from the weld pool. Connecting an oscillator to the circuit allows you to simplify the work, get a stable arc at the output and its trouble-free ignition at first.
Ignition coil oscillator
The most accessible circuit is performed on a car ignition coil.
However, the characteristics of the reels are not entirely suitable for such a purpose. Therefore, careful selection of the remaining elements of the circuit is required. You can use several combinations of thyristors until you are sure that the arc is reliably excited. Despite the temptation to make a simple oscillator, this is not the best circuit.
Varieties
The oscillator can be used in different ways depending on the type of work and the type of device. Common to all equipment options is the need to convert the current to values of 3000-5000 V and increase the frequency to 150-500 KHz. The main difference is the duration of the high-frequency pulse. Based on the principle of operation of the device, there are two types.
Continuous action
The peculiarity is that the high-frequency and welding currents are summed up. The arc is ignited in a non-contact manner. The arc remains stable even at low current levels. Electrocution of a specialist, as well as splashing of the melt, are excluded. It does not matter how the equipment is connected to the circuit - parallel or serial.
In a series connection, the device is connected to a cable that supplies voltage to the electrode. This option for turning on the oscillator is the most popular, since its capabilities are used most effectively. No energy is wasted on high voltage protection. Continuous models are often installed on transformers and inverters to operate with coated electrodes.
Pulse
It is connected in parallel and is used when welding work is performed with alternating current. The equipment must respond very quickly to polarity changes and this is where the main difficulty lies. In such conditions, it is possible to maintain the arc and ensure stability only with the help of pulsed high-frequency current. If you connect a continuous oscillator to an AC welding machine, the welding arc will light without problems. But only the first time. It will be impossible to initiate it again. Simply put, the device will only be able to perform its functions partially.
Capacitors in the circuit are necessary in order to fully utilize the functionality of the equipment with maximum efficiency. They accumulate the charge that is needed for repeated impulses - ignition of the arc that died out during the formation of the weld. This inevitably happens every time the welder moves the electrode away from the weld pool over a large distance, interrupting the flow of the electrical discharge. You cannot do such an installation without feedback. Therefore, a control circuit is provided that synchronizes the discharge of the capacitor.
We make an oscillator for a plasma cutter with our own hands
A voltage of 20,000 volts DC is sufficient to ignite the plasma in the torch. Therefore, a spark oscillator is suitable. In order not to create a complex step-up transformer, it is easier to use a banal voltage multiplier. The current doesn't matter. The circuit is compact, and is literally made from junk parts from the USSR era.
Popular: Do-it-yourself toroidal transformer - calculation of turns, winding technology
Oscillator for plasma cutter - video recommendations.
Important! When winding a high voltage transformer, be sure to provide insulation between the windings. Despite the low power, 20 kV will easily “flash” the primary and damage the transformer.
To prevent the winding turns from vibrating under load, the transformer is impregnated with epoxy resin.
The storage capacitor is a capricious part of the circuit. After going through several options, the Conder from a starter for fluorescent lamps showed itself to be the best.
Plasma cutter and oscillator control circuit
When the start button S3 , the power supply circuit of the plasma cutter inverter is turned on. At the same time, power is supplied to the oscillator circuit.
Its operating time is determined by the discharge of capacitor C5 . transistors T7 and T8 close , and the power to the oscillator stops. The cycle lasts 2-3 seconds, during which time the arc of the plasma cutter becomes stable.
After opening the S3 button, the C5 capacitor is recharged, and the system is ready for a repeated plasmatron startup cycle.
Avoiding common mistakes
Compliance with the following recommendations helps to eliminate the occurrence of problems in the operation of a homemade device:
- When assembling simple circuits, it is not always possible to maintain a stable arc. The cause of the malfunction is low voltage in the electrical network. Installing an autotransformer helps eliminate the occurrence of malfunctions in the operation of the welding unit.
- Don't skimp on the throttle. The spark gap supplies a series of damped high-frequency oscillations with a voltage of 1000 V. The secondary winding, which does not have a choke, receives up to 50 V. Because of this, a short circuit occurs. The current coming from the network begins to heat the transformer. To prevent the welding machine from malfunctioning, install a choke.
- When forming the winding, insulating gaskets are used and the cores are impregnated with bakelite varnish.
- A current frequency of 150-300 kHz is considered safe. If a person becomes a conductor, the current does not affect the functioning of internal organs, but causes superficial burns. Proper grounding helps to avoid a traumatic situation.
- The oscillating circuit must be equipped with a blocking capacitor.
Before assembly, it is recommended to consult with a specialist who will find out whether the chosen scheme is safe.
We recommend reading: How to choose a gasoline welding generator