A video endoscope is a technical device that is a portable flexible probe equipped with a backlit video camera and a screen on which the current image or video is displayed. Technical endoscopes have the ability to save received data into the device’s memory, as well as moisture protection.
Technical video endoscopes are used to monitor ventilation systems, pipes, cars and other devices and structures that require maintenance, but have areas with difficult access for visual inspection.
Do-it-yourself video probe for finding blockages and damage in pipes
Author: Andrey Guslavsky Recording date
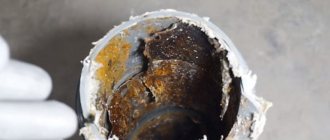
A friend of mine's drainage pipe stopped working. Since it is buried under the lawn/paths, it is very difficult to find the location of the blockage or damage. In order not to dig up the whole thing, the idea arose to take a small video camera, attach a backlight to it, and put it in some kind of waterproof case. Place this entire structure on a long flexible but durable trunk, insert it into the pipe and assess the condition of the pipes in real time and find the unfortunate place of blockage or damage.
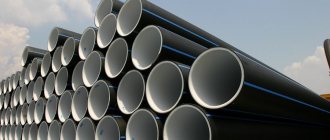
Drainage tubes are thin 35-40mm. The camera should be small. In principle, a small camera is not a problem, but the law does not allow the sale of video cameras smaller than a certain size, since they are classified as special equipment. An internet search led me to this option:
A small color camera, the size of which in this case is 20x25x22. It's not bad anymore. and I figured if I remove the infrared illumination LEDs and take it out of this body, the camera will become a completely suitable size. I ordered the camera, received it, took it apart.
What I saw exceeded my expectations. I threw out the back cover, cut off the front cover with the lens, and removed the infrared LEDs and microphone.
I made a scarf from thin PCB onto which I soldered 2 white SMD LEDs and resistors.
I note that the camera board is powered by 5 volts (I also calculated the limiting resistors for the LEDs for these 5 volts), but 12V is supplied to its standard connectors. The voltage converter is located in a plastic knob where standard wires with connectors meet and where the wire goes to the camera.
The lens was glued to the camera board with hot glue. The backlight fits tightly onto the lens. The result is a camera with illumination like this.
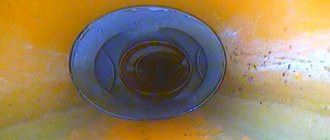
By the way, a photo of a picture from a TV that this camera takes in complete darkness. Again, I was pleasantly surprised that these two lights were enough to take a good picture.
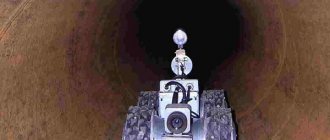
And so the camera is ready, now it needs to be installed in the body. The housing must be waterproof, since what is in the pipes underground is unknown. The housing must also be shaped so that the probe can pass through pipes bent at an angle of 90 degrees. In my opinion, the body should be in the shape of a ball.
Attempt No. 1
I came across a nylon tube.
Using a hair dryer, I shaped one end into a hemisphere. I soldered a wing nut into this end of the pipe to secure the camera to the “carrier”