Publication date: July 30, 2021. Category: About the material.
This is one of the most frequently asked questions when choosing a bath restoration method. We get asked this literally every day. In this article we will answer the following questions:
- What is the difference between glass, acrylic and self-leveling bathtub
- Which is better, stakryl or plastol?
- Which is better, glass or liquid acrylic Lux
- Which is better, plastol or liquid acrylic
For those who do not want to understand this issue in depth, we have prepared a short answer:
Liquid acrylic
is the name of a group of materials intended for the restoration of bathtubs using the pour-in method ("fill-in bath" technology). Not a specific material, but a group of substances - just like all computers, regardless of the manufacturer, are called computers.
Stakryl, Plastol, Ecovanna, etc.
- these are the names of trademarks of liquid acrylic from different manufacturers (by analogy, the substance is called “enamel”, a).
Filling bath
is the name of a bathtub restoration technology that uses liquid acrylic. The meaning of the technology is that a new bath is literally poured onto the old one.
That is, it is impossible to answer which is better, acrylic or glass, because the question itself is incorrect and compares unequal concepts. STACRYL IS A TYPE OF ACRYLIC for restoring bathtubs, which is produced in St. Petersburg by the Ecolor company.
But we can compare acrylics from different manufacturers. Let's see what brands of liquid acrylic there are.
Liquid acrylic - material properties
Plumbing, like all household items, deteriorates over time and loses its attractive appearance. Cracks, chips, and roughness appear on the bathtub. In some cases, the enamel comes off. Strong cleaning agents damage the surface with their abrasives. Dirt accumulates in microcracks and rust forms. And then the question of replacing plumbing arises.
Surface damage to an old bathtub can be repaired using liquid acrylic
Sometimes it is really necessary to buy a new bathtub (deformed or burst body, large area of fallen enamel, etc.). But in most cases, the bathtub can be restored, even with your own hands.
Today, several methods of bathroom restoration are used:
- acrylic liners;
- enamel coating;
- filling bath with liquid acrylic.
The newest and simplest method of restoring bathtubs is the use of liquid acrylic. What is liquid acrylic?
Preparation of the composition
Liquid acrylic is a two-component high-density enamel consisting of a base and a hardener. Acrylic coating has a number of characteristics that distinguish it from other materials:
- High strength - withstands mechanical loads and does not wear out.
- Semi-liquid consistency - spreading over the surface of the bath, it forms an absolutely smooth surface.
- Low level of thermal conductivity - the water in the bath retains heat for a long time (cooling the water by 1º C for 30 minutes).
Important! Sometimes liquid acrylic is identified with the long-known Stakryl. It is not right. Glass acrylic has different strength and wear characteristics and is inferior to liquid acrylic in all respects.
What is the enameling procedure?
Coating a bathtub with an enamel composition is a popular procedure for updating the surface of plumbing fixtures. It attracted the attention of consumers decades ago. This method of restoring the surface of a product is valued at a low cost.
To obtain a high-quality result, enamel paint is applied to plumbing equipment in two layers. During their work, our craftsmen use only high-quality tools and materials. When painting a bathtub, brushes are used that do not leave lint on the surface.
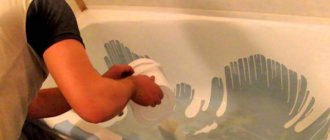
Restoration example:
Prices for services:
| Bathtub enamel | from 3000 rubles |
| Pouring liquid acrylic | 3800 rubles |
| Filling with Premium liquid acrylic | 4500 rubles |
| Installing an acrylic liner | 5700 rubles |
| Acrylic bathtub repair | from 4000 rubles |
| Restoration of a cast iron bathtub | from 2900 rubles |
| Restoration of a steel bathtub | from 2900 rubles |
| Restoration of a shower tray | from 3500 rubles |
| Restoration of a sink or sink | from 2500 rubles |
Benefits of using liquid acrylic
It's very easy to give an old bathtub a new life with liquid acrylic. You can even handle this work on your own, without involving specialists.
You can restore a bathtub with acrylic without damaging the renovation of the bathroom
Self-leveling coating does not require:
- special surface preparation before applying liquid acrylic;
- professional tools;
- dismantling the bathtub and removing adjacent tiles.
What you need to restore a bathtub:
- sandpaper;
- liquid acrylic;
- detergent or soda;
- putty knife;
- water;
- some free time.
Work on applying liquid acrylic lasts only a few hours.
To carry out restoration work you do not need special construction tools
The result of using self-leveling acrylic coating:
- smooth glossy surface;
- aesthetic appearance;
- high mechanical strength of the new surface;
- long service life of a restored bath (up to 15 years);
- possibility of repeated restoration.
Using liquid acrylic for bathtub restoration will allow you to get a completely new coating. In terms of external and physical-mechanical indicators, the new bathtub will not be inferior to its predecessor, and in some cases will surpass it.
Acrylic liners
If you don’t like giving up hygiene procedures for several days, or using a bathhouse/basin, then the method of inserting an acrylic liner is ideal for you. The process of such restoration will take no more than 3 hours, and you will be able to use the bathroom the very next day. Moreover, the liner is made of very durable acrylic for plumbing purposes, and helps to significantly reduce the thermal conductivity of the bathtub, so the water in it will cool very slowly. For best results, you should not only select a liner that is suitable in size, but also correctly distribute the adhesive composition (foam and sealant).
Take a grinder and a screwdriver, remove the trim elements.- Prepare the bathtub for installation of the acrylic liner. To do this, clean the entire surface with sandpaper, and then degrease the surface. Wipe dry any drops of water. This measure is required to improve the adhesion (adhesion) of the foam for gluing to plumbing fixtures.
- Transfer the liner from the technological edge, which was trimmed very carefully before installation.
- After the edge is cut, insert the liner into the bath and mark the technological holes. To do this, draw circles with a marker, sticking your hand under the vessel and tracing the drain holes and overflow.
- Drill technological holes according to the markings.
- Apply sealant and two-part foam. Insert a can of sealant into the gun and apply around the overflow/drain holes. Next, take the foam and use a syringe to inject a special composition into the balloon that will prevent it from swelling too much. All that remains is to apply foam in strips from top to bottom to the bottom, sides and walls of the restored bathtub.
- Insert the liner into the bathtub, gently press it with your hands and align it. Remove excess sealant and foam.
Ready! All you have to do is wait for all the fixing agents to harden, and in the morning you can take a shower in the new bathtub. As you can see, restoration is not something complicated or incredible; it is quite possible to do it yourself.
Disadvantages of using liquid acrylic
Despite many advantages, liquid acrylic also has its disadvantages.
If you follow the instructions, the result will not disappoint you.
- Firstly, for the surface to dry completely it will take at least 3 days, and sometimes more. During the drying process, dust and small particles of debris may adhere to the filling surface, and then the appearance will be spoiled.
- Secondly, to care for the acrylic surface you will need special non-abrasive cleaning products, which are not cheap.
- Thirdly, the high cost of restoration work.
Stages of bathtub restoration with liquid acrylic
When starting to work with liquid acrylic, you first need to prepare the surface of the bathtub.
First of all, you need to dismantle the decorative overflows and drains. Clean the surface of the bathtub and drain holes with sandpaper, thereby getting rid of rust, scratches, and small cracks. After this, the bath is thoroughly washed with detergents and running water. Baking soda is perfect for cleaning the bathtub after cleaning. It will wash away dirt and degrease the surface for better adhesion to liquid acrylic.
If the bathtub has deep cracks and chips, automotive putty is used. This putty dries instantly and is easy to apply. After drying, the putty areas are sanded with sandpaper. Then you need to thoroughly wash the entire bathtub.
Acrylic application process
The last stage of preparing the bath is heating. Warm water is drawn into the bath and drained after 10 minutes. The surface must be wiped dry.
Working with liquid acrylic
First, the polymer base is mixed with a hardener.
Advice. You need to knead the mixture for no longer than 10-12 minutes, otherwise the final result will remain unhardened liquid acrylic on the surface.
The finished polymer mixture is first applied around the perimeter of the bath in an even, thick layer. It is important that the acrylic flows freely along the side surfaces of the bathtub. The second tier begins to be applied from the middle of the side slopes.
Important! You cannot touch freshly poured acrylic - this will lead to irreparable defects. Also, do not add acrylic from above - this will ruin the integrity of the coating.
Allow the substance to flow freely along the sides of the bathtub, all small irregularities will be eliminated on their own.
A thick layer of acrylic may accumulate at the bottom of the bathtub. The excess should be moved into the drain hole with a spatula, and the surface should be leveled. By the way, do not forget to first disconnect the siphon, otherwise all the acrylic will harden in it.
Advice. All smudges and unevenness of the self-leveling acrylic will disappear on their own. There is no need to try to equalize them.
After painting the bathtub, the room is closed. There is no need to go in there until the acrylic is completely dry.
How to make a self-filling bathtub with your own hands - step-by-step diagram
Step 1: Prepare the mixture
In order for us to get a high-quality pour-in bath at home, we need to properly prepare the mixture. Liquid acrylic is obtained by mixing two components - a hardener and a polymer base. The process is as follows: pour the white mixture from a store-bought container into a small container. When performing this stage, it is necessary to prevent dirt from getting into the mixture, so you need to work with gloves and preferably away from the repair site. Mix the mixture by hand for a couple of minutes until smooth, using a clean spatula.
Do not use power tools at this stage, otherwise bubbles will form in the mixture.
Gradually add the hardener to the mixture, remembering to stir the mixture. It is best to pour the composition in several portions - after each filling, thoroughly mix the composition for several minutes. In order for liquid acrylic for a bath, prepared by yourself, to turn out to be of high quality, it is important to very carefully observe all proportions when mixing. After you have completely poured in the hardener, continue stirring the composition for another 10 minutes, and then leave the finished solution to settle for 10 minutes, after which you can begin restoring the bath. If you want to change the color of liquid acrylic, add color paste to it - its content in the composition should not exceed 3%.
Owner reviews
Those who have decided to restore a bathtub with liquid acrylic generally give positive feedback to this method. It is noted that restoration completely solves the problem of replacing an old bathtub:
- snow-white coating;
- no need to take out the old bathtub and remove the tiles in the bathroom;
- the bath becomes warmer;
- repair work is carried out in a short time;
- restoration is not accompanied by dust and dirt;
- it's cheaper than buying a new bathtub;
- the appearance is maintained for a long time.
People praise liquid acrylic and recommend it to their relatives and friends. As expected, there are also negative reviews. Mainly:
- the coating is swollen;
- Six months after the restoration, the coating cracked and yellowness appeared.
Most owners note a significant improvement in the appearance of the bathtub after restoration with acrylic.
Analyzing all the negativity, experts say that people only get a poor-quality coating if they do not follow all the rules for applying liquid acrylic. Restoring bathtubs with liquid acrylic according to all the rules will not have negative consequences.
One can argue about the high cost of self-leveling acrylic. For the cost of this work, you can only afford to buy the cheapest fiberglass bathtub. This bathtub will sag under the weight of the body and cool down quickly. In addition, dismantling the bathtub will entail renovating the entire room. So, to each his own!
Of course, restoring a bathtub with liquid acrylic has both pros and cons. With proper application and continued use, self-leveling acrylic will serve for many years.
What does this mean?
The difference in the quality of the products of these three manufacturers is so insignificant that it can be neglected. There are certain differences in the chemical composition and technical characteristics, that is, in the behavior of the mixture when applied. For example, ecovanna hardens faster during application than plastol. But this information is important only for the master, because the nuances of the work process depend on it.
The factor that really determines the final quality of the restoration is the professionalism of the master, and not the material (unless you use defective or counterfeit material).
