Self-repair of the body of the legendary UAZ “loaf”
When you look at the UAZ 452 model, the first thing that comes to mind is the outline of a loaf of bread. However, it is simply a godsend for our off-road conditions, since it is an all-wheel drive all-terrain vehicle. Working in the most difficult conditions sooner or later leads to the need for repairs and restoration of the car body. Let’s try to figure out further what UAZ-452 owners have to deal with during operation, what most often goes wrong, how to do the repairs yourself, what spare parts and components to use.
Rotten body of UAZ Bukhanka - how to fix it?
We have already completed the welding work. Our whole bottom is overcooked. There's just a little touch-up left to do, so we can say we're at the finish line. We even puttyed the body. Let's sand the whole thing and paint it. In general, the cost of the work for us all came out to somewhere around 15-16 thousand.
So what did we do? We completely cut out the bottom and welded all the beams. We used old wings, that is, we cooked them a little, and everything became normal. On the back of the mounts we also left everything old. We welded it here, the doors now close, everything works great.
Our price included metal, beams, putty or putty, whatever it is, paint, we took the paint. As for welding work, everything seems to be fine. Now let's take a look at the interior from the inside. And, by the way, the price also includes carpet, then you will see it, this will be the next video. The ceiling, we don’t know yet what to do or not to do, maybe we’ll work on the ceiling, these are all plans for now.
If you are interested in the process of how we sealed the cracks of the Loaf, then we coated everything with sealant. It’s normal, tight, and I don’t think the metal will move around. This is our hole for the tanks to connect the tanks. To strengthen it, but no matter how powerful it is, we still welded this beam so that the body would not play. Still better than just this.
Instead of steps, we did it a little differently here. We made a ledge so that we could stand with our feet, but here everything is solid, because the body and the bottom will be stronger, it will be easier to live this way. Now watch how we did it all in our video.
- Look, our wings are just hanging. - They fell out. - Yes... - Atas, of course. “There’s not even an atas here at all.” Our doors sank, in short the bottom is falling through. This is how we went. - Holy shit. This is atas in general. - Tell me, where did you go with it? - Fishing. So fishing is in full swing. - Burned, what did we burn? - The box was burned. — The chicken broke. - What is it? It could have been cooked. - Cool, yes, in general. - Because of which? Is this why it's cold? - Or because of this, I still don’t understand. - What does the wing support? - On my word of honor! — What do you fuel up with? - I wanted to help, but somehow... - I didn’t have time. - I didn’t have time, yes. - Well? How was it blowing? - How was it blowing for us? - It’s like a blower in the left kidney! — What’s good about the Bukhanka is that you don’t have to look into the instructions, everything is shown outside, the discs are on their way. - Here's the beam.
— We welded the first rear beam, screwed it on, checked how our doors closed. Now our body doesn’t move, which makes us very happy, and finally the doors are closing. Hooray! — The beam, the bend here was made according to geometry. - Yes, they bent it a little. “We grabbed that door, now we’ll move the second one and grab it too, so that the body won’t move anymore.” - Yes. - He's on the snot here. — When we started cooking, we had two cans of gasoline under the Loaf. But we only removed them at the end. And then I walked and tripped over them...
Getting to know your car and the main causes of body damage
The UAZ-452 is considered the oldest production car produced in Russia. The first samples of an all-wheel drive two-axle vehicle rolled off the Ulyanovsk assembly line back in 1965 and are still being produced. It is distinguished by simplicity, accessibility, reliability, and increased cross-country ability. The car is equipped with a carburetor-type power unit from ZMZ with a volume of 2.4 or 2.7 liters. It allows the UAZ to reach a maximum speed of up to 110 km/h. A 4-speed manual gearbox is responsible for changing gears.
UAZ loaf body repair
Repairing UAZ BUKHANKA
.
We are replacing the rotten bottom. We scald the body
. We paint and putty.
Budget repair of UAZ Bukhanki: ROTTEN BODY
UAZ body repair procedures
.
An impressive clearance of 220 mm helps to overcome various obstacles. And for all its outward unpretentiousness, the UAZ in its basic version is capable of transporting cargo weighing more than 1.2 tons. Excellent layout and characteristics to this day provide the car with popular love and constant demand. This car is used so intensively and in such conditions that the body and its individual elements are one of the first to suffer. Based on this, the main reasons for violating the integrity and performance of hull elements are:
- Road traffic accidents resulting in dents, cracks, chips, or scratches.
- Pockets or entire zones of corrosion that arise as a result of damage to the paintwork. This can be affected by aggressive substances, such as, for example, sprinkled on roads in winter, or by the presence of previously mentioned defects that were not eliminated (or this was done, but poorly).
- The desire to improve the existing design.
Each of the reasons for the violation of the integrity and performance of elements has individual characteristics that affect the repair, its scope and stages. The spare parts and components required for this also differ.
Do-it-yourself UAZ “loaf” car repair
The UAZ 452 “loaf” is a fairly reliable Soviet all-wheel drive SUV. The main breakdowns of this car are associated with leaks of lubricating fluids from the engine, gearbox (gearbox), front and rear axles, constant velocity joints (CV joints) and hubs. The main reason for the formation of such leaks is that the material from which the original oil seals and gaskets of the above units are made is partially corroded under the influence of modern lubricating fluids. Due to poor lubrication, moving metal parts wear out greatly and must be replaced periodically. It is necessary to carry out preventive maintenance of the UAZ 452 at least once a year, change leaking oil seals and gaskets, and also adjust the clutch.
The problem is that finding a factory repair manual for these SUVs is quite difficult. Therefore, we bring to your attention instructions that will allow you to repair your car yourself.
They greet you by their clothes.
It's finally time to paint. I thought I couldn’t wait for this day. Sanded (2 days).
Primed (1 day) and painted (1 day). The biggest problem was with sanding. Just an ass.
A MONTH has passed since the start of work. They worked, however, not every day, because... The street lighting poles were being replaced and at times there was no electricity. Sometimes it rained.
There was a can of primer. It was used up. Interior without floors and without engine compartment lid. To disassemble it to this state now, you need about 25 minutes and a screwdriver. The rear messes are under the floor. 2 pcs. The total volume is almost 0.2 cubic meters.
- nuts, etc.
Changing wheels
As you know, the cross-country ability of a vehicle directly depends on the wheels. Considering that the UAZ wheels are covered in fairly hard and not too large rubber, before proceeding directly to the elevator, it is necessary to mention the wheels.
In addition, the tread pattern on the Bukhanka tires leaves much to be desired. All this suggests that it would not be superfluous to install suitable imported wheels on the legendary car. As an option when choosing new wheels for the UAZ “Loaf”, you can use BF Goodrich 33×10.5 R15 tires, and, accordingly, wheels with a diameter of 15 centimeters.
As for the choice of discs for them, it depends on the wishes of the owner. These can be alloy or cast wheels.
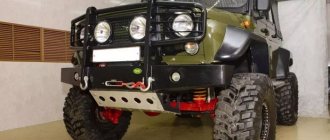
Or you can leave the regular standard wheels. However, you shouldn’t stop at this stage, because such tuning makes it difficult to control, since on sharp turns the front wheels catch the edges of the steering rods, and when the effect of crossing the axles appears, the wheels are located directly on the sides of the arches. This causes friction between the tires and the fender. Therefore, an indispensable stage of tuning after installing the wheels is the UAZ Bukhanka body lift.
UAZ Bukhanka body lift
No matter how strange it may seem, the UAZ Bukhanka frame is attached to the body using ten furniture bolts, six of which are located in the area of the passenger seats, two behind the front wheel arches, and two more at the feet of the driver and passenger. The bolts at the bottom are secured with second nuts. Before you begin dismantling the bolts, you need to disconnect the battery, disconnect the ground from the engine - behind the hood compartment and raise the car on a lift. Then, in order, we carry out the following steps:
- Disconnect the wires from the starter; Disconnect the radiator mounts from the bottom or top; Detach the transmission lever drive rods and the brake booster rod; Drain all the coolant and remove the hoses that are connected to the UAZ Bukhanka heaters; Disconnect the brake pedal rod to the vacuum booster; Disconnect the tube leading to tank control valve.
The last point may not seem so important, but failure to comply with it can lead to the plate bending under the mount, as a result of which it will have to be leveled. Next, we proceed directly to unscrewing the nuts. You should start with the six rear body bolts, then slightly loosen the nuts of the front bolts. When lifting a UAZ Bukhanka with your own hands, be careful and careful, since the fasteners on such a car are usually rusty and outdated.
Communities › UAZ drivers › Blog › Body repair “loaf”
I would like to share our version of body repair.
We are building a travel car based on the “loaf”. But you can’t go far on a collapsed body! After purchasing the car, first go through sea trials. We rode over some potholes for a bit. We listened to all the creaks, groans, knocks and bangs. As if everything is clear. Now go to the doctor for treatment. When choosing a car, you don’t need to look at the presence of linoleum on the floor. And the door cards, covered in matching leatherette, completely inspire deception. When sold, most cars look the same. And the previous owner says that everything was cooked and painted. Before entering the garage, our interior looked like this. But we are not interested in the interior trim yet. What's important to us is what's inside. We remove the headliner, unscrew all the cards and remove the floor. The work is slightly dusty and dirty. But it must be done. We remove everything carefully. We are trying to fight for every screw and every tin. The roof and sides of the car are pleasing. Roof reinforcements were torn off in places. Welding on body parts has come loose in places. There is some rust near the windows.
But with the floor it’s not so rosy. Ordinary plywood, even laid on a painted floor, attracts moisture. There are a lot of rotten elements. A lot of rust. Although, quite an expected picture.
No panic. We knew what it would be like. Everything's under control. We remove part of the rotten floor.
We broke some elements during dismantling. Some of the dirt fell off and rust came out. Very bad in the area of the rear arches. Under the plastic protection there was simply a dirt collector. Almost all body reinforcements were damaged.
The next stage is creative. An artistic applique, so to speak. We cut out and bend new parts of the amplifiers from sheet metal. We bought repair inserts for the lower part of the body. Amplifiers were cut and welded. We adjusted the detail. They put it in place.
The work is creative. It doesn't happen very quickly. But there is nowhere to go. Slowly, element by element. Detail by detail.
The treatment process for our “UMKI” is in full swing. To be continued…
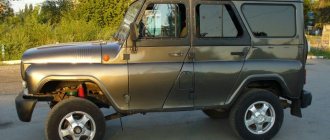
Tuning UAZ-452 (loaves)
In its classic version, the UAZ-452 Bukhanka is popular among many fans of hunting, fishing and just those who like to travel. But there is another reality for this car - tuning the UAZ loaf. In this regard, the car is simply ideal.
The diligence and skillful actions will result in the creation of a completely new exclusive car. The main advantages of the loaf are considered to be a successful platform and a low price, this is what attracts tuning enthusiasts to it. Among other things, the car is distinguished by excellent chassis qualities, a high cross-country ability and the ability to customize the car’s interior to suit any whim.
Theoretically, the “Loaf” could very well become an elegant city car. But more, nevertheless, it is intended for off-road travel, which, in fact, is indicated by its factory design.
Self-restoration of the Bukhanka body
December 15, 2013 – KULIBINSK CLUB
RESTORATION OF THE LOAF BODY
The entire technical process is described in the photo:
So, with hands growing from the right place, a little free time and available materials, you can turn even the most rusty bucket into a more or less decent car.
Of course, if we are talking about more expensive cars, then it is better to turn to professionals and not waste time, effort, or money,
Repair
What diesel engine can be installed on the UAZ loaf?
UAZ Bukhanka is perhaps the only model of the Soviet Automotive industry produced to date. The all-terrain vehicle is still popular in its niche among residents of the Russian outback, famous for its “roads,” as well as among hunters and fishing enthusiasts.
OEM auto parts for Bukhanka
There are many situations where you may want or need to buy new auto parts for your Loaf. OEM parts are original equipment manufacturer parts. They are made for unique models of cars, trucks, and SUVs
Do-it-yourself UAZ engine overhaul
Changing unsuitable spare parts or restoring them will help to revive the engine and return it to its original agility and obedience. All spare parts must be the correct size. The stores offer a varied selection of pistons, piston rings, intake and exhaust valve seats, and crankshaft connecting rod bearing inserts. The size of the part can be checked with sales consultants.
Bulkhead UAZ engine
Engine wear is significantly affected by deterioration of lubrication of rubbing surfaces, which depends on an increase or decrease in clearances. To rebuild the engine yourself, you first need to dismantle it. This is done as follows:
- drain the antifreeze and oil from the pan;
- separate the air intake filter and unhook the muffler pipe from the engine;
- disconnect the cooling system pipes, oil radiator and heating devices from the engine;
- remove the cooling system radiator;
- separate the throttle and air valve drive rods from the carburetor;
- remove all wiring from the motor;
- Unscrew the bolts of the lower and front support cushions.
Now he removes the engine from the UAZ 3303. For this, a bracket specially designed for this purpose is installed on the cylinder head studs. The engine needs to be jacked up and the gearbox separated from it. The motor can be removed by lifting it up.
Other actions will lead to the need to remove the transfer case and gearbox along with the engine.